|
WordPress makes it easy for site owners and webmasters to run a highly functional website. To get the most of your WordPress site, you’ll probably want to have other people help you out. You might want to give a third-party contractor the ability to publish blog posts or maybe hire a developer to help you create new pages. But giving others full access to your WordPress site can be frightening and pose a potential security risk. That’s where WordPress roles come into play. Roles give website owners full control over what users can or cannot do on the site. With WordPress roles, you won’t have to worry as much about users doing something on your site that they’re not supposed to. What are WordPress Roles?WordPress roles and capabilities allow site owners to control who has access to what parts of a site on the backend. Out-of-the-box, there are five default WordPress user roles—administrator, editor, author, contributor, subscriber. Each user has uniquely defined capabilities, such as writing and editing a post, publishing a post, creating users, moderate comments, installing plugins, deleting a theme, and more. In total, there are 70+ hardcoded capabilities built into WordPress for different users. The main purpose of WordPress roles is to restrict access. For example, you probably wouldn’t want to give a part-time blogger the ability to delete your site’s theme or install a new plugin. 5 Tools to Improve WordPress RolesWhile WordPress comes with the ability to manage user roles out-of-the-box, there are some third-party plugins out there that take this functionality to the next level. These are my five favorite tools for managing WordPress roles. #1 — PublishPress Capabilities
With over 100,000 active installations, PublishPress Capabilities is another popular way to manage WordPress roles. This plugin is perfect for anyone who wants to have more control over the way user roles and capabilities on their WordPress site are handled. You can fully customize the roles of editors, authors, administrators, contributors, and subscribers, so each role has exactly what you need. Easily modify an existing role or create completely new roles. All of the roles within PublishPress Capabilities work for single sites and multisite WordPress networks as well. I like PublishPress Capabilities because it automatically backs up your website’s permissions whenever a change gets made to a role or capability. So, if anything happens to your website, you can restore those permissions with ease instead of doing everything again manually. These backups are also extremely useful if you decide to migrate your user roles and capabilities from one site to another. PublishPress Capabilities makes it easy to customize permissions, copy roles, add extra permissions to the taxonomy of your site, create permissions for custom statues, and so much more. The basic version of this plugin is free to use. Paid plans start at $69 per year and come with access to six other PublishPress plugins. #2 — Members
Members by MemberPress is a WordPress plugin that’s built specifically for managing user roles. With 200,000+ active installations, it’s one of the most popular solutions in this category. This is arguably the easiest way to manage user role permissions within WordPress, too. The default role options within WordPress aren’t so user-friendly, especially for non-technical admins. But the Members plugin simplifies role management with a straightforward UI that’s easy to navigate. You’ll be able to add roles and change capabilities for users with just a few clicks. The plugin comes with an extensive list of functionalities for basic and advanced users alike. For example, you’ll have the option to perform basic tasks, like creating a new user, editing a user, deleting roles, and adding capabilities for roles. But it also comes with more advanced functions, allowing you to assign multiple roles to any user. You can also clone roles, create content permissions, restrict certain content, decide who has access to shortcodes, and more. The basic Members plugin is free to download and use. You’ll also have access to free add-ons like block permissions, admin access, role levels, role hierarchy, and more. The plugin even integrates with third-party tools like Easy Digital Downloads and WooCommerce. #3 — User Submitted Posts
The User Submitted Posts plugin for WordPress is a bit unique compared to some of the other tools in this guide. Technically, it’s not used to manage WordPress roles. But the plugin essentially provides you with a similar benefit when you want to give users the least amount of access to your site. That’s because User Submitted Posts is a frontend solution—meaning site contributors won’t have access to your WordPress dashboard. But verified users can still publish content on your website. This is perfect for WordPress sites that publish content from a wide range of different freelancers or users outside of the company. Instead of giving those people WordPress login credentials for the backend of your WordPress site, you can just install the User Submitted Posts plugin as a safer alternative. This workaround for publishing is still fast and easy for the end-users. The plugin features a simple registration, login, and password form. You can display the login forms anywhere on your site using a simple shortcode or template tag. You’ll also benefit from shortcodes for access control and restricted content. Other noteworthy highlights of User Submitted Posts include email notifications for new submissions, image preview thumbnails, Google reCAPTCHA for forms, built-in client side verification, action and filter hooks for advanced customization, and so much more. User Submitted Posts is the perfect way to add user-generated content to your site without having to create new WordPress roles. #4 — Advanced Access Manager
Advanced Access Manager is a powerful and versatile WordPress plugin with 100,000+ active installations. I like Advanced Access Manager because it is built to help WordPress admins customize and control every component of their WordPress sites. User roles are just one of the many aspects that can be managed using this plugin. Regardless of the use case, Advanced Access Manager is primarily built around access and security policies. You’ll define who, when, and how users can access specific resources on your WordPress site. Access control can be maintained on the backend and frontend of your site as well. The backend menu access control feature is arguably the plugin’s most popular tool. This allows you to customize access for any user or role. You’ll also have the ability to customize all roles or capabilities from a user-friendly dashboard. Use Advanced Access Manager to create temporary accounts, limit content access, manage temporary users, restrict backend functionality, manage access based on IP address or referred domain, and so much more. Advanced Access Manager is free for basic use. Paid plans for role hierarchy and multi-level groups start at $39. Most sites go with the enterprise package. For $399 per year, you’ll have access to the full suite of all premium add-ons. #5 — User Role Editor
The User Role Editor plugin for WordPress has a pretty self-explanatory name. As implied, it’s a simple solution that gives you the ability to manage user roles and capabilities. Using the tool is as easy as clicking checkboxes to customize roles and capabilities according to your personal preferences. If you’re not happy with the built-in role management tools within WordPress, User Role Editor is an upgrade that can accommodate your needs. There’s a free version of the plugin for basic role management and capabilities customization. But the Pro version is designed for anyone who really wants to get the most out of managing user roles. You’ll benefit from additional features like frontend menus, per plugin access for user roles, the ability to block meta boxes and navigation menus, manage widgets, and more. The Pro version also supports WordPress multi-sites with a super admin. The Pro Personal plan starts at $29 per year for a single installation. Lifetime access starts at $87 for a one-time purchase. The Basics of WordPress RolesLet’s take a closer look at the core components of WordPress roles. This will give you a better understanding of the capabilities associated with default user roles. AdministratorAdmins have the most powerful role. They can add new posts, edit posts, and even delete posts created by other users. Users with administrative access can edit, install, and delete plugins and themes. An admin can add new users, delete users, and change information about other users (including other admins). The administrative role is essentially created for the site owner. Anyone with admin access will have full control over the WordPress site. So be cautious if and when you assign this role. EditorEditors can access and control the content portions of your WordPress site. They have the capability to add posts, edit posts, publish posts, and delete posts on the site, regardless of who wrote the post. Editors also have the ability to edit, delete, and moderate comments on your website. By default, an editor cannot install plugins, change your theme, add a new user, or change your WordPress site settings. AuthorAs the name implies, authors can create, edit, and publish posts on WordPress. They also have the ability to delete published posts, assuming the post was written by that author. It’s worth noting that authors only can select an existing category when they’re publishing a new post—they cannot create a new category. However, an author does have the ability to add tags to their posts. While an author can view comments and see comments pending review, they cannot manage those comments. Authors won’t have access to plugins, themes, or site settings either. Overall, this role grants fairly low-access to the WordPress site. ContributorContributors are similar to authors but have even less access. While a contributor can add new posts and edit posts that they wrote, this role does not grant access to publishing content. A contributor won’t have the ability to upload files to WordPress either. So anyone with that role cannot add images to posts that they wrote. SubscriberSubscribers are the least powerful WordPress users. They can log in to your WordPress website and update their own profiles on the frontend. But they can’t write posts or do anything within your WordPress admin dashboard. The subscriber role is perfect for sites that require users to login before reading posts or commenting on posts. But beyond that, they won’t have access to other permissions. 3 Tricks For WordPress RolesHere are a few quick tips and best practices that you can apply to your WordPress site. These tricks will make it easier for you to understand and manage WordPress roles. Trick #1: Super Admin For WordPress MultisiteIf you’re running multiple sites from the same WordPress installation, make sure you take advantage of the super admin role. This is only available on WordPress multisite networks. Super admins can add sites, delete sites, install plugins, manage themes, and basically manage all network-wide actions in WordPress. It’s the most powerful role in WordPress and usually best if you keep this role to yourself. If you’re using WordPress multisite, make sure you’re using a web hosting service that can accommodate your needs. This type of installation requires a bit more power from your host. Check out our guide on the best web hosting for WordPress to see our top recommendations. Trick #2: Limit Admins and EditorsIt might be tempting to start giving people full access to your WordPress dashboard. But this isn’t a great idea. You really only need to have one administrator and one or two editors at most. Always follow the “principle of least privilege.” This IT security concept says users should only have privileges essential to perform functions for their desired work. For example, this is why an editor can’t delete your theme or add a new plugin. These capabilities aren’t part of an editor’s job. Trick #3: Customize Roles AccordinglyThe default roles are fine for basic use, but they likely aren’t suitable for every need and potential use case. So you can change capabilities based on your workflow and customize how different users have access to your WordPress site. For example, you might decide to give contributors the ability to upload files to WordPress. Or maybe you want to give authors the ability to moderate comments. By installing a plugin or third-party tool, it’s much easier to customize different roles at scale. via Quick Sprout https://www.quicksprout.com/wordpress-roles/
0 Comments
Want to jump straight to the answer? The best online legal service for most people is definitely Rocket Lawyer or Incfile. Online legal services can be crucial. Lawyers help with everything from setting up your business entity to settling disputes and reviewing contracts. But not everyone has a lawyer on retainer. For those that do, your lawyer might not specialize in the type of legal practice you need for all of your business and personal needs. That’s why online legal services are so helpful. With just a few clicks, you can access legal documents, find an attorney nearby, set up your business, and seek legal counsel. Whether you need an attorney now or you’re planning for the future, I’ll show you how to find the best online legal service for your business and personal needs.
The 7 Best Online Legal Services of 2021After extensive research, these are the top seven online legal services that I’d recommend:
I’ll highlight the top features, benefits, use cases, and considerations for each one as we continue through this guide. Best Online Legal Services Reviews#1. Rocket Lawyer – Best for Fast Legal Help
Rocket Lawyer offers an online legal service that helps individuals and business owners create legal documents and get legal advice—and do so very quickly. As their name suggests, they give you a variety of ways to quickly access attorneys and their advice including through phone, email, or chat. RocketLawyer will connect you with attorneys that cover a wide range of topics including family law, business contracts, criminal law, personal injuries, and more. They also have an excellent legal advice portal where you can type in your legal question and get answers back within a business day. If you need even more help, they can help connect you with an actual lawyer to talk to and consult on your matters. Their helpful lawyer directory allows you to choose the legal topic you want a pro to consult with, along with your state so they can connect you with someone knowledgeable with local laws. It takes just a few minutes to do so. This online legal service also individuals and business owners create legal documents for a wide range of use cases. Here are a few documents they help you create and process: Business
Real Estate
Their service can also help with more personal matters such as estate planning and healthcare directives. Rocket Lawyer offers two ways to pay: You can pay a monthly membership fee of $39.99 per month to access free services and discounted documents. Alternatively, you pay per use based on what you need. Think of it like the a la carte offering. For example, Rocket Lawyer charges $39.99 per document. So the monthly membership pays for itself with just one of these. If you know you’re going to need multiple documents at once or need legal documents created on an ongoing basis then the monthly membership is definitely worth it. Rocket Lawyer comes with a fantastic mobile app. This gives you fast access to your documents from anywhere. You can even sign agreements directly from the app. Click here to get a free 7 day trial. #2. Incfile – Best for Starting Up Your Startup
Incfile offers an online legal service that specializes in business formation. Simply choose your entity type (LLC, S-Corp, C-Corp, or Nonprofit) and select your state of formation to proceed. The best part—they will help you choose the best entity type if you’re unsure what’s best for your needs. Incfile has three different packages. The rates for each one vary by state. All plans include:
The basic plan is $0. That’s right. All you have to pay is your state’s registration fee. However, you’ll have to pay extra for things like that EIN/Tax ID, IRS Form 2553, operating agreements, and more. But they’ll also help you with long-term assistance with compliance and trademark registration. I recommend going with at least the Gold package. It comes with all those extras along with unlimited phone and email support, express shipping, expedited filing, and FedEx Delivery. To find the exact cost for your startup, just select an entity type and choose your state. You can get a quote from Incfile in seconds. #3. LegalZoom – Best for Pain-Free IP
LegalZoom is the most diverse online legal service on the market today. This website can accommodate your personal, professional, and business needs. Where LegalZoom really shines is in their IP services. They’re one of the most comprehensive services for finding prior art, patent/trademark/copyright searching, and filing utility and design patents, including lesser-known tools like provisional patent applications that require just three steps to get done. LegalZoom’s online legal services can be segmented into four main categories. I’ll give you a quick summary of some of the top legal services and features within those categories below. Business
Intellectual Property
Wills, Trust, and Family
Attorney Advice
In addition to these categories for specific needs, LegalZoom offers six-month and annual plans for businesses and individuals. Individual plans start at $9.99 per month with an annual contract, and business plans start at $31.25 per month with a one-year commitment. Overall, LegalZoom is a top choice to consider for one-time services as well as ongoing legal needs. Learn more about how they can help at LegalZoom.com. #4. LegalNature – Best for DIY Legal Documents
LegalNature gives you all you need for legal filings and templates. It’s fast, reliable, and easy for anyone to use. LegalNature’s platform offers a lot of great templates too. They have legal documents for businesses, landlords, and individuals. Here’s a quick overview of some of LegalNature’s top categories:
Choose the legal document you’d like to create and LegalNature walks you through step-by-step through the entire process. Easily download and store your documents when you finish. Let’s take a closer look at the plans and pricing options for LegalNature: Single Document
Standard Plan
Professional Plan
Whether you need legal documents for a single use or an ongoing basis, LegalNature gives you an easy way to draft offer letters, NDAs, and other HR forms that are a regular need for a growing business. #5. Avvo – Best for Online Legal Q&As
Avvo is a bit unique compared to some of the other online legal services on our list. The platform has an extensive lawyer directory to help you find an attorney in your area. But it also serves as a way to get free legal questions answered online. You can browse questions that were asked by other people or post your own question and get responses from multiple lawyers. Popular questions and legal advice on Avvo are related to:
This is just the tip of the iceberg. There are hundreds of legal topics that Avvo covers that they can help you out on. In addition to the lawyer directory and free Q&A, Avvo also has tons of free articles, resources, and guides with legal advice. For those of you who need legal questions answered online but don’t want to spend money on an attorney consultation, Avvo will be your best option. #6. UpCounsel – Best for Outsourcing Your Legal Department
UpCounsel is great for a wide range of legal services. From one-time personal legal consultations to an entire freelance legal department for your business, UpCounsel has it all. They’re even used by top brands like AirBnB that frequently deal with complex legal matters. So you know you’re in good hands. Popular legal categories offered on UpCounsel include:
Here’s how it works. Take a minute to post the job related to your business and legal needs. All of the information you share on UpCounsel is strictly confidential. The UpCounsel algorithm will automatically match you with qualified attorneys to handle your specific needs. Those lawyers will send you proposals, and you can schedule a free consultation without any obligation. Once you’re ready to proceed, you can hire your lawyer. All of the pricing is straightforward, so you never have to worry about hidden fees. Collaborate with your lawyer online, directly through the UpCounsel platform. UpCounsel makes it easy for you to manage all of your communications in one place. The platform offers time-tracked phone calls and free document management. You’ll also be able to manage all of your invoices, track your spending, and benefit from flexible payment options. If you worked with a lawyer in the past that you liked, UpCounsel makes it easy for you to connect with them again. If you need dedicated legal support, always available when you need it, reach out to UpCounsel today. #7. LegalMatch – Best for Finding an Attorney Near You
As the name implies, LegalMatch is a platform designed to match you with an attorney. It’s the best choice for those of you seeking legal counsel in your local area. The process is simple, quick, and straightforward. Just provide your location and choose a category from the following list of options:
LegalMatch will automatically connect you with a high-rated licensed lawyer near you. The best part? The entire process is free to you. More than four million cases have been posted on this legal website. LegalMatch has been helping people find local lawyers for the last 20 years. You’ll have a response within 24 hours of posting your case. So it’s a great option for those of you with a time-sensitive matter. After you’ve been matched, you’ll have full access to the attorney’s profile and background information. You’ll also have access to user ratings and reviews from previous clients to help you make a decision. LegalMatch provides a complete breakdown of each lawyer’s fee structure. It’s an ideal option for finding lawyers without any pressure. Simply choose which lawyer is best for your needs after reviewing the options provided by LegalMatch. You’re never under any obligation to hire a lawyer or sign a contract when you’re matched with an attorney through this platform. So, you can try LegalMatch risk-free today. How to Choose the Best Online Legal Service For Your BusinessWith so many different online legal services to choose from, it can be tough to narrow down your options. How can you find the best online legal service provider for you? This is the methodology that we use here at Quick Sprout. I’ll go through each factor in greater detail so you can understand what matters the most as you’re going through this process. Legal Practice FocusOnline legal services vary according to their offerings—with each one focusing on specific areas of law. That’s why it’s important to find one that has a category based on your needs. After all, someone going through a divorce wouldn’t need the same attorney as a freelancer drafting a contract for a new client. Take a look at what each online legal service focuses on. Companies like RocketLawyer, LegalZoom and IncFile can help you form LLCs and corporations. Some of them like LegalZoom and IncFile let you go deeper and help you register trademarks. LegalZoom can even help you establish a copyright for original creative work or a patent for an invention or product. They’ve worked with creators to establish more than 650,000 IP filings and processed more than 90,000 copyright applications. On the other hand, platforms like Avvo and LegalMatch are primarily used for finding an in-person lawyer to assist you in your area. Think of them as the Craigslist of legal services (only without the creepy, weird posts). Also, consider whether or not you need business or personal legal needs. Some platforms offer online legal services for both businesses and individuals. Others specialize in one or the other. Business Stage and SizeThis doesn’t apply if you need an online legal service for personal matters like immigration or divorce services. If that applies to you, I recommend skipping this. However, many of you will be using these services for your business. If that applies to you, there are two things you need to consider when researching:
For those of you who are launching a startup, you could benefit from an online legal service like Incfile for registering your company. Midsized companies might need infrequent but reliable legal services. A service that connects them with a good attorney like LegalMatch they might hire on occasion could be good enough in this case. One that might need some specialization from their legal advisor can depend on Rocket Lawyer. But larger organizations that need an entire legal team or outsourced department would be better off with something like UpCounsel, which will connect you to the attorneys you need to represent your business. They specialize in helping you outsource your legal department. Frequency of UseHow often you expect to actually use the online legal service should play a big role in your ultimate decision. Some of you might need an attorney for just one event. Whether it’s filing paperwork, drafting a contract, or settling a dispute, we suggest Avvo or LegalMatch to find a great attorney for you. Some of you are going to want to establish an ongoing relationship with an actual lawyer. This is especially true for business owners, who can’t necessarily afford retaining in-house counsel. Or, you might be in a specific legal situation where you need to have a lawyer on retainer or for a prolonged period of time (e.g. litigation). You might want the ability to contact a lawyer on-demand whenever a problem or question arises. If you fall into this category, look for an online legal service with one-off plans like RocketLawyer or LegalZoom. They can connect you with lawyers who can work with you on your unique schedule. Knowing how often you’re going to use a legal service is going to help you save money, too. The pricing structures for online legal services vary from platform to platform. Some charge an ongoing fee for a membership, while others charge on a per-case or per-use basis. There are even some online legal services that offer free legal consultation and matching Speed of AssistanceTimeliness is crucial when it comes to legal assistance. After all, emergencies can pop up that require legal help as soon as possible. Platforms like LegalMatch promise that an attorney will respond to your case within 24 hours of your posting. Avvo works a lot like Quora, allowing you to post a question and have it answered by lawyers on their website. You can also jump into their backlog of questions other users have already asked for answers to situations similar to your own. Getting your question answered for free on an online legal forum isn’t the best option for those of you who need to speak with a lawyer within the next few hours, though. Make sure you find a platform that’s easy to use and allows you to choose a lawyer without any pressure or obligation. There’s always a service like UpCounsel that you can choose, which will allow you to have a dedicated lawyer or team ready to help whenever issues arise. Live Legal AssistanceIn a lot of cases you won’t ever need to meet up with a lawyer. However, if you need to meet face-to-face with an attorney (due to security concerns or a complex issue), you’ll want to find a service that can connect you with a live attorney. With the last year seeing the rise of work-from-home culture, these services will also connect you with a lawyer over Zoom or the phone—though that might depend more on the specific lawyer and firm’s communication infrastructure. Getting matched with a lawyer that’s all the way across the country won’t be ideal in these scenarios (also, if you’re a smaller business that needs to adhere to specific local and state guidelines). So, look for a platform that allows you to find a qualified lawyer based on your ZIP code or state. Our choices for the best services with directories— LegalMatch, Avvo, and LegalZoom—are good places to start. ConclusionOnline legal services are growing in popularity. These platforms give you access to legal help without having to leave your home or office. Plus, you won’t always be limited to attorneys in your area. If you need to find a lawyer, start a business, or get legal advice, these are the top platforms to consider:
No matter what kind of situation you’re in, there’s an online legal service for everyone on this list. via Quick Sprout https://www.quicksprout.com/best-online-legal-services/ Want to jump straight to the answer? The best dropshipping companies for most people are definitely Modalyst for Wix and Oberlo for Shopify. If you want to start an ecommerce business without having to deal with:
Get into dropshipping. Manufacturers ship products directly to your customer for you. You get all the upside without any of the ecommerce headaches. In this guide, I list and review the best dropshippers to help you get started.
The 8 best dropshipping companies, suppliers, databases, and tools
Once you have your Wix or Shopify account and your store set up, you’re ready to link up with a dropshipping partner and get selling. But, it can be hard to break into dropshipping because most dropshipping businesses don’t like to share their items or their suppliers. The thinking is: you’ll just replicate their shop and eat into their market. I’m here to help with this list of 15 dropshippers, databases and suppliers — along with their pros and cons. 1. Modalyst — Best Wix Plugin & Directory
Modalyst seamlessly automates your dropshipping business. They connect you with suppliers to get your customers the products they need. They also boast a massive of products including clothing, jewelry, accessories, and more. Modalyst is also centralized—making it very easy to use. You’ll be able to connect with suppliers from a single dashboard, and they even have an app for easy communication. Where Modalyst really shines is their highly rated integration with Wix. With just a single click, you’ll be able to install their app and get started selling to your customers. Pricing starts free with a basic plan that includes a 25 product limit. 2. Oberlo — Best Shopify Plugin & Directory
Oberlo offers an excellent plugin service that works with Shopify stores. The Oberlo directory offers you all the products you need. The dashboard also shows you how many pageviews, sales, and star-rankings each item and seller has. Once you make a sale, you’ll use Oberlo to order the item to be shipped to your customer.
The product selection and fulfillment are handled for you. That frees up your time to focus on driving traffic to your store. Oberlo has a forever-free Starter plan. However, to unlock shipment tracking and order fulfillment monitoring (which I recommend) you’ll need to upgrade to the Basic plan at $30 per month. It’ll also raise your sales limit from 50 to 500. Once you crest 500, you’ll be in Pro territory, which is $80 per month and allows for multiple users as well. Oberlo has 4.2 out of 5 stars from 2,000 reviews in the Shopify app store. 3. SaleHoo — Members-Only Database of 8,000+ Suppliers
A $67 yearly membership grants you access to this database of wholesalers and dropshippers. There are currently 8,000+ suppliers on the site, and they’re all screened by SaleHoo before they’re added to the directory. There’s a 60-day free trial period, and the customer service gets high marks: 9.6 out of 10 with 300 reviews on TrustPilot. 4. Spocket — Shopify Database App with Good Reviews
Spocket gives you a great database app of dropshipping items. They allow you to sort by country and simply upload the products into your Shopify store. They make it easy to find US and EU items that’ll ship within your country rather than from China, cutting down on slow ship speeds. The Basic plan (25 products with unlimited orders) is free, and upgrading to Pro is $49 per month for 250 products and branded invoicing. The Empire plan unlocks unlimited products for $99 per month. The app has 4.5 out of 5 stars in the Shopify app store. 5. Wholesale2B — Versatile Supplier and Dropshipping Hub
Wholesale2B offers more than 1 million products ready to be dropshipped. on top of that, they allow you to sell products on:
Handle the orders yourself by becoming a registered reseller with each supplier. Or pay Wholesale2B a 3% fee to handle that for you. Wholesale2B starts free and includes their 1 million products, customer support, and a lifetime free account. 6. Inventory Source — Time-Saving Dropshipping Automation Tool
Inventory Source is an automation tool that allows you to either sync the suppliers products with your page (inventory automation) or to sync the entire customer purchase flow so that your orders are automatically placed with your supplier (full automation). Inventory automation is $99/month and full automation is $150/month. However, getting just a directory account that allows you to view all dropship suppliers and preview product feeds is free. Nothing beats that, right? 7. Worldwide Brands — Best Budget-Friendly Database
For $299, you can get a lifetime subscription to Worldwide Brands’s database of wholesalers and dropshippers. It’s a great budget-friendly solution for those competing to sell products on Amazon, eBay, and Etsy. Worldwide Brands distinguishes itself with its extensive upper-market wholesale directory of certified dropshippers and its reliable and quick-to-respond support team. The lifetime membership certainly doesn’t hurt either. Worldwide Brands has 4.9 out of 5 stars from 171 reviews on Trustpilot. 8. Dropified — Popular Shopify App for AliExpress
This is another Shopify app to stock your store and automate your orders on AliExpress (including shipping addresses). But there’s no Dropified marketplace, but rather a browser plugin that’ll let you pull from anywhere on the web. You can set up margin parameters and rules for changing the price points in your store. There’s a 14-day free trial; after that it’s $47 per month for the Builder plan, or $39 per month on the annual plan. The Premier plan, which costs $127 per month or $97 per month with annual billing, recently added a profit dashboard, Zapier integration, and an unlimited high-speed captcha solver. The app has 4.4 out of 5 stars from 104 reviews in the Shopify app store. The Worst Dropshipping Services1. National Dropshippers — Difficult user interface and product search (not recommended)You can give a try to see if there’s a product that’s only available here, but if you can find it elsewhere you’ll probably be better off going with the alternative. Products are hard to find and search for, and the returns and shipping policies aren’t favorable. 2. Dropwow — Negatively reviewed Oberlo competitor (not recommended)An app that’s reminiscent of Oberlo and Spocket, but with more negative reviews. The tool claims to automate your orders and help you locate dropshippers located in the US and elsewhere. However, with only 3.8 out of 5 stars from 121 reviewers on the Shopify app store, and a monthly subscription of $29 per month, I don’t recommend it. 3. DropshipDirect.com — Currently in hiatusThis site makes some enticing claims: 100,000 items in its inventory, a SaaS-approach to data, and quick shipping from its Michigan warehouses. However, the sign-up form is in private mode and the company seems to be on a year-long hiatus. We’ll keep an eye on Dropship Direct and report back. Why Dropship?Dropshipping solves a bunch of problems: no cash needed upfront, no boxes piling up in your store room, garage, or let’s be honest, in your spare bedroom. You never even have to touch the product or be responsible for the packaging or shipping. That means no more trips to the Post Office, either. Your dropship partner takes care of all that.
The benefits of dropshipping are also its drawbacks. You don’t have the inventory in your warehouse, so you don’t have control of a customer ordering something that’s out of stock. There’s no shipping work on your end, so you can’t control the shipping speed, or the packaging. Long ship times = canceled orders. And, you still need some money up front to build your website, put in the sweat equity of making that business take off, and all the other steps you’ll need to take to start your business. Like any business partnership, you need to do your research on who you’re working with, what it’s going to cost you, and what you’re expecting to get out of it before you get too involved. This review will help you pick dropshipping companies that’ll work for your business — no matter your niche. What’s the best dropshipping company for me?Trying to find the best dropshipping company all up is a little bit beside the point. It’s like asking for the best eBay seller or the best store on Etsy. The things that make dropshippers great are a lot of the same things that make an eBay or Etsy seller great: They’re communicative and have fast shipping. The product arrives as promised. It looks like the listing and it shows up in one piece in packaging that looks nice and not chewed up by an alligator. Just like an eBay seller, the best dropshipper for you is the one selling what you’re interested in buying (and reselling). They will reliably, communicatively, and quickly ship the product you’re after at a price that’s profitable for you — it’s about finding your best. Most dropshippers use a Shopify or Wix store and an automation app like Modalyst or Oberlo. If you’re new to dropshipping, this is definitely the easiest way to get set up. Why Shopify is the best way to start your dropshipping businessThat means, you are basically setting up the equivalent to any ecommerce store. For ecommerce stores, the clear winner is Shopify. It’s been the frontrunner for a while. What’s most important about that for dropshipping is that the app store is super robust. Most stores use Shopify, so developers looking to make a high-quality app develop it for the Shopify app store. So, if you haven’t already set up your Shopify store, that needs to go on your to-do list. We have a post that’ll walk you through the step-by-step process for setting up your Shopify store. It’s easy. There’s even a course in the Shopify Academy to learn how to start a dropshipping business with Shopify: Dropshipping 101. I don’t recommend dropshipping with eBayIt’s compelling to set up shop with a marketplace — you don’t have to start a website, pay a subscription, etc. like you would with Shopify. But, I don’t recommend it. Unlike Shopify that’s super excited and helpful with new dropshipping businesses, eBay is growing more and more against them. Here are the sticking points for me:
If you do want to build your dropshipping business with eBay, I’d spend a few weeks or months in the seller forums to understand the specific risks and challenges of dropshipping on eBay. How to start a dropshipping company1. Find items to sellFind your niche.There’s lots of chatter on the internet about finding your dropshipping niche, but this is just a trendy buzzword for product-market fit: are there people who want to buy your product? From you? If not, you won’t have a successful business. You’ll have the most success dropshipping a product if there’s an audience that wants to buy it and doesn’t have an easy way to access it. That’s where you come in. Some ways to find your niche: brainstorm rabid fan groups or audiences with a common need or interest (dog lovers, anime fans, parents who love to dress up their kids in matching outfits, sailors, very tall people, people who love 90s throwback tees). These are purchase-ready populations looking to love and buy things that they’re interested in. See what’s trending on Facebook.Doing a quick search of a phrase like “Get yours here” or “Buy now” and look at the videos featuring items for sale that are getting traction. This can give you a sense of which products are interesting people on Facebook right now. Look for a high number of views in a short period of time, then search for the item at a dropship supplier like Oberlo or AliExpress. Consider the price-point of the item in the video and the assets you can create for it. Can you replicate — or improve on — the current trending video? If so, you may have an item worth dropshipping. Don’t sell anything dangerous or copyrighted.If you’re a beginner, don’t start with something that goes in or on a person’s body. If you do not know the quality and source of the ingredients, and something goes wrong, do you have coverage for that liability? Also, if there’s a celebrity or character from a movie franchise on the item, it could get you in trouble. Steer clear of mice with big round ears. Look at seller’s reviews and order a test product.How long has the seller been selling? What feedback have they been getting. When you order a test product, does it meet your expectations? What do you need to tell your customers so they’ll be happy when they receive the product? Consider dropshipping only some items.Just because you’re dropshipping some things doesn’t mean you need to dropship everything. Perhaps it makes sense to use dropshipping for large, bulky, high-priced niche items. Say, for example, you have an online store that sells nautical gear. You may want to personally store and ship some items, but dropship the anchors. For items like this, your customers may also be more accommodating to longer shipping times since it’s a large and more considered purchase. Same goes for home goods: perhaps you keep small items in stock, but dropship the couches. You can increase your inventory breadth very simply this way. Go directly to a supplier and build a dropshipping relationship with them.This is a killer plan: there’s guaranteed to be less competition. You’re basically creating a new audience for an under-marketed product that’s not getting seen by a ready-to-buy audience. If you use a database, every single other subscriber is using that same database. 2. Nail the basicsInvest in a good domain name.We buy all our domain names from Domain.com. (You can read our full review on the best domain registrars.) Set up your website.If you go with Shopify, you’ll be up in minutes. Lots of dropshippers recommend the Shopify Brooklyn theme with a good font choice. You can also use another ecommerce option. Here’s our review on the best ecommerce platforms, if you’re interested in exploring. Get a professional logo.You can get one for a reasonable price (and no design expertise) with 99Designs. See my post about how to get your first brand identity on a budget for more details and how to run a logo design contest. Use a professional email address.It should be a sensible start (help@, support@) with your own domain name. I recommend getting G Suite for $5 a month per user. There’s nothing to trust about emailing a customer service that’s at yahoo.com or gmail.com. Give your customer strong trust signals.You can do this with high quality photos and unique item copy, a real and robust About Us page, and thoughtfully using things like discounted prices and pop-ups. Ask yourself: Would I buy from this store? Would I feel comfortable suggesting it to a friend or family member? You’ll need some trust logos and some FAQs at minimum. Set shipping time expectations.Most dropshipped items aren’t going to get to the customer very quickly — and in world where Amazon Prime has set the standard at two days, that means dropshipments of 30 days feel extremely slow. If you don’t prepare your customers they’ll be very unhappy. We’ve seen very straightforward copy, like: All our items ship directly from our suppliers in China. Shipments are processed the day of your order and arrive in 25–30 days. Make sure your orders go through.Bundle credit card orders so your bank doesn’t cancel your numerous orders. Let your bank know what types of orders and in what quantities you’ll be placing, so they’re not flagged as fraudulent. There is no pain so rich as having to reorder orders you’ve placed. (You do have a business credit card, right?) Prepare for returns and cancellations.How will you deal with unhappy customers? What’s your return policy and how will you chargeback customer payments? Will returned items be shipped to you, or to your distributor? How will that work? Like with anything in business, it’s important to set it all up from day one like it’ll be a huge success. Set aside money to pay taxes.If you’re using Shopify as your payment gateway, once you get to a certain sales threshold, Shopify will automatically report your sales to the government. You’ll want to make sure you have money available to pay applicable taxes. We also recommend getting an accountant and a lawyer (we’ve heard good things about UpCounsel and LegalZoom) and setting up Quicken. 3. Differentiate yourselfMake your store listings and ads unique.Remember, if you can quickly and easily set up a dropshipping order for a specific product, it’s likely another store will be able to do the same. You will need to find an edge: why would someone order from you, or find your store selling the product, and not your competitor? Take your own pictures. Write your own copy. Shoot unique social videos. Really put thought into how to best convey the product and why a person would want it: What problems does it solve? Can it make them feel joy? Import user reviews.If you’re using AliExpress, you can import the user reviews. No one likes being the first to buy something. Consider offering free shipping.Do all orders have free shipping or only when a certain order spend is hit? What threshold or minimum spend works best? I do not recommend offering “Free products — you pay shipping.” Many customers would rather know the price up-front than go through a purchase flow that says $0 the whole way through and then slaps on a $15 shipping charge. It’s 2019 and the norm is free 2-day shipping with Prime. People are catching on and aren’t happy about it. Read more from The Daily Beast in Instagram Influencers Dupe Their Fans With ‘Free’ Products. Market your store.Make sure people know about your store. This can be through word of mouth, social media ads, viral memes, influencer programs, SEO, a newsletter. You’re going to need visitors to make sales. 4. Iterate iterate iterateUse ads to test and gather data.We’re assuming that you’ll be buying ads. If you do, buy and use the data to test what’s working. What gets traction? Double down on it. What doesn’t? Trash it. This may lead you to changing your products, your ad style, your audience. Following the early traction means you head toward what’s working and away from what’s not. Analyze your sales.What’s selling well? What’s not selling at all? Is there any common theme in the items? Replicate what you can. Stop what’s not working. Dropshipping vocabularyArbitrage – The simultaneous buying and selling of an item to take advantage of a difference in price for the same asset. Say there’s a board game for sale at Walmart for $20, but the lowest price on Amazon is $45. Arbitrage is listing the game for sale on Amazon and buying the Walmart game. For every sale you make on Amazon, you take advantage of a $25 price difference. If your arbitrage is online to online, with free shipping, the math suggests you could simply sell on one site, buy and ship from the other, and pocket all the profit. This does not take into account any hiccups: returns, merchandise not accurate, merchandise no longer in stock, price changes in either market, etc. Dropshipping (DS) – The supply chain system in which a seller does not keep items in stock, but rather transfers orders directly to a manufacturer, supplier, or wholesaler who ships the item directly to the consumer. Minimum Advertised Price (MAP) – Some sellers set a floor to how low you can advertise or display your product for sale. This is not the same as the price you can sell it for. So, the MAP price does not take into account coupon codes or sales, or other tricks like offering a gift card with a purchase, offering rebates, or doing things like showing an even lower price in the cart. Dropshipping examples and pressYou may have seen the posts we’ve seen — the ones about people starting dropshipping businesses and raking in the sales. We’re talking five-figures in a single day, six-figures every month. What is this magic sauce, we wonder. The magic sauce is the same sauce as any other business: it’s a math equation based on margins. How big are your margins? How big is your customer base? What’s the conversion rate? How stiff is the competition?
The mystery of the $70 hoodie is also not a mystery: it’s a one-time sale that’s not going to turn into repeat business. It’s a simple equation: high price + low product quality + poor customer experience = repeat business
“This guy” is Justin Wong, and he made his business work by studying Instagram marketing, set up affiliate partnerships with influencers, and matched his product with his marketing technique. And, he’s not confused about the pros and cons of that marketing strategy: when the posts age on a influencers feed, his sales go down.
SummaryDropshipping can be a lucrative method of conducting ecommerce, but it’s vital to have the right partner. Choosing the best dropshipping company for you depends on the type of products you want to offer your customers, how good their suppliers are, and how well they’ll mesh with elements you already have in place, like your website. Want a deep bench of suppliers and products to choose from? Then, one of SaleHoo, Wholesale2B, or Worldwide Brands could do the trick for you. Running a Shopify store? Oberlo, Spocket, and Dropified represent good options that will play nicely with your web store. If you’re cranking out the orders and need a platform that will help you save time through automation, look no further than Inventory Source. And if you’re running an ecommerce site on Wix, Modalyst will be just the dropshipping partner you need. via Quick Sprout https://www.quicksprout.com/best-dropshipping-companies/ Making mistakes when writing code is inevitable. But just one mistake can cause glitches, security issues, and countless other headaches. Trying to find an error in your HTML code manually with your own eyes is near impossible. For beginners and experienced web developers alike, HTML editors will improve your coding. These tools help check for errors and even speed up your workflow with useful features like syntax highlighting, auto-completion, spell checking, and so much more. If a basic word processor just isn’t getting the job done, it’s time to upgrade to an HTML editor. The Top 7 Best HTML Editors
After extensive research and testing, we’ve narrowed down the top seven HTML editors on the market today. Check out the following reviews to help you find the best HTML editor for your unique needs. #1 – Sublime Text — Best For Customization
Sublime Text is an advanced version of a basic text editor. It’s an ideal solution if you need multi-language support. Users love Sublime Text’s clean interface, robust performance, and advanced features.
What really makes Sublime Text unique is the ability to customize anything. The tool gives you total flexibility, as the settings can be modified on a per-project and per-file type basis. Nearly every aspect of Sublime Text can be customized with JSON files. Use Sublime Text for customizing symbol indexing on a per-syntax basis. Customize the menus, macros, key bindings, completions, snippets, and so much more. Another cool feature of Sublime Text is the “Goto Anything” capability. This shortcut allows you to open files or jump to lines, symbols, or words with just a few clicks. Overall, the feature really helps speed up the coding process and improves the user experience. You’ll also benefit from top features like split editing, instant project switching, and the ability to make multiple changes simultaneously. Sublime Text is a cross-platform editor, available on Mac, Windows, and Linux. With just a single license, you can use it on every computer you own, regardless of the operating system. You can download and try Sublime Text for free. But for continued use, the license is $80. #2 – Atom — Best For Collaborative Coding
Atom is a free and open-source text editor. The tool was initially developed by GitHub, and it’s still maintained by the same community. If you’re working on a team and need to write code collaboratively, Atom will be a top choice to consider.
The Teletype package offered from Atom supports shared workspaces and real-time editing. Here’s how it works. A host user has the ability to invite collaborators to join. Once those collaborators are in, they can start editing in real-time. Even as the host user moves between different files, it’s easy for the collaborators to follow along. Not only is this great for team projects, but it’s also really helpful for knowledge sharing. Teletype is just one of many open-source packages offered by Atom. You can browse from thousands of other open-source packages to add features and functionality to your workspace. You’ll also benefit from features like autocompletion, split interfaces, cross-platform editing, and more. Download and start using Atom today—it’s free. #3 – UltraEdit — Best Versatility For Advanced Users
UltraEdit is a robust and secure text editor that’s loaded with features. The tools definitely make it easier for users to speed up their coding and reduce errors. With 4+ million users trusting the platform, UltraEdit is one of the most powerful HTML editors on the planet.
UltraEdit can be used by programmers, web developers, database managers, system administrators, and more. It supports multiple languages and potential use cases. Overall, UltraEdit is so feature-rich and powerful that a beginner will be overwhelmed by its capabilities. From text editing to web development and cloud services, the platform can handle everything. Noteworthy features and highlights include:
The list goes on and on. There are literally hundreds of features. The UI is fully customizable as well, so you can make it your own. If you need a text editor that can do more than just help you write and edit basic HTML, look no further than UltraEdit. UltraEdit starts at $79.95 per year, which includes up to five installs. The All Access version costs $99.95 per year. Your purchase is backed by a 30-day money-back guarantee. #4 – Visual Studio Code — Best For Debugging Code
Visual Studio Code is another free and open-source editor. This modern tool is designed to help build and debug web applications and cloud applications. The software is available on Windows, Linux, and Mac.
While lots of HTML errors help you avoid errors and make fewer mistakes, not all of them have debugging tools. That’s where Visual Studio Code really shines and stands out from alternatives on the market. Print statement debugging is outdated. With Visual Studio Code, you can debug your code directly from the editor. Use the tool to debug with call stacks, point breaks, and an interactive console. Another cool feature of Visual Studio Code is that it works directly with Git and other SCM providers. In fact, Git commands are built-in to the software. You’ll be able to push and pull your work from whatever hosted SCM service you’re using. I like Visual Studio Code because you can customize the platform and extend functionality based on your needs and preferences. Simply install an extension if you want a new theme, want to add new languages, or connect to a third-party service. All of the extensions run as a separate process, so your HTML editor won’t be slowed down. Download Visual Studio Code and get started for free. #5 – BBEdit — Best For Simple HTML Editing
BBEdit is an HTML and text editor built for macOS. While so many HTML editors on the market are made for advanced users and professional developers, BBEdit stands out for its simplicity. You’ll obviously still need to have a coding background. But BBEdit delivers basic functionality without complex bells and whistles.
The tool is trusted by software developers, writers, and web authors. BBEdit has features for basic editing and searching. It can also be used for manipulating prose, textual data, and source code. Other noteworthy features and highlights of BBEdit include:
Again, all of these will accommodate basic needs. But if you’re looking for something more advanced like a tool for debugging or checking for errors, BBEdit falls a bit short. You can try all of BBEdit’s features during a 30-day trial period. For continued use, individual licenses start at $49.99. Alternatively, you can subscribe from the Mac App Store for $3.99 per month or $39.99 per year. #6 – NoteTab — Best For Fast HTML Coding
If you’ve been using Notepad to write code and you’re looking for an upgrade, NoteTab will be a great option to consider. This award-winning HTML editor is known for its versatility and speed. What’s unique about NoteTab is that it combines the benefits of a dedicated HTML editor with a feature-packed text editor.
Webmasters love NoteTab because the features are designed to speed up the HTML coding process. Huge collections of HTML code snippets are available at your fingertips. From single characters to complete web pages, you can implement these snippets into your code. Instead of spending time copying, pasting, and editing large blocks of HTML and tags, NoteTab streamlines the way you work. You’ll be able to:
Like many other HTML editors, NoteTab has syntax highlighting. I really like the fact that they don’t go overboard with a crazy amount of different colors. So it’s easier for you to work without feeling overwhelmed by too many colors. If you’re looking for a way to boost your productivity while writing HTML, NoteTab has you covered. The software costs $38.95. Take advantage of NoteTab’s 30-day free trial to test it out before you buy. All purchases are backed by a 90-day money-back guarantee. #7 – TinyMCE — Best Flexible and Powerful WYSIWYG HTML Editor
TinyMCE is built to simplify content creation on websites. This WYSIWYG (What You See Is What You Get) HTML editor has 350+ million downloads. As one of the most popular rich text editors on the market today, TinyMCE is really easy to use. They have a simple guide that can get you up and running in less than five minutes. Plus, they provide you with everything you need to customize TinyMCE for your needs.
TinyMCE offers over 50 plugins to extend its functionality. That flexibility can be added with just a single line of code. In addition to its flexibility, TinyMCE is highly customizable. The plugins are super easy to configure, and there are 100+ different customization options. Another cool part about TinyMCE is its versatility. It can be used for such a wide range of possibilities. Common use cases include:
No matter what you’re building, TinyMCE can help. The WYSIWYG editor is really user-friendly, so you don’t have to be an advanced developer to get the most out of this tool. There’s an open-source version of TinyMCE that’s free forever. For advanced features, upgrade to Cloud Essential or Cloud Professional. These start at $25 and $75 per month, respectively. You can try either paid version for free with a 14-day trial. How to Find the Best HTML Editor For YouAs you’ve likely learned by now, HTML editors are not created equal. The best option for me might not be the best choice for you. With that said, there are definitely certain factors that should be taken into consideration as you’re evaluating HTML editors and comparing them side-by-side. I’ll explain these in greater detail below to help you make an informed decision. Text Editors vs. WYSIWYG EditorsGenerally speaking, HTML editors fall into one of these two categories. The biggest difference between the two is that a WYSIWYG (What You See Is What You Get) tool is connected to a visual editor. So when you’re working in a WYSIWYG editor, you can see exactly how things will be displayed when everything is published on a web page. Then you can generate HTML code. With a text editor, you’ll have to write all of your HTML code manually. Lots of developers still prefer to use these, but WYSIWYG tools are great for beginners and people who want to save time and avoid doing things by hand. Time-Saving ToolsOne of the benefits of using an HTML editor as opposed to a plain notepad is the fact that you’ll have tons of different tools at your disposal. This can make your life much easier and save you time as you’re writing code. Features like autocomplete, find and replace, and syntax highlighting are just a few things to look out for. With something like autocomplete, the HTML editor will provide you with suggestions based on what you’re doing. So with a single click, you can fill in blocks of code. CollaborationIn some cases, you might be working on a project with team members or other users. Not every HTML editor is ideal for this. With some options, you’ll be forced to copy and paste and do a ton of manual work to collaborate with others. But some of the best HTML editors are specifically designed for collaborative work. You can even find tools that allow you to invite collaborators to edit your code in real-time. So you and a few other people on your team can all be working on the same thing simultaneously and see those updates as they happen. Customization and ExtensibilitySome HTML editors don’t have a ton of features out-of-the-box. But you can customize the editor and extend the functionality by adding plugins or extensions. If you’re using a free and open-source tool, expect to do lots more customizing on your own. Paid HTML editors typically come with more functionality. Avoid rigid platforms if customization is important to you. But if you just need a basic HTML editor, this is something that you can probably look past and not worry about. SummaryWhat’s the best HTML editor? It depends on what you’re looking for. Sublime Text is my top recommendation for anyone who prioritizes total customization when they’re coding. Atom is the best option for collaborative coding. UltraEdit is better for advanced users, and it’s extremely versatile. If you want an HTML editor with debugging capabilities, check out Visual Studio Code. For those of you searching for a solution towards the simple end of the spectrum, try BBEdit or NoteTab. TinyMCE is perfect if you want a WYSIWYG HTML editor. Regardless of your needs, you can find what you’re looking for based on the reviews and recommended use cases in this guide. via Quick Sprout https://www.quicksprout.com/best-html-editors/ Everyone browsing the web is worried about security. To put visitors at ease, site operators need to take steps to properly secure their sites and ensure safe browsing for users. SSL (secure sockets layer) certificates have become a must-have for all websites today. Aside from adding protection to your site for visitors, search engines like Google penalize websites without an SSL certificate. SSLs from a reputable certificate provider tell people on the open web that the data transmission on your site is safe and authentic. If it’s your first time adding an SSL to your website, you’ll quickly realize that there are dozens, if not hundreds, of places online to get an SSL certificate. Finding the best certificate provider for your site can feel like a daunting task. Whether you’re launching a new site from scratch or merely implementing an SSL on your existing site, this guide will steer you in the right direction. The Top 6 Best SSL Certificate Providers
After extensive research, we’ve narrowed down the top six SSL certificate providers on the market today. The following reviews will help you determine which option is the best choice for your website. #1 – SSL.com — Best For Cheap SSL Certificates
Lots of the best SSL certificate providers out there are geared towards large organizations and businesses with advanced security needs. But not every website needs to have such robust security. In some instances, a cheap SSL with basic protection is enough to satisfy certain needs. If you fall into this category, check out SSL.com.
Basic SSLs from SSL.com start as low as $36.75 per year. That’s really cheap compared to alternatives on the market that charge significantly higher. This is a quick and affordable way to protect your site at a basic level. You can get a DV SSL issued within a matter of minutes, and you’ll even get a free secure site seal. For those of you who have higher security needs, SSL.com has EV SSLs as well, which is the highest level of trust you can get with an SSL certificate. These are better for business websites, ecommerce sites, and they even come with a $2 million warranty. If you fall somewhere in between these two extremes, SSL.com has OV SSLs and wildcard SSLs. Don’t let the low cost fool you. SSL.com is a reputable Certificate Authority that’s trusted in 120+ countries. But the provider is perfect for anyone that needs a fast and cheap way to get an SSL. #2 – GoDaddy — Best For Security And Malware Protection
GoDaddy is best known for its domain registration services. But this company has additional website services, including web hosting, site design, and SSL security.
The cool part about using GoDaddy as your SSL certificate provider is that you’ll get more than just an SSL. GoDaddy offers additional security services. In addition to the SSL, GoDaddy has plans with full site encryption, malware protection, malware scanning, site cleanups and remediation, DDoS protection, site speed boosts, and site backups. The plan with all of these security extras is only available with a standard SSL. But that’s fine for smaller websites that aren’t collecting payment information or sensitive user data. Generally speaking, GoDaddy is a better option for smaller sites and people who don’t need to secure dozens or hundreds of domains. If you just need to protect one website or a few websites, GoDaddy will be a top option to consider. #3 – Sectigo — Best For Long-Term Certificates
Sectigo is one of the most reputable and reliable Certificate Authorities (CA) on the market today. The company offers an extensive list of web security options, including SSL and TLS certificates for every need. With 100+ million digital certificates issued over the last 20+ years, Sectigo is the world’s largest Certificate Authority.
Sectigo offers SSL certificates in the following categories:
All TLS certificates from Sectigo enable 256-bit encryption, the strongest available option for web connections. If you’re not sure which certificate is right for you, Sectigo has a really easy comparison tool directly on its website to help you decide. One unique standout of Sectigo is the length of subscription durations offered. You can get an SSL for one, three, or five-year periods. Not every certificate provider gives this option. In some cases, other providers only offer certificates in three-month or one-year intervals. Renewing your certificate too frequently can be a pain, and you risk letting the certificate expire. You can save some money with a longer certificate subscription from Sectigo as well. For example, the EV SSL Certificate costs $249 for one year. But that rate drops to $210 per year with a five-year subscription. Sectigo certificate warranties range from $500k to $1.75 million. Free 24/7 expert support and a trust logo for your website come with every certificate. #4 – GlobalSign — Best Managed SSL Certificate Service For Enterprises
GlobalSign offers identity security solutions to businesses, enterprises, innovators, and cloud-based service providers worldwide. 2.5+ million SSL certificates have been issued by GlobalSign. Over 25 million certificates rely on GlobalSign’s trusted technology. For large companies and enterprises with advanced security needs, GlobalSign will be a top option to consider.
The managed SSL service (MSSL) from GlobalSign is really unique compared to other certificate providers on the market today. This solution is designed to reduce the costs, time, and effort associated with managing enterprise SSLs at scale. This platform was built with enterprise-specific requirements for all types of SSL certificates, including solutions for public websites, non-public sites, and internal servers. GlobalSign certificates come with:
GlobalSign’s managed platform for enterprises simplifies the deployment and management of certificates at scale. They also provide volume discounts and flexible terms for businesses. Licensing, user permissions, automated deployments, certificate lifecycle management tools are just a few of the many benefits you’ll get using GlobalSign. This certificate provider is definitely not for everyone. If you’re a small business owner or just managing a personal website, you should probably look elsewhere. GlobalSign is reserved for larger corporations with advanced needs. #5 – DigiCert — Best For SSL Lifecycle Management
DigiCert is a digital security company that launched back in 2003. For ecommerce transactions and other sensitive data, DigiCert will be a top option to consider for TLS/SSL certificates. DigiCert SSLs come with unlimited server licensing, 256-bit encryption, free reissues and replacements for the certificate’s lifetime, a DigiCert secured site seal, and more. From basic SSLs to SSLs with the highest possible authentication and brand protection, DigiCert has you covered.
According to the DigiCert website, the vast majority of the world’s largest banks are secured using SSL certificates issued by DigiCert. This should give you an idea of the company’s reputation and reliability. SSL warranties from DigiCert go all the way up to $2 million, which is one of the highest amounts we’ve seen on the market. But what really makes DigiCert unique is its certificate management tool. It’s really easy for anyone to order, issue, revoke, and renew certificates from a centralized platform. This is perfect for anyone who needs to manage multiple SSLs at scale. You can even automate some of this process and ensure that your certificates never expire. DigiCert gives you the ability to add role-based users to delegate certificate-related tasks as well. Compared to other SSL certificate providers on the market, DigiCert definitely falls into the advanced category. The service goes above and beyond issuing a single SSL to personal blogs or small business websites. It’s designed for larger organizations. #6 – Entrust — Best SSL Certificate Provider For Business Websites
Entrust has been around for more than 50 years. The first Entrust SSL was issued back in 1998, so it’s safe to say the company has its fair share of experience in this industry.
What’s unique about Entrust is the fact that they do not issue domain validated (DV) certificates. DVs are the least secure type of SSL, but Entrust doesn’t even give you the option to get one. Entrust only issues organization validated (OV) SSLs and extended validation (EV) SSLs. These are much more credible than DV SSLs and better for business use. For single sites and large sites with lots of subdomains, Entrust has you covered. Additional features from Entrust SSLs include:
Entrust also offers robust reporting tools to help you avoid downtimes, security gaps, and certificate expirations. All SSLs are backed by a 30-day money-back guarantee. For small businesses, ecommerce websites, and enterprises alike, Entrust should be a top consideration. How to Find the Best SSL Certificate Provider For YouThere are certain factors that must be taken into consideration as you’re evaluating prospective SSL certificate providers. This is the methodology that you can use to narrow down your options. SSL Certificate TypeThere are three main types of SSL certificates—domain validated (DV), organizational validated (OV), and extended validation (EV). DV SSLs are the most basic and the cheapest. EVs are the most advanced, and OVs fall in the middle. The vast majority of domain-validated certificates can be issued almost immediately. You can typically get one within minutes of applying. Organizational validated and extended validation certificates take a bit longer. Business websites should be using OV SSLs at a minimum. If you’re collecting sensitive user data and credit card information, go with an EV SSL. When it comes to running a website, it’s always in your best interest to err on the side of caution. So if you’re unsure what’s right for you, it’s worth paying a little more for a better certificate. But if you’re just running a small personal blog or something like that, you probably don’t need to get too carried away. Number of Domains and SubdomainsHow many websites do you need to secure with an SSL? Beyond the three certificate types mentioned above, you should also consider whether or not you need a single-domain SSL or wildcard SSL. As the name implies, single-domain SSLs are meant for one website. Wildcard SSLs can secure multiple domains and subdomains. Some providers will even offer volume discounts depending on how many domains and subdomains you need to get an SSL for. Provider TypeInterestingly enough, lots of SSL certificate providers do much more than just issue SSL certificates. This is important to keep in mind as you’re shopping around. While some do specialize in SSL certificates, others offer additional digital security solutions. Larger businesses with advanced security needs could potentially get all of their digital security services from a single provider. There are even certificate providers out there that operate outside the scope of web security with other services. For example, you could get an SSL certificate from a domain registrar, web hosting provider, or even a website builder. If you’re launching a new website from scratch, those might be viable options for your situation. You could potentially even get a free SSL certificate included when purchasing another service, like web hosting. SSL Certificate ManagementEnterprises and large organizations with advanced security needs and lots of SSL certificates need tools to help them manage these SSLs at scale. Otherwise, it would be nearly impossible to track renewals and distribute SSLs accordingly. There are providers out there that specialize in SSL certificate lifecycle management, and there are even managed SSL services. This makes it easier to order, issue, revoke, and renew SSL certificates. Some tools offer role-based permissions so you can assign tasks related to SSLs to other people within your organization. You really only have to worry about certificate management at scale. If you just have one or two websites, this isn’t necessary to consider. SummaryWhat’s the best SSL certificate provider? It depends on your needs. Sectigo is an industry leader in this space and offers certificate durations of up to five years. GlobalSign has a managed SSL certificate service for large corporations and enterprises. Use DigiCert if you want the best certificate lifecycle management tools. GoDaddy is a viable option for those of you who just need a handful of SSLs. They also offer additional security perks, like malware protection with certain certificates. Entrust is built for businesses because they only offer OV and EV SSLs. If you’re just looking for a cheap SSL with fast issuance, go with SSL.com. Regardless of your website type or needs, you can find what you’re looking for with the recommended SSL certificate providers reviewed in this guide. via Quick Sprout https://www.quicksprout.com/best-ssl-certificate-provider/ Building a website essentially means investing in your career prospects. Even if you choose a free platform, you will always have to pay for certain components to build your website. WordPress is one of the most beginner-friendly content management system (CMS) options on the market. It’s flexible and intuitive, but there are costs involved if you want a professional-looking website with maximum flexibility. Unlike other CMS options, WordPress doesn’t have any hidden fees, and its pricing plans are easy to navigate and view on your own. However, as a beginner, it can be difficult to figure out how much money it involves to build a website. Well, we’re here to help. In this complete beginner’s guide, we will go over the basics of WordPress pricing, what essential tools can help improve your experience, the difference between .org and .com options, and some helpful tricks to better navigate as a learner. What is WordPress Pricing?The actual price of using WordPress indicates the overall cost of building a website through this specific CMS. Pricing isn’t just an annual or monthly subscription plan or service. You also have to think about web hosting, security, domain registration, and premium themes or templates. The price will depend on your website and career goals. If you want a website purely for blogging, you could probably get away with building a site more affordably. However, if you want a website for business purposes—this is typically where the investment comes in. No matter what goals you have, pricing will be different for everyone. But luckily, WordPress has tools and plans to satisfy every need. Three Tools to Improve Your WordPress ExperienceAs a beginner, these tools are great for improving your overall WordPress experience. Some of these tools cost an additional fee, so it’s important to always weigh up the price against your personal needs. Wordfence Security PluginWebsite security is very important, and what better way to do this than with the Wordfence security plugin that’s backed by WordPress itself? This plugin will help you protect your website with a high-quality endpoint firewall and malware scanner.
With more than 5 billion attacks blocked and over 200,000 malicious IPs blacklisted, Wordfence is the most secure and seamless plugin for beginners. The Wordfence firewall is incredibly fast and can block attacks before it even gets to your website database. This works so well because once you enable the firewall, it trains your website server to run the Wordfence firewall code before any other PHP code. You can get Wordfence for free if you purchase a WordPress.com business or ecommerce plan, which ranges from $33-$59 per month, billed annually. However, if you are using a free WordPress.org site, you can purchase the premium version of Wordfence for $99/year for custom security. You can get between 10-20% off if you purchase a premium plan for two or three years at a time. We highly recommend Wordfence Security for absolute beginners, so you have that peace of mind right from the get-go. Bluehost Web HostingIf you choose to build a website with WordPress.org instead of WordPress.com, Bluehost is the best all-in-one web hosting service on the market.
Just like Wordfence Security, WordPress also recommends and backs Bluehost, so you can guarantee that as a beginner, you will experience a seamless transition and hosting solution. All plans offer automatic installation, a free domain for one year, secure login credentials, and automatic WordPress updates. Bluehost offers such a supportive solution for web hosting, domain registration, and even design, with its very own marketplace with fully customizable themes. There’s no better option on the market if you decide to work with WordPress.org. What’s also great is that it offers 24/7 WordPress hosting support, so if you get stuck at any point, all you need to do is give the support team a quick call. Bluehost offers three pricing plans, including:
If you are building a website through WordPress.com, there’s no need to worry about additional fees, as each plan offers to host your website already. SEOPress PluginFinding the most successful SEO practices for your website can be difficult, especially as a beginner. Therefore, we recommend the SEOPress plugin for all beginners on both WordPress.com and WordPress.org sites.
The great thing about SEOPress is that there is a free version for all WordPress.org users. The free version has quite an extensive range of features like installation wizard, sitemaps, content analysis, Google tools, and import/export settings, all within an intuitive interface. SEOPress allows you to optimize your SEO in the easiest way possible, with metas, ecommerce options, indexing, and RSS. You can also seamlessly integrate this plugin into your WordPress.com website on the business and ecommerce plans. For both CMS options, you can choose to pay for the premium version of SEOPress to get a wide range of features, one year of updates and support, and unlimited sites. SEOPress Pro will run you just $39 annually. We think the free version is just as great and is a more affordable option for WordPress.org websites. The Basics of WordPress PricingNow you know what additional tools we recommend for beginners to improve their experience. (You’ll notice that all of those three options have pricing of their own, which is also important to build into the same website budget where you’ll write down WordPress’s pricing.) Next, we’re going to break down the basics of WordPress pricing into its different tiers. But before we do that, we need to explain the difference between WordPress.com and WordPress.org. The Difference Between WordPress.com Vs. WordPress.orgAs you’ve probably noticed, we’ve mentioned both WordPress.com and WordPress.org multiple times so far. Most people don’t realize that these are two very different CMS options, not just different endings to the same URL. So let’s break it down. To put it simply, WordPress.com is a hosting service that offers five pricing plans with different features, whereas WordPress.org is a self-hosted solution that is completely free to begin with. Most users find WordPress.com easier to use. It’s generally considered the ultimate option for beginners because it compacts everything you need into one plan. However, WordPress.org is better for larger businesses that need more flexibility. With the .org solution, you have all the access, freedom, and flexibility you need to build your website from the ground up. With that said, it can become more expensive over time because you need to pay for most add-ons and services. WordPress.com Pricing TiersNow that we’ve discussed the differences between both WordPress solutions, let’s look at the WordPress.com pricing tiers and their benefits for users.
Personal Plan
Apart from the free version, this plan is the most basic tier. It’s priced this way for personal use, and users can best utilize this space for a portfolio. It’s affordable, and most users will have a simple time navigating the interface. It would be better if it offered live chat support for beginners, but there are many support forums and documents on its website to combat this. Premium Plan
The premium plan is the most popular, and we think it’s a great deal for the features you get. You receive five more additional tools than the personal plan, and although it suggests it’s best for freelancers, we honestly believe a small team of 1-3 users could make do. The only downside is that WordPress doesn’t support plugins on this plan, which is a shame because the price jump from the premium to the business plan is quite expensive. Plugins would be a great option for all plans, even if it’s a limited amount for the cheaper ones. Business Plan
Just like we said above, the jump from premium to business is quite expensive, so WordPress is right to tailor this plan for small business owners. You only miss out on three extra features, but plugins and advanced SEO are worth the cost. If you purchase this plan, you get the freedom of choosing more than 50,000 WordPress plugins, or you can purchase a premium plugin and integrate it into your website. We think it’s a brilliant plan that’s more for local businesses since it doesn’t accept payments from a handful of countries. Ecommerce Plan
Online stores will reap the benefits of the ecommerce plan. You get all features, including full design customization, accept payments from 60+ countries, and integrate with shipping carriers. If you sell a high volume of products each month, the price of this plan shouldn’t be too discouraging. However, this plan isn’t super beginner-friendly, as you would have to know how to work every feature to notice its maximum potential. VIP Plan
WordPress doesn’t showcase the VIP plan often, and that’s because it’s a hands-on service, where WordPress experts partner with you to help build and grow your website. This service is similar to hiring a freelance developer, so it’s important to weigh up your options before purchasing this plan. Three Inexpensive WordPress Tricks for BeginnersBeing able to use tips and tricks to improve your WordPress experience as a beginner is important, especially when you’re preparing to make an investment. These tricks offer a big payoff with little effort and/or lower cost. Here are our top three tricks for WordPress beginners: Preview Themes Without ActivationTo most beginner’s surprise, you can preview both free and premium themes without activating them and risk losing important data. This is a free feature to use and is accessible to all WordPress users.
This tool will eliminate the worry of losing data or other unwanted consequences when you change your WordPress theme. All you have to do is simple and comes in three easy steps: Step 1: Install your new WordPress theme Step 2: Go to the appearance tab » themes page Step 3: Click the ‘open live demo’ button and watch WordPress launch a preview of your website without actually activating it. You can do this with as many WordPress themes as you like, which is a great way to get a feel of how your website will look without committing to it just yet. This tool is great for beginners, as it saves time and is less risky and confusing. Cheaper Premium ThemesWordPress premium themes range from $57-$218 on free or personal plans. Especially as a beginner, purchasing a premium theme isn’t always possible budget-wise, but we know the easiest way to get premium themes at an affordable price.
To put it simply, the easiest and most efficient way to get premium themes at the cheapest possible cost is to purchase the WordPress premium plan. Now, we know you may be thinking that it seems counterproductive since you are still paying a bulk fee—however, unfortunately, there are no guaranteed ways to access premium themes for free. Hear us out for a second. When purchasing the premium plan for $10 per month, billed at $120 per year, you are saving money in the long-run by not having to pay for more expensive themes. The premium plan offers you access to unlimited premium themes with customization options, which is everything you need to create a great website. The yearly cost for an entire plan is cheaper than some of the high-end premium themes, so it only makes sense to purchase a plan in the long-run. The only reason it would be worth buying a premium theme is if you have a small budget and can only afford the personal plan, and the free themes didn’t interest you. Customize Your ContentWhether you have a website for business purposes or for blogging, there will always need to be content on your site. Luckily, WordPress makes it easy to upload, manage, and customize content in the most seamless way possible. Here are some quick and easy steps for content customization with WordPress: Step 1: Go to the site tab » posts » add new post Step 2: Once you’ve finished writing your content, there will be a bunch of tabs on the right-hand side Step 3: Click the status and visibility tab, where you can change the visibility and publishing of your content Step 4: Choose to launch your content or preview it in the top right-hand corner As you can see in the picture above, you can also choose from an abundance of tabs that will help customize and improve your content published on your WordPress website. All the information and tools you need are right there, which is what makes it so easy for beginners. SummaryBoth WordPress.com and WordPress.org have different pricing variations, but we recommend WordPress.com for complete beginners and WordPress.org for more established businesses with a budget for their back end. WordPress offers reasonable and affordable pricing plans for all types of websites and user goals. If you need a little more or a little less, there’s a plan waiting for you. Beginners don’t have to worry about finding the best-of-the-best web hosting, themes, or domain registration services, because WordPress does it all for you. via Quick Sprout https://www.quicksprout.com/wordpress-pricing/ Imagine the power of a platform if nearly every entrepreneur thinks of starting there to open their dream business and sell globally in an instant. That’s Shopify for you. You can’t not know about this amazing eCommerce platform if you’ve ever thought of opening an online business. After all, it has the broadest range of sales tools and templates, is user-friendly and cloud-based, and is suitable for all sizes of businesses. But what exactly is Shopify, and how does it work? You’ve heard your friends talk about it, watched that one random YouTube video, and read a few blogs. But now you want to know more. Well, you’re at the right place. What Exactly Does Shopify Do?
Shopify is a commerce platform that lets you set up an online store to sell your products. It has been designed for businesses of all sizes to sell anything and everything that’s socially acceptable in society. You can sell physical products, dropshipped products, digital products, or services…really anything that isn’t illegal or shady. You get everything you would need to build and market your online store, including templates, a payment processor, email marketing tools, a blog, and so on. Customizing the site so that it meets your individual requirements is also possible. Shopify is a hosted solution, which means that the platform runs on its own servers. You don’t have to buy any web hosting or install any software anywhere. You simply have to pay a monthly fee to use the platform, and as long as you have access to a web browser and the internet, you can manage your store from anywhere. Who Should Use Shopify?Shopify is for everyone who wants to become a part of the eCommerce niche. You can sell anything from bike saddles to doormats to temporary tattoos to hair styling tools and accessories to motor-vehicle upholstery here. Yes, you can get that specific too. But it’s not a marketplace like Etsy, Amazon, or eBay. There are all kinds of companies—from Kylie Cosmetics and Homegrown Meats to Water Aid and Tesla—who trust this platform to reach out to and serve customers. It’s best for people who want to run their businesses online and offline and want to reach out to new customers. So, there really are no clear-cut rules about who can join Shopify. To give you more clarity, though, I’ll tell you about the other things you can sell on Shopify that aren’t physical products.
The above are just a few examples of things that can be sold on Shopify. As you can see, the platform is literally for anyone who wants to build an eCommerce store by using its templates and sales tools without any extra hassle or expense. Who Should NOT Use Shopify?Like two sides of a coin, the advantages of Shopify are accompanied by its fair share of limitations. Due to this, it’s possible for the platform to not be the right fit for you in specific cases. Here are a few: Case 1: When You Want Highly Detailed Site CustomizationYou can upload your store logo, choose your colors and fonts, and attractively present your products and services. But if you want more customization than that, you’ll have to either hire a Shopify designer or learn how to code yourself. In other words, Shopify has limited customization features. If you want custom fonts, control the display of your product pages, or other similar tasks to have control over your store’s design, Shopify isn’t for you. And coding isn’t necessarily a way around this issue. You can always learn Liquid, which is Shopify‘s own language used for themes, if you really want to. But even if you do, you can’t simply head to Google to solve issues in Liquid the way you could if Shopify used a standard programming language like PHP. If customizing Shopify is that important to you, you can hire a developer that specializes in Shopify—provided you have the budget for it. Speaking of budget… Case 2: When You Have a Small BudgetShopify themes are expensive. Shopify apps are expensive. Shopify itself is expensive. Its basic plan is almost useless as it lacks some crucial features like analysis, reports, and real-time shopping rate. The cheapest plan starts at $9 per month, and while this may seem affordable at first glance, you’ll soon realize launching your eCommerce business with Shopify is definitely not a cheap affair if you start digging deeper. You have to shell out extra cash for the transaction fees, credit card processing fees, purchasing and installing apps, among others. Plus, there are only 71 themes in the official theme store, which can cost anything between $140-$180. So if you’re trying to avoid spending money, Shopify is not the best option for you. Case 3: When Shopify is Only a Stop, Not Your DestinationAs mentioned before, Shopify is a hosted platform. While this is great since all the technical details like finding a hosting platform, installing software, and getting an SSL certificate are taken care of, you face the risk of losing your Shopify store if the platform ever decides to close its doors or to penalize you. And not only that, even migrating your store isn’t easy. All you’ll get is a CSV of your products—everything else has to be recreated from scratch. How Shopify WorksShopify has many things going for it. It works as a software-as-a-service (SaaS) tool that can be used by anyone. It has a simple set-up process. All you have to do is pick a theme, customize information, add the products you want to sell, specify payment options, and finally, go live. In this section, I’ll elaborate on the different tools and perks the platform offers that can be fantastic for eCommerce sellers. Let’s take a quick look: Automatic Order FeaturesA Shopify shopping cart can automatically calculate shipping rates and taxes while giving you the option of ordering flat-rate or free shipping at the price point to choose from. The idea here is to help you provide an enhanced customer experience to your customers. Secure PaymentsShopify allows you to accept payments in different ways. You can use the platform’s proprietary gateway, Shopify Payments, as well as third-party payment gateways for an additional fee. The good news is that all your payments are secure with a free SSL certificate. Marketing FeaturesShopify offers tons of marketing features to take your experience to another level. For instance, you can use Shopify tools to group your ideal customers by category. This can be useful for creating targeted marketing campaigns. The other feature is called the abandoned checkout recovery. Whenever a customer abandons their shopping cart before checkout, Shopify automatically sends them reminder emails in a bid to entice them back to the items they almost purchased. Social media integration, built-in blog features, and customizable automated email templates are also available. Product HandlingYou can get rid of time-consuming and costly activities like storing, packaging, and shipping products with Shopify.
Extra ChargesYou have to choose from the available monthly payment plans to use Shopify. You’ll also incur credit card fees for every transaction, with varying fee amounts depending on the plan you choose. As your business grows, you can add services and lower transaction costs by upselling, which is very useful for ambitious entrepreneurs. For instance, if you use third-party payment systems, the additional charges will be 2% for Basic Shopify, 1% for Shopify, and 0.5% for Advanced Shopify. What I Wish I Knew Before Starting My First Shopify StoreYou’ll learn several lessons once you embark on your Shopify journey just like I did. However, to ensure you don’t make the same mistakes as I did, here are some of the things I wish I knew to make my journey smoother. Lesson #1: Always Choose Functionality Over DesignI’m not claiming that my first Shopify store was the most visually attractive site, but I did everything I could to make my website beautiful and cool when starting out. That was my first mistake. Having a pretty website wasn’t something that would help me make money. Instead, what my visitors really cared about was usability. They wanted a website that they could trust. I soon realized my folly and shifted focus from having a gorgeous design to navigability. I prioritized making it easy for people to visit my Shopify store, find what they want and add it to their cart, fill in their payment information—basically, everything that could help enhance their experience. Lesson #2: Getting People to Come to Your Store is HARDThe whole point of launching an eCommerce store is to make money, but you really can’t succeed if you don’t have customers. The catch? Getting people to visit your store is anything but easy. I was under the impression that since I knew the SEO basics and had launched paid campaigns, I had taken care of that. That was my second mistake. Choosing an advertisement channel is important for generating enough buzz for your store. But instead of launching campaigns for every single channel, it’s better to focus (and succeed!) on either one or two. I got this part right. However, what I messed up was with the budget. I ended up making a substantial upfront investment without truly understanding the ins and outs of paid ads. Eventually, I created a different funnel for generating quality leads—not boosting sales, mind you—and saw better results. This also helped lower my acquisition costs which worked in my favor in the long run. Lesson #3: Don’t Skip Mobile OptimizationI didn’t have to worry too much about how my website looked thanks to Shopify’s amazing website design tool. But it was getting the mobile version right which was trickier for me. The platform itself will indeed tweak things to make your website more mobile-friendly, but it isn’t enough. I didn’t know that, and that was my third mistake. Considering that 8 out of 10 people won’t continue browsing your website if it isn’t displayed properly on their device, this isn’t something that you should take lightly. I realized that while my CTA buttons looked appropriate on the website, it was smaller for the mobile. I also tweaked my content to show as little text as possible and make the images the center point. Additionally, I optimized for different screen ratios, minimized the number of pop-ups, and fixed the main header too. While it took time, I was soon able to lock in more mobile traffic. With the what-to-do and what-not-to-do out of the way, let’s focus on actually starting your Shopify shop. How to Get Started with ShopifyHere’s a step-by-step walkthrough of how you can start your very own first Shopify store. Step 1: Sign up for the Free Trial
You can avail of a 14-day free trial with Shopify. This will give you enough time to get used to the platform and test out the features before making any real commitment. The even better news? You don’t have to give any credit card information—just basic information like your store name, email address, and so on is enough. Once you complete everything, you’ll get access to Shopify’s marketplace. Step 2: Add the Products You Want to Sell
Before adding the products, you have to figure out the products you want to sell on Shopify. This is an exciting process as you get to take all the creative decisions related to your eCommerce store. There are hundreds of products and services you can sell on Shopify, but you know that already. The important thing here is for you to have your own product idea and then work on getting those products. Follow this up by adding the products to your website. Click on Products and then All Products to include as many details you want. This is where your customers will learn about your product and decide whether to buy it or not. Make sure you upload high-quality and clear product images that help highlight its special features as well. Once everything is done, click on Save Product to save the changes. Step 3: Customize Your Store With Themes
When choosing a theme, keep in mind that is exactly how your website would look to your visitors. So getting the aesthetics right is crucial here. Go to Online Store, and click on Themes. You’ll find all kinds of themes—free and premium—in the Shopify Theme Store. While each one of them is well-designed, mobile-friendly, and highly responsive, you can also pick one from third-party marketplaces like ThemeForest. Once you find a theme to your liking, click on Add Theme, and then Customize in Theme Manager to start editing your webpage. Step 4: Sort Your Shipping Details
Getting the shipping details accurate is important for every eCommerce store. They must be calculated based on your product weights, packaging, carriers, locations, profit margin per order, and more. Go to Settings and then Shipping and Delivery. All you have to do here is set your preferred shipping rules. You can choose Shopify Shipping or any other third-party provider—it’s completely up to you. Step 5: Enable Payments to Your Store
You can receive payments from customers through your website thanks to Shopify’s payment gateways. Just make sure you choose the right payment gateway after considering prices, commissions, and features. Click on Settings, followed by Payments, to set your payment options. You’ll find two choices here: Shopify Payments or Third-party payment providers (PayPal, Amazon Pay, etc.). My tip? Enable both options. This will help you appear more trustworthy and dependable in your visitor’s eyes without having to spend an extra dime. It’s really a win-win. via Quick Sprout https://www.quicksprout.com/how-does-shopify-work/ Everyone in the project management space has heard of Scrum. But even though this project management methodology is so popular, there’s a lot of confusion surrounding the term. If you’re considering implementing Scrum with your team and projects, you need to have a firm grasp of how it works. This guide will walk you through everything you need to know about using the Scrum methodology for a wide range of projects. What is Scrum Project Management?Scrum is a project management framework within the agile methodology. It’s designed to help teams improve the way they work together through autonomy, organization, and self-reflection. The scrum management methodology is built for complex projects, like software development. This framework is intended for smaller teams led by a “Scrum master.” All of the work is completed in short cycles, referred to as “sprints,” and the team meets quickly on a daily basis to identify tasks and roadblocks. 3 Tools to Improve Scrum Project ManagementScrum project management won’t be useful if you’re not leveraging technology to your advantage. These are the three tools that every Scrum master should consider using to ensure success for their teams: #1 — ClickUp
ClickUp is trusted by 200,000+ teams across the globe. This includes big names like Uber, Google, and Booking.com. What makes this software unique compared to other tools on the market today is its robust functionality. It’s more than just a platform for managing your Scrum projects; ClickUp is an all-in-one solution for productive work. The tool is designed to replace other apps for things like team chat, goal planning, task lists, and more. In terms of Scrum projects, ClickUp has a dedicated feature set for managing and planning new sprints. It’s easy for anyone to assign dates, designate priorities, and automatically move unfinished work into the next sprint. Scrum masters have full control over the entire team’s workload. It’s easy to sort tasks and subtasks by role and view everyone’s progress at-a-glance. The tool comes with burndown charts, burnup charts, cumulative flow workload reports, velocity metrics, and more. The basic version of ClickUp is free for unlimited users. But I strongly recommend the premium version. At just $5 per user per month, it’s tough to beat that value. Learn more. #2 — Jira Software
Scrum is popular among software development teams, and Jira by Atlassian is built specifically for this use case. If you’re managing an agile development team using the Scrum framework, Jira Software should definitely be on your radar. The tool has everything your team needs to plan, track, and release high-quality software. You can use it to plan sprints, create user stories, and assign tasks to everyone on your team. The software makes it really easy for managers to prioritize tasks and collaborate with total visibility. Everyone can view the status of tasks, sprints, and projects with real-time visual data charts. I like Jira because it comes with pre-built workflows, which can save you a ton of time when you’re first getting started with Scrum. With that in mind, you can use this tool to create a completely customized workflow to match the way your Scrum team works. Jira’s functionality can be extended with 3,000+ apps in the Atlassian marketplace. The software is trusted by 65,000+ businesses worldwide, including technology leaders like Spotify, Airbnb, Square, eBay, and Cisco. Jira is free forever for teams of up to ten users. Paid plans start at just $7 per user per month, and you can try it free for seven days. #3 — Trello
Trello is one of the most popular project management tools on the market today. That’s why 1+ million teams across a wide range of industries rely on this solution. Compared to other tools, Trello shines due to its simplicity. At its core, it’s a basic Kanban-style board for project management. But the software can easily be manipulated to handle the requirements of a Scrum team. For example, Trello comes with sprint board templates, sprint retrospective templates, and product backlog templates as well. You can also add-on plug-ins and power-ups to bring essential Scrum functionality into your team’s workflow. Use Trello to create custom columns and color-code tasks based on priorities. If you and your team are new to Scrum, you might find other tools to be too confusing or complex. But Trello is easy to figure out, even for non-technical users. The basic version of Trello is free, and paid plans start at just $10 per user per month. Try it free for 14 days. The Basics of Scrum Project ManagementLike other project management methodologies, there are specific components of the Scrum framework that apply to all Scrum projects. This section will explain each one in greater detail. Scrum RolesFirst, you need to understand how a Scrum team is arranged. Scrum teams must be highly flexible, cross-functional, and adaptive to change. These teams are typically made of 5-11 people segmented into three clearly defined roles—product owner, Scrum master, and development team.
It’s crucial for everyone to understand their role from the beginning. Leadership will be responsible for clearly defining those roles and conveying what’s expected of the team. Scrum ArtifactsThere are three main artifacts designed to prioritize deliverables and business value within the Scrum framework:
It’s up to the product owner to prioritize the product backlog. This contains all functionalities that must be incorporated in the final deliverable. Once this has been prioritized, the entire team will understand the top requirements of a project, which ultimately eliminates guesswork and confusion. The sprint backlog contains a prioritized list of activities that must be completed for each sprint. Increments refer to the completed work at the end of each sprint. The increments are typically managed on Scrum boards and burndown charts. Each scrum team might have a unique way of defining a particular action item as “Done” based on the increments for each sprint. Sprint PlanningSprints are a core component of the agile framework and Scrum methodology. They can be defined as short time-boxed periods when a team aims to complete a predefined amount of work. This helps break down bigger projects into smaller pieces that are much more manageable. Sprint planning starts before the actual development work begins. The team will determine what specific features can be delivered during the upcoming sprint and come up with a plan for how those deliverables will be achieved. Team members will be assigned different tasks based on their role and the tasks’ priority level. Daily ScrumDaily Scrums are commonly known as “standup meetings.” That’s because these meetings are supposed to be so quick that you wouldn’t need to sit down. In less than 15 minutes total, your entire team will give a quick update. They’ll explain what work they’ve completed in the previous day and identify what they plan to achieve in the coming day. This will be the time for anyone to raise concerns or identify problems they might be facing. The goal of a daily Scrum is to ensure that the whole team is on the same page. Sprint ReviewGenerally speaking, sprints should last no more than 2-4 weeks. At the end of each sprint, the team will meet again to review the progress made during that period. This will also be an opportunity for the team to optimize the upcoming sprint based on feedback from the previous one. The product owner, Scrum master, and development team will all be present during the sprint review. Everyone will compare actual deliverables against planned deliverables for the sprint. Did the team meet their intended achievements? Some sprint reviews might involve a product demonstration for clients or stakeholders to keep them updated with the team’s progress. Sprint RetrospectiveThe sprint retrospective is a bit unique compared to the sprint review. Rather than focusing on the actual deliverables and activities associated with a sprint, the team will assess the overall process and procedures to determine what went well and what needs improvement. For example, team members can share how they were feeling during the sprint, whether positive or negative. The team will also discuss how the sprint process can be improved by eliminating unnecessary steps, adding a new procedure, or continuing with things that worked. Sprint retrospectives end with the four L’s—liked, learned, lacked, and longed for. Everyone on the team has a chance to share their thoughts on each of these points. 3 Tricks For Scrum Project ManagementEvery project manager using the Scrum framework can apply these quick tips and best practices. This will make your life much easier and improve your team’s performance. Trick #1: Use Project Management Software to Manage SprintsThe whole foundation of Scum is to take something complex and simplify it. That’s why larger projects are broken down into sprints with different tasks and deliverables along the way. To make everyone’s job easier, the entire team should have access to the project tasks, backlog, and sprint planning at all times. The easiest way to achieve this is with software. In addition to the tools listed earlier in this guide, check out our list of the best project management software for full reviews and alternative suggestions. Since Scrum has become such a popular framework in the world of project management, so many tools on the market today have solutions built for Scrum teams. Teams should have virtual access to Scrum boards where they can update their progress with the entire team in real-time. This is the best way to manage projects, especially if you’re working with a remote team. Trick #2: Set a Main Goal For Every SprintSprints are more than just a two-week task list. Each sprint should all have a main goal that’s articulated in a one or two-sentence statement. Sprint planning helps ensure that teams and stakeholders have clearly aligned objectives for the coming weeks. This process is much easier if the team knows exactly what goal they should be working towards. Be specific. Whether it’s launching a specific feature or finalizing certain functionality within the product, each sprint should have a main endpoint. Without a main goal for the sprint, it can be tough for teams to distinguish between one sprint and another. This defeats the purpose of Scrum and makes the project feel like a larger task as opposed to something that’s segmented into achievable steps along the way. Trick #3: Establish Team Communication GuidelinesLots of Scrum teams work remotely or from dispersed locations. That’s just the reality of the modern workforce. With that said, your entire team must understand what’s expected of them from a communication standpoint. While you may not necessarily require a team to be available via Slack, Skype, or another team messaging platform at all times, you should definitely require everyone to attend the daily Scum. Set your daily Scrum for the exact same time every day. So regardless of location or time zone, your team knows that they must be available for the 15-minute period. Beyond the daily Scrum, updates and progress can be made directly within your project management software. So team members can see these updates at their leisure and get notified about anything directly related to their tasks. via Quick Sprout https://www.quicksprout.com/scrum-project-management/ With over 3.5 million accounts, Basecamp is one of the more popular project management platforms. It offers many benefits, including a highly user-friendly design and multiple in-platform communication options to help streamline your workflow and keep team members focused and working within the platform. But Basecamp also has some downsides, like limited reporting and time tracking functionality. While it’s ideal for smaller projects, it might not be the right choice for highly complex, larger projects. Basecamp Pros and ConsPros
Cons
Compare The Best Project Management Providers
We reviewed dozens of project management providers and narrowed them down to the best options.
See Top PicksHow Basecamp Compares to Top Project Management SoftwareWhen it comes to affordability and a user-friendly design, Basecamp wins out over most other project management software. Its free version is a great option for freelancers and startups, while Basecamp Business is still highly affordable for businesses of all sizes. Basecamp lacks when it comes to task automation and timesheet tracking, so if you’re looking for those specific perks, Zoho Projects is a better choice that’s still highly affordable. Basecamp is also frequently mentioned in the same sentence as Trello, which is also ideal for smaller projects and which offers a highly functional free plan. Any of these project management software options are suitable for smaller-scale projects and businesses working on a limited budget. Basecamp Project Size CapabilitiesBasecamp operates on a to-do list basis. You can break larger projects down into lists smaller tasks and assign team members to-dos with deadlines. Team members can upload files directly to tasks, keeping work centralized.
With the ability to create and customize multiple projects and endless tasks for each project, Basecamp theoretically has the capability to handle everything from a small and simple project to a much more complex multi-stage project. You can simply keep adding on as many tasks as are needed, and it’s easy to tailor those tasks as the project evolves and progresses. Task templates help to streamline the creation and assignment process, but this process is already much simpler than what you’d be facing with other project management software. With Basecamp, you can create a task by giving it a name – and that’s it. There’s no need to provide a description, pick a start or end date, or create milestones. This can save time, letting you quickly create tasks that you can then return to and add detail at a later time. While a to-do list can help manage smaller projects, bigger projects require bigger, more detailed planning. Enter Basecamp’s hill charts. These charts give project managers a better view of the big picture. Each hill chart effectively visualizes the uphill project phase that involves figuring out an approach and solving potential problems. It also shows the downhill phase that’s all about task execution and making those plans happen.
With Basecamp, you’ll have the option to develop a hill chart for each to-do list within your project. It’s as easy as turning on hill chart tracking and dragging and dropping the tasks into the chart. The fact that the charts are human-generated means that they can be tailored to your specific project, rather than based on deadlines or milestones that are input and fulfilled. The result is that the hill chart can establish a realistic way to visualize and track project progress, and to identify when and why challenges arise. Although Basecamp can absolutely support larger projects, it does have some shortcomings. It lacks task dependency settings, so if one team member misses a deadline and a second task depends on that task being completed, your project can go off the rails without you being able to see that problem coming. Basecamp also lacks in project reporting, budget monitoring, and other important details that you might need to provide to stakeholders and supervisors. Basecamp has the capability to support all of the to-do lists that a big project might need, but without features like task dependency and reporting capabilities, it’s probably better suited for smaller projects with limited complexity. Basecamp Team Size CapabilitiesBasecamp can accommodate teams of all sizes. Basecamp Personal supports up to 20 users. Upgrading to Basecamp Business means you can have an unlimited number of users, ideal for larger businesses and projects that require big teams or multiple teams. Basecamp has done away with per-seat charges, so you can enroll anyone who may even have a small role in the project without having to worry about increased plan costs. Basecamp Ease of UseOne of Basecamp’s major strengths lies in its ease of use. This is a platform that everyone–including team members, clients, and team supervisors–can quickly learn to navigate. Basecamp has a user-friendly design and a relatively simple dashboard. This easy learning curve makes it practical for businesses with a large freelancer base; while freelancers might not work in the platform as regularly or intensely as full-time employees, Basecam is easy enough to use that even occasional users can still pick up right where they left off when they last logged in. Basecamp’s largely central design also contributes to its ease of use. With in-platform communication tools, users can stay focused on Basecamp, rather than jumping back and forth into email and other chat platforms during the day. Basecamp also makes it easy to upload documents, files, and images, and those files are stored within Basecamp where they’re easily accessible. This design saves time and makes it easy for team members to retrieve the files they need.
All of that information is conveniently located in a “My stuff” menu. Team members can quickly view their assignments, schedule, recent activity, and more. It’s quick and easy to catch up after a day out of the office, and this centralized summary of the need-to-know information can help team members to prioritize their work and ensure they meet their deadlines. Project managers enjoy a similarly concise view of their own. A manager’s view displays all of the activity, including the overview tasks and upcoming milestones. At a glance, a manager can identify potential problems that need attention, so they can work more productively. Basecamp CommunicationGood project management software not only makes establishing deadlines and assorting tasks easier, but also facilitates in-platform communication so you don’t have to constantly jump back and forth from the platform to your email or office chat function during the day. This is one area where Basecamp excels. Basecamp features message boards that let team members communicate right within the platform. The message board creates an organized discussion, and users can look back through the message history for pertinent information, rather than trying to track down details in a fragmented email thread.
For quick questions that need prompt responses, you can also use Basecamp’s real-time group chat, which Basecamp refers to as a Campfire. There’s no need to bring up a separate chat app, and users can continue to work right within the platform while waiting on their response. This can help to keep users focused and productive, eliminating the distractions of other apps.
The automatic check-in function also saves users time on status meetings and check-ins. This function will automatically ask your team members a question at a scheduled time. Replies are compiled into a single thread, so you can review them and get the most up-to-date information about your project’s progress. Basecamp IntegrationsQuality project management software needs to work with, and not detract from, the other apps and programs that you’re already using. Basecamp offers many integrations that can streamline your workflow, including some of the most popular mobile and desktop apps, time tracking and accounting apps, reporting and planning apps, customer service apps, and more. Basecamp might be light on capabilities like time tracking and reporting, but its integrations do make up for some of those shortcomings. Just be sure to consider the subscriptions that you’ll need to have with these other apps when deciding if Basecamp’s price is right for your business.
Basecamp MobilityBasecamp is highly mobile, and you can use it on most platforms. Apps are available for iPhone, iPad, and Android phones, so you can check in on project progress and respond to messages. In terms of getting tough work done, Basecamp is available as a download for your Mac of Windows computer, and you can also access it as a web browser on any tablet, laptop, or phone. You can also respond to basecamp emails from your email inbox without logging into an app, so you can always stay connected no matter which device you’re using. Basecamp SupportBasecamp offers significant online information to help you learn and implement this software. Its online video library covers the topics that users need to get up and running. These videos are free to access and guide users through essential skills and features.
While those videos are pre-recorded, users can also register for Basecamp’s live Q&A classes. These classes are free and users have the chance to ask experts any questions they might have about Basecamp in a live setting. Basecamp also offers a detailed help library of articles that can help users learn how to better use Basecamp. Articles offer step-by-step guidance and feature plenty of screenshots.
If you can’t find the help you need in the tutorials or help guides, Basecamp also offers free online support. You can send a message detailing your help request, and according to Basecamp, the average response time is 20 minutes. Support is available from 8:00 am to 6:30 pm Central Time Monday through Friday. While the lack of phone support is a definite downside, the 20-minute response time means that you should still be able to access quality support when needed. Basecamp PersonalBasecamp Personal is the base tier, and it’s available for free. This plan includes up to three projects and up to 20 users. It also includes up to 1 GB of storage space. While Basecamp Personal is light in terms of its capability and features, it’s an efficient option for students, freelancers, families, and personal projects. It can also be a good choice for anyone looking to try out the Basecamp platform, or for a brand-new business that is growing and needs an affordable yet helpful project management platform. Basecamp BusinessWith Basecamp Business, you’ll enjoy the full functionality and features of Basecamp. This plan is highly affordable at $99 per month. There are no per-user fees to worry about, so pricing is simple and upfront. Basecamp Business includes everything you need to manage multiple projects and teams of any size:
Basecamp offers a free 30-day trial for its Business plan, and there’s no credit card required. Basecamp also notes that it will extend the 30-day trial if you contact them to explain that you need more time. Discounts are available for non-profits, and teachers and students can get free accounts. Paying for a year upfront will get your business a 15% discount. Basecamp doesn’t require minimum contracts, allowing you to cancel at any time. They’ll even refund your unused months if you paid for a year and need to cancel early.
Compare The Best Project Management Providers
We reviewed dozens of project management providers and narrowed them down to the best options.
See Top PicksSummaryBasecamp is one of the more affordable project management software options available, and it delivers impressive functionality and versatility, even in its free plan. Its simplistic task management and document uploading make this platform very easy to learn and use, and its unlimited users capability accommodates teams of all sizes. That ease of use does come with downsides, mainly in the lack of reporting tools, task dependencies, and time tracking tools that other software options commonly offer. As a result, Basecamp is an excellent choice for smaller projects that aren’t highly complex. Large-scale multi-part projects with significant detail and complexity are better handled by a more robust project management platform. via Quick Sprout https://www.quicksprout.com/basecamp-review/ You’ve decided to sell your business—now what? Selling a business can feel overwhelming, especially if you’ve never been through this process before. Between the timing of the sale and the logistics, there are lots of factors to take into consideration before you proceed. First, you need to understand that it’s perfectly OK to sell your business. Many small business owners struggle with this concept, especially if it’s a company they’ve built from scratch. Entrepreneurs sell their businesses for a wide range of reasons. Whether you’re ready for retirement, feeling overworked, or just ready to move on to the next chapter of your life, selling your business can be extremely rewarding. If you take the right approach, the profits can fund your next venture or give you the financial freedom you’ve always dreamed about. As someone who has bought and sold multiple businesses throughout my career, I know what it takes to sell your business the right way. I’ve taken a complicated process and simplified it to just five easy steps. Find the Best BrokersThere are hundreds of business brokers in the USA! Find out which one is the best match for your specific needs. Enter your zip code below to begin. Step #1: Determine Your Business ValuationMost entrepreneurs think they have an idea about what their business is worth. But in many cases, the number in their minds is way off from its actual value. So before you list the sale price too high or too low, it’s best to bring in a valuation expert. A third-party valuation will provide you with a realistic estimate of the company’s worth. For a fixed amount (usually a few thousand dollars), a qualified appraiser can determine the business’s worth with a detailed report and documentation. The report can ultimately help bring credibility to your asking price if prospective buyers question the amount. At the very least, the valuation will give you a rough estimate of what you can expect. If you don’t want to hire an appraiser, you could always try to figure out the value on your own. Generally speaking, there are three main ways to value a business—cost approach, market approach, or the intrinsic value approach.
The third method, also known as the discounted cash flow approach, is the easiest to do. Most companies are usually worth anywhere from three to six times the current cash flow. With that said, there are lots of other factors to take into consideration here. Industry trends, business debt, assets, and similar companies for sale are just a few examples to consider. Whether you estimate the value on your own or bring in a third-party appraiser, the valuation may not end up being the final sale price. At the end of the day, the business is only worth what someone is willing to pay for it. If you’re unhappy with the valuation, it might not be time to sell your business quite yet. Think of it like selling a home. Your real estate agent could tell you what the house is worth, but the property could sit on the market for months at that list price. You might have to put some money into the house to get the maximum value. The same analogy can be applied to selling your business. Step #2: Get Your Financials in OrderOnce you’ve determined the company’s value, it’s time to organize your financials. For some of you, this will be much easier than others. Selling a business puts lots of eyes on your financial records. Prospective buyers, lawyers, accountants, third-party valuation firms, brokers, specialists, and other people will be combing through your statements. To ensure everything goes smoothly, your bookkeeping must be immaculate. In most cases, you’ll need to provide at least the last three years of tax returns, as well as accurate financial statements (balance sheet, income statement, cash flow statement). Any mistakes or disorganization in these records could be a red flag for potential buyers. Inconsistencies in your books could raise other questions, even if it was just an honest mistake. Am I being misled? Are these numbers trying to cover something up? Can I believe everything else I’ve been told about the business? These are the types of thoughts that will go through the mind of a buyer if errors are found in your financials. The vast majority of small businesses don’t have an accountant or a bookkeeper.
If you fall into that category, I strongly recommend hiring an accounting expert to clean up your books before you list the business for sale. This will make your life much easier down the road. Step #3: Hire a Business BrokerThere are basically two options to consider when selling a business—sell it on your own or use a broker. You could potentially sell the company on your own if you’re selling to a family member or someone trustworthy in your life. This will help you save some money on brokerage fees. But for the vast majority of circumstances, using a broker will be your best bet. Will there be some extra fees associated with this method? Absolutely. But a broker can help you get the best possible price and sell your business faster than you could do on your own. Remember, brokers work on commission. So it’s in their best interest as well to sell the company for maximum value. The broker will typically form their own valuation of the business. Compare this to estimate you got back in step #1. While the two numbers probably won’t be exact, they should be relatively close. If there’s a drastic difference between the broker’s estimate and valuation given by the appraiser, you might want to get a third opinion to see which one is more accurate. Your broker has lots of experience selling businesses, which is extremely valuable. Other common duties of a broker include:
Business Broker OptionsThere are hundreds of business brokers in the USA! Find out which one is the best match for your specific needs. Enter your zip code below to begin. Here are recommendations on best business brokers to sell your business:
So how much will this cost you? Pricing for a business broker usually depends on how much money your business makes. The general rule of thumb is this; the higher your revenue, the lower the broker’s commission fee. A business with up to $1 million in revenue will typically pay a 10-12% brokerage fee, whereas businesses with $25+ million typically pay in the 2.5-4.5% commission range. For companies in the middle, it’s common for brokers to use the Double Lehman commission model, as opposed to a flat percentage.
It’s important to understand the broker’s commission model from the beginning. So ask questions if you’re unsure. Some brokers might even charge you a retainer, but you can probably avoid that by offering a minimum commission amount. Step #4: Find Pre-Qualified BuyersThere are two key words to this step; pre-qualified and buyers (plural). You’ll definitely want to field multiple offers for several reasons. For starters, not every offer will be legitimate. Selling your business requires you to disclose sensitive information about your organization. This could be worth a fortune to your competitors. It’s possible that a competitor, or someone acting on behalf of a competitor, could make an offer just to review your financials. So don’t hand over that information to just anyone. Most business transactions are backed by a third-party loan from the SBA. In some cases, banks require sellers to provide some of the financing as well. So don’t get too excited over the first offer that comes in and assume the company will be sold. On average, it takes six to eight months to sell a business.
In addition to the broker, you could always bring in a sales expert to help speed up this process and pre-qualify buyers. Buyers can typically be segmented into three main categories:
The type of buyer making an offer plays a role in how long it takes to process the transaction. For example, an individual buyer will likely need an SBA-backed loan, which can take up to 90 days for approval, whereas a private equity group could finance the purchase on its own. Don’t rush to accept an offer right away, either. You can always use one offer to leverage another, which will give you the maximum value for your business. Step #5: Finalize Legal Documents and ContractsOnce you’ve found a qualified buyer and accepted an offer, it’s time to finalize the deal. This is where things can get a little bit messy and confusing. So you’ll definitely want to have your lawyer handle the vast majority of this stage. Some of the standard legal documents and contracts associated with a business sale include:
You could potentially draft a purchase agreement and contract on your own, but I would strongly advise against that. There’s a good chance that you’ll miss vital information, and you could be left vulnerable to unforeseen circumstances. These contracts can be upwards of 25-50+ pages long. If your current lawyer is not an expert with contract law, they should be able to refer a colleague. Once everything is in order, it’s just a matter of crossing the T’s, dotting the I’s, followed by lots of signatures and initials. Tips and Best Practices For Selling Your BusinessWhile the process of selling your business can be simplified to just the five steps listed above, there are certain things you need to do along the way. Follow these tips and best practices to make sure the sale goes smoothly. This will also ensure you get the maximum value for your business. Boost Your SalesAs I said before, selling your business takes time. You can’t expect to list it today and get an offer tomorrow. I’ve seen so many business owners focus so much effort on selling their company, that they neglect the business itself while they’re still in charge. You must continue coming to work every day and put all of your efforts into increasing sales. Strong sales will ultimately increase the valuation of your business and make it more appealing to buyers. On the flip side, a drop or plateau in sales could be a huge red flag for prospective owners. That’s why it’s important for you to surround yourself with people who can help you through this process. Let your broker, lawyer, and accountant handle their respective responsibilities. This will give you more time to prioritize sales. Develop an Exit StrategyEvery business owner needs to have an exit strategy. The best exit strategies are developed long before the decision to sell your business occurs. So hopefully, this is something you’ve been planning for a while; a proper exit strategy takes time to develop. For those of you who don’t currently have an exit strategy, it’s not too late to create one. But with that said, this might not be the best time to sell your business. The last thing you want is to be in a position where you feel forced to sell your company. In those circumstances, it’s unlikely that you’ll be able to sell for maximum value. Things come up. So have a contingency plan in place for a wide range of possible exit strategies.
What will you do if a big box store opens nearby? How will you proceed if age or illness becomes a factor in your life? What if your children don’t want to take over the company? These are just a few examples of situations that could arise. When the day comes that you decide to sell, you’ll already be prepared with an exit strategy. Be RationalSelling a business can be very emotional. This is especially true for family businesses, small businesses, or something that you’ve built on your own from scratch. Most business owners have a great sense of pride for what they’ve accomplished. Blood, sweat, tears, and sleepless nights are all things that entrepreneurs have in common. With that said, it’s crucial that you keep your emotions out of the deal. Getting emotional can cloud your thoughts and decisions. Prospective buyers don’t care how many hours you’ve worked per week for the last decade. All they care about is the bottom line. If you think an offer is too low or unfair, you can always decline. In some cases, a competitor might make a legitimate and fair offer, with the full intention of buying. Don’t let an old rivalry prevent the deal from going through. Get Paid Up FrontMake sure the terms of your deal require an upfront payment. Some buyers might make you an enticing offer, but don’t have the funding to pay you now. Getting paid over time might not sound like a big deal, but this arrangement could pose some challenges for you down the road. You could end up in a situation where you’re not getting paid to the terms that you agreed. If that happens, any legal recourse would just be an added expense to your side. Furthermore, the new owner could run out of money to keep the business alive. If that happens, there may not be any money left for you if the company goes under. Let’s say you have two serious offers on the table. One is for a higher amount but involves a ten year financing period. The second offer is less but pays you upfront. I’d strongly recommend the latter. ConclusionReady to sell your business? Don’t overcomplicate things; the entire process can be broken down into just five simple steps. With that said, selling a business takes time. Have realistic expectations in terms of the price and timeframe. In some cases, you might ultimately decide to postpone the sale until you can increase revenues and get your financials organized. If your company is doing well and generating high profits, it’s much more appealing to potential buyers. Use this guide as a reference to walk you through the process. Make sure to follow the tips and best practices that I’ve outlined above to get the maximum purchase value for your company. Find the Best BrokersThere are hundreds of business brokers in the USA! Find out which one is the best match for your specific needs. Enter your zip code below to begin. via Quick Sprout https://www.quicksprout.com/sell-business/ |

Sean BrianWhile radishes deter certain insects naturally, they require similar growing conditions as carrots. Although the crops both have roots, radishes grow and germinate quicker, allowing carrots to continue growing in the soil space available when the radishes are harvested, Archives
April 2023
Categories |
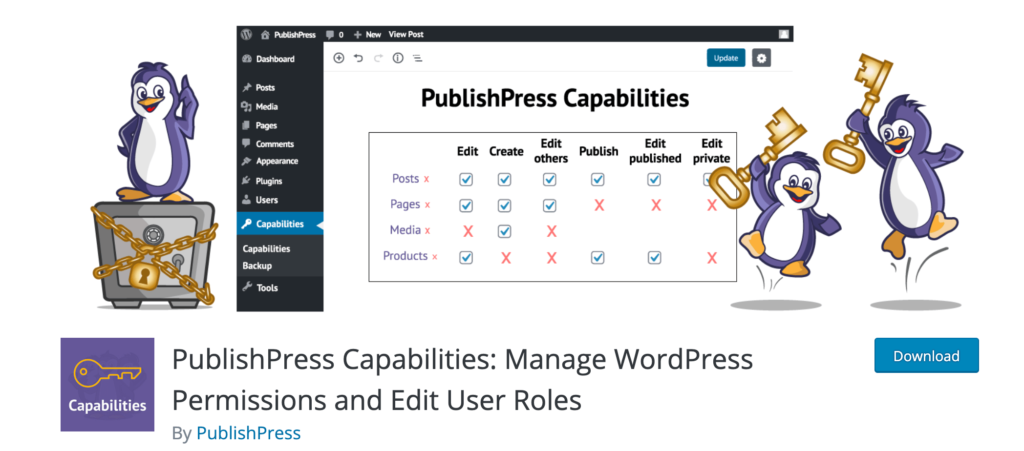
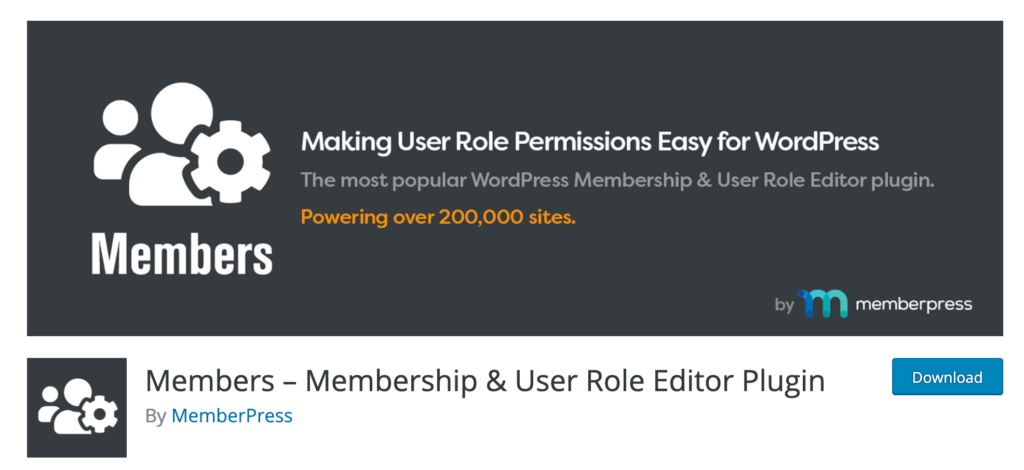

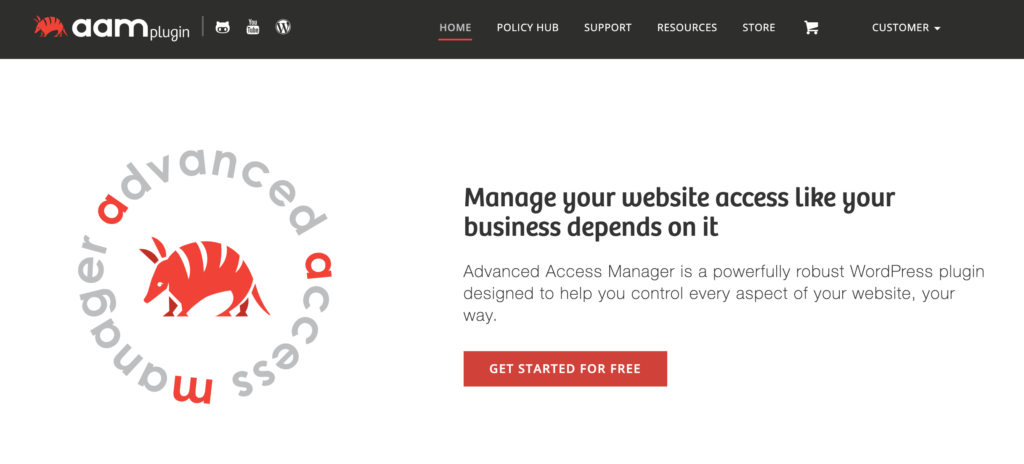
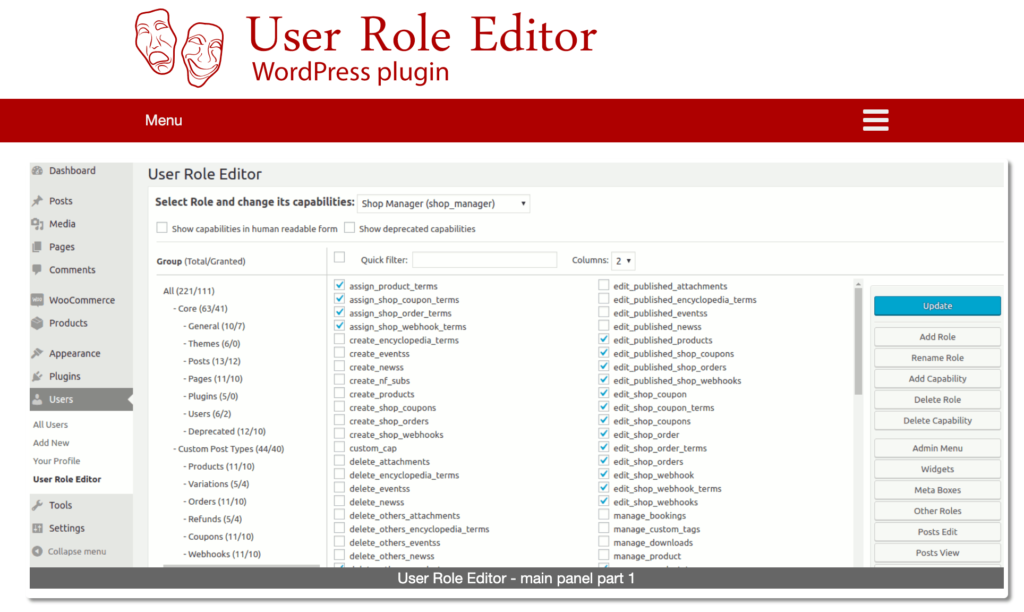


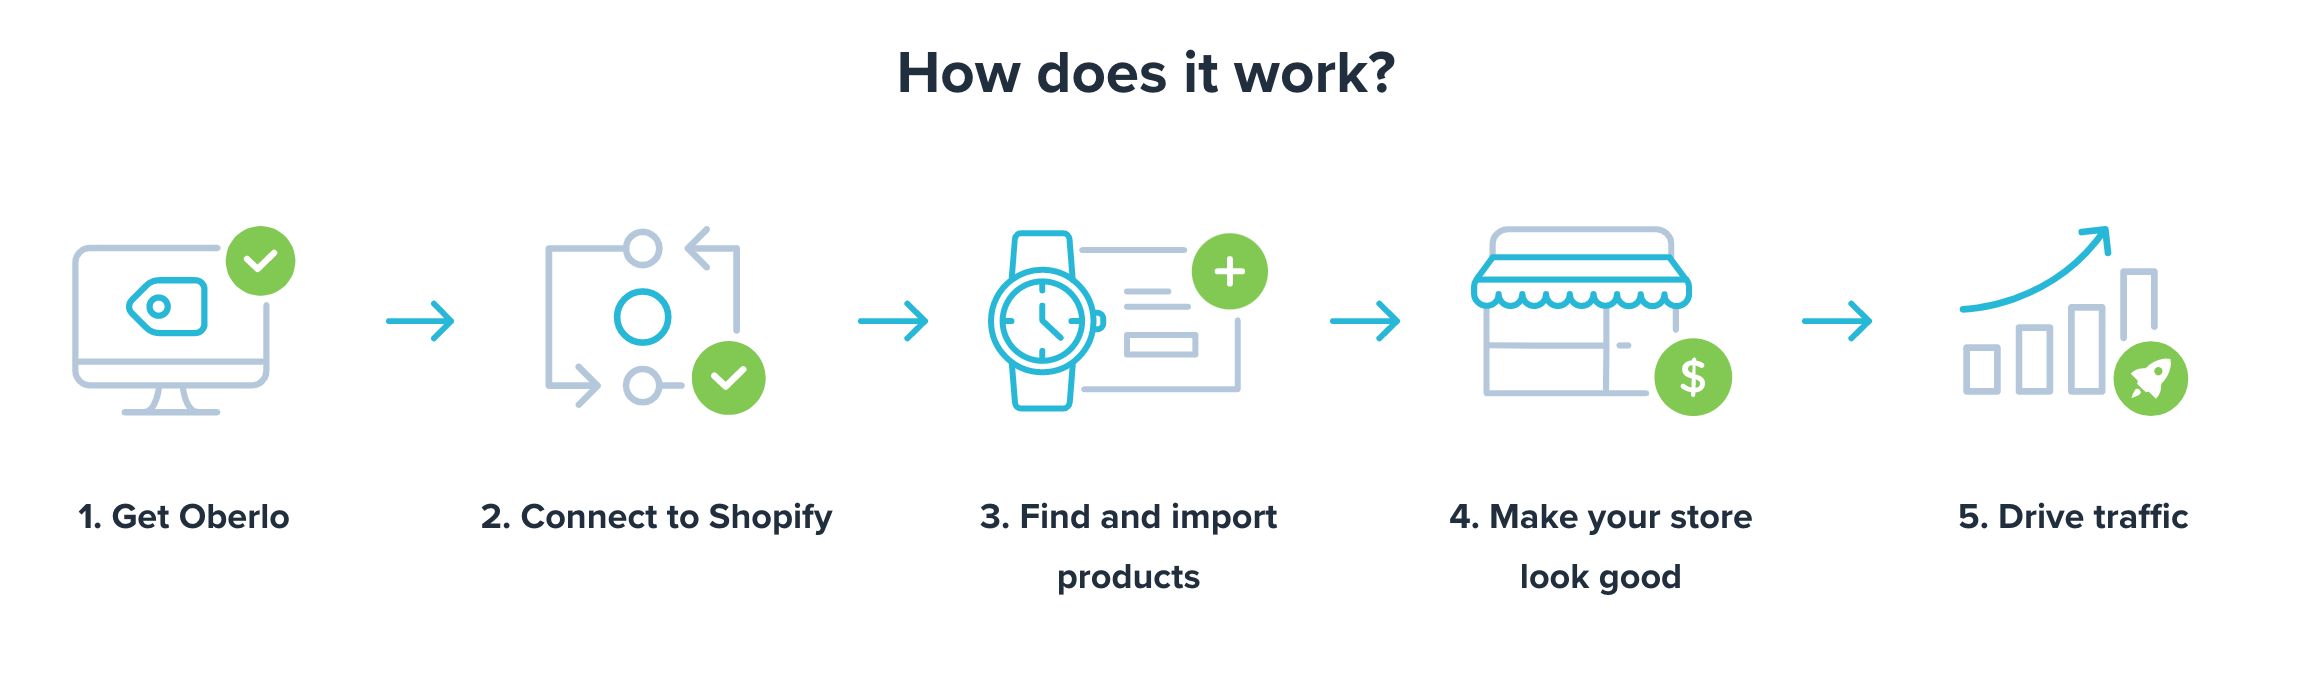


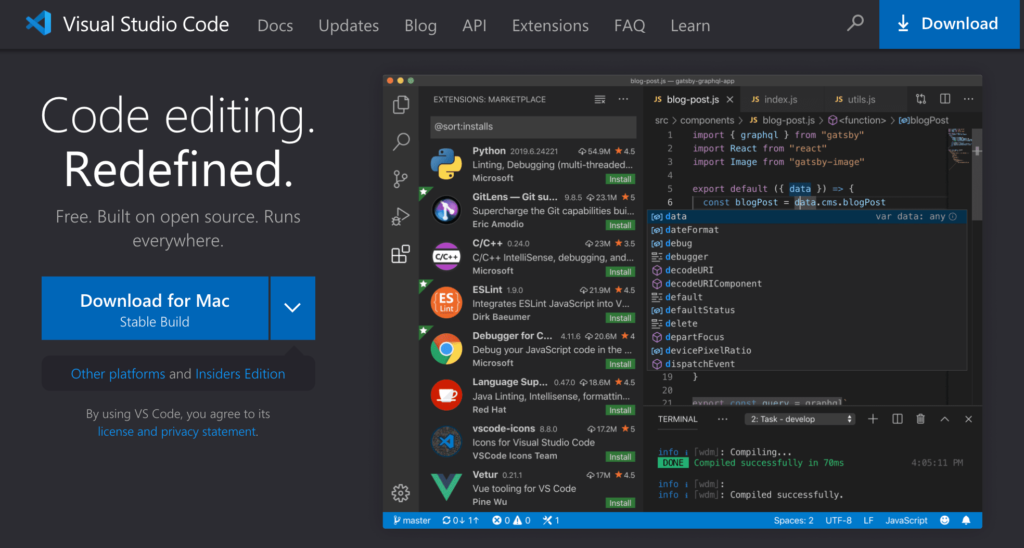
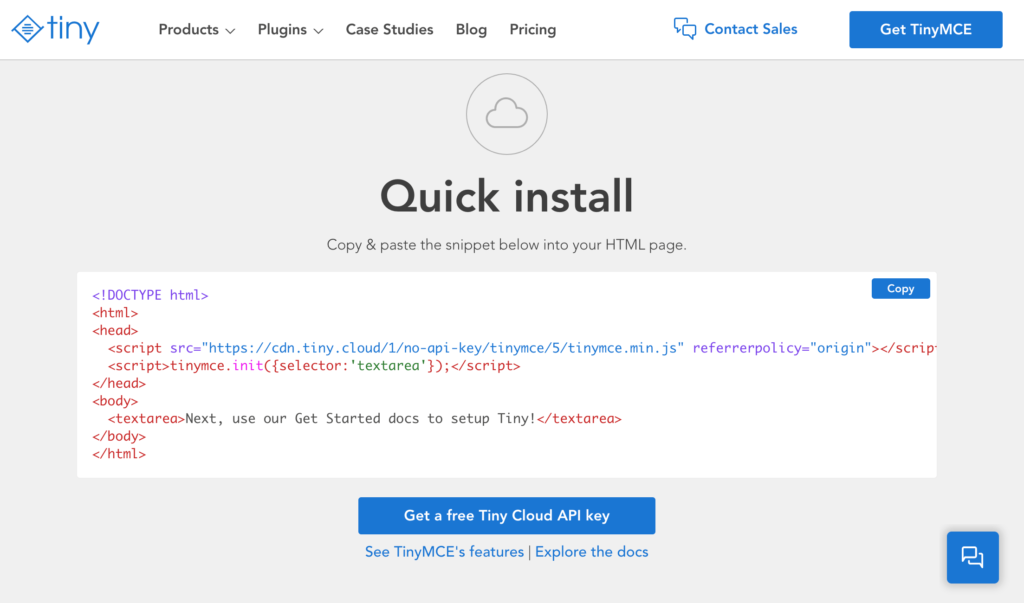


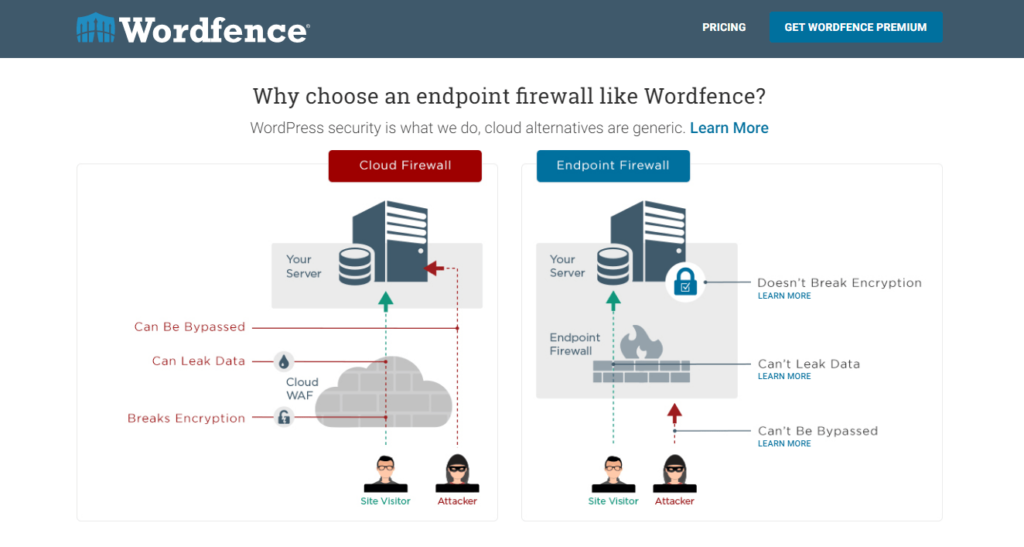
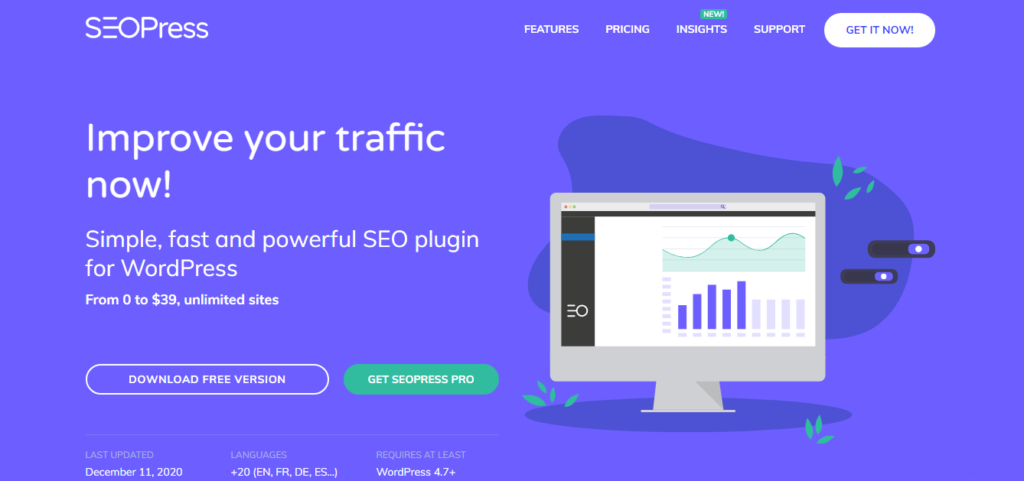
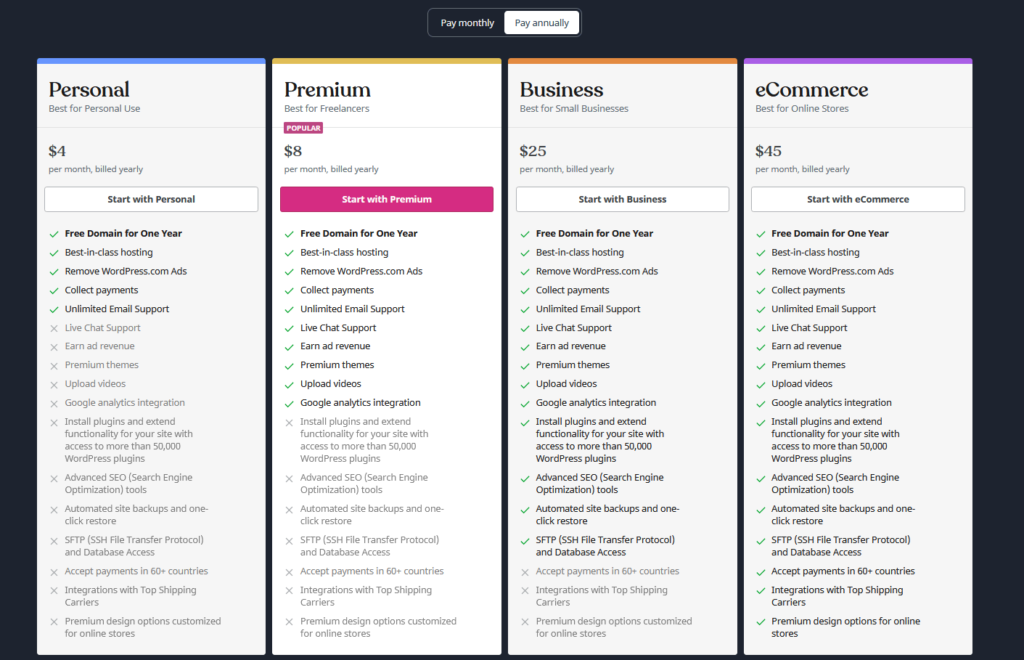
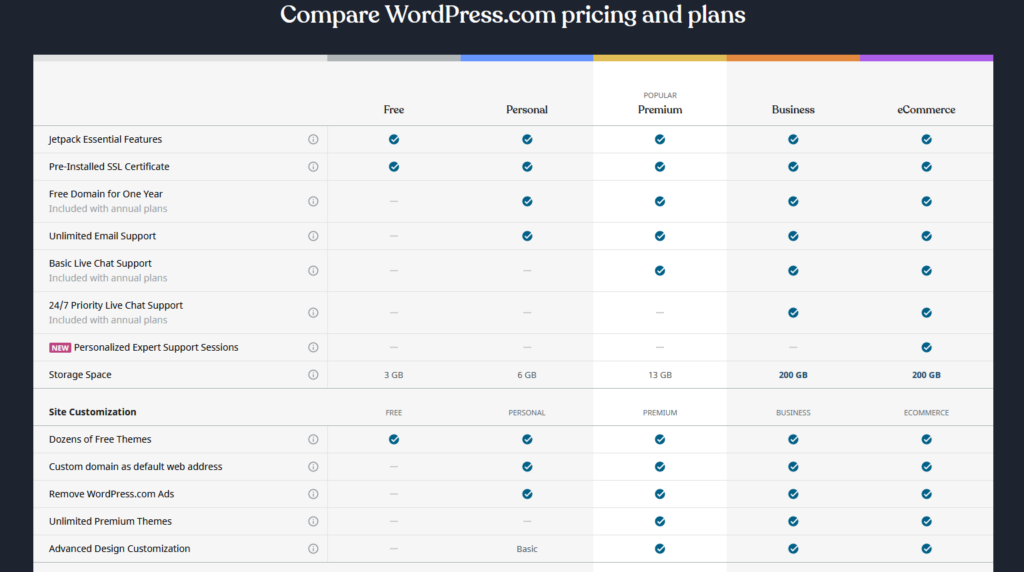
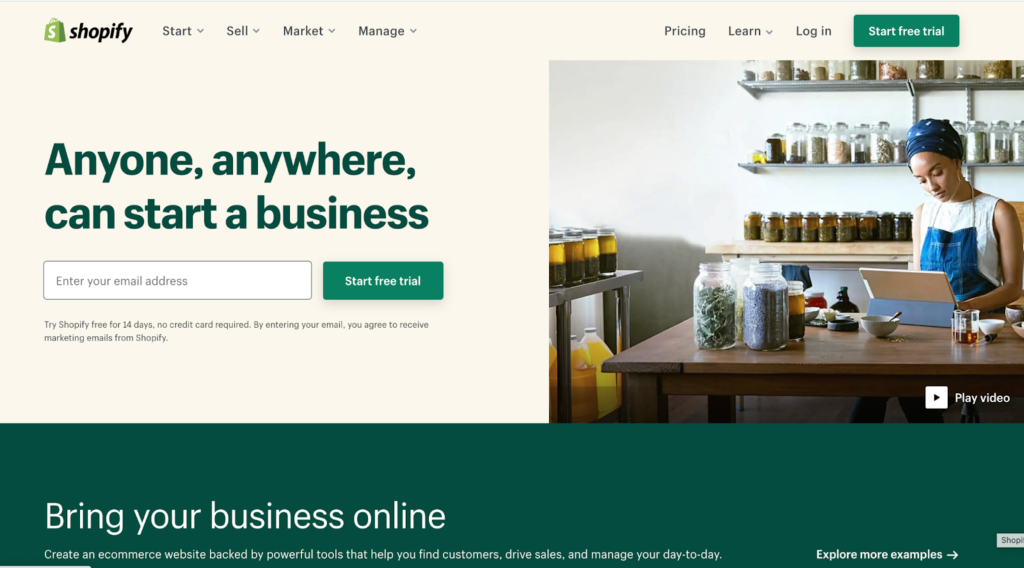
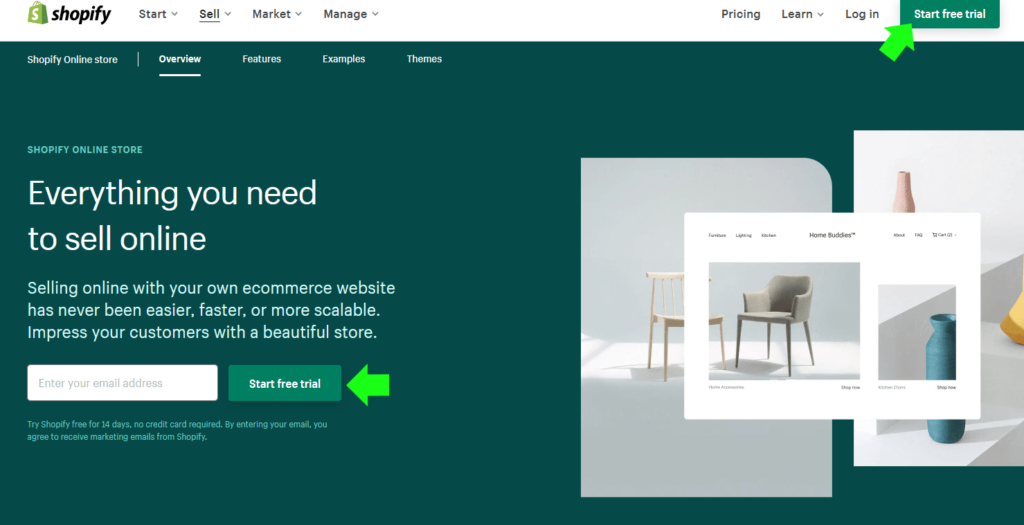
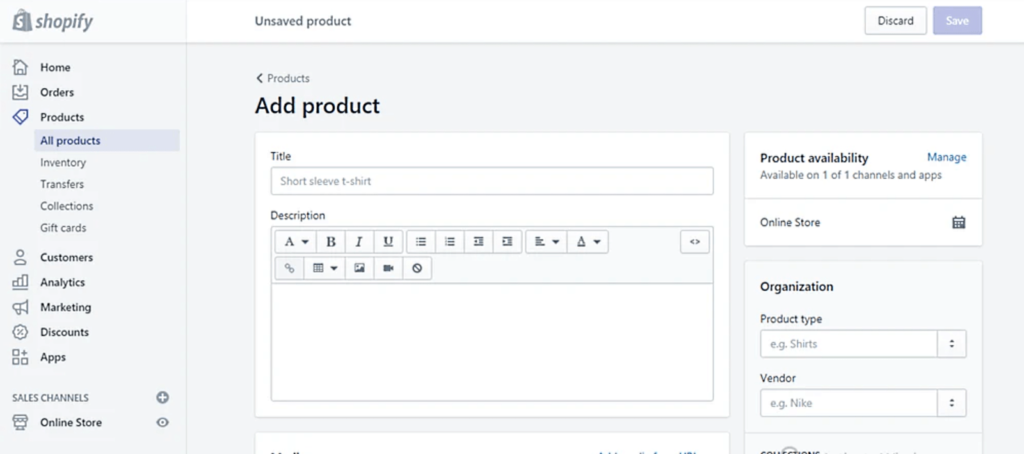

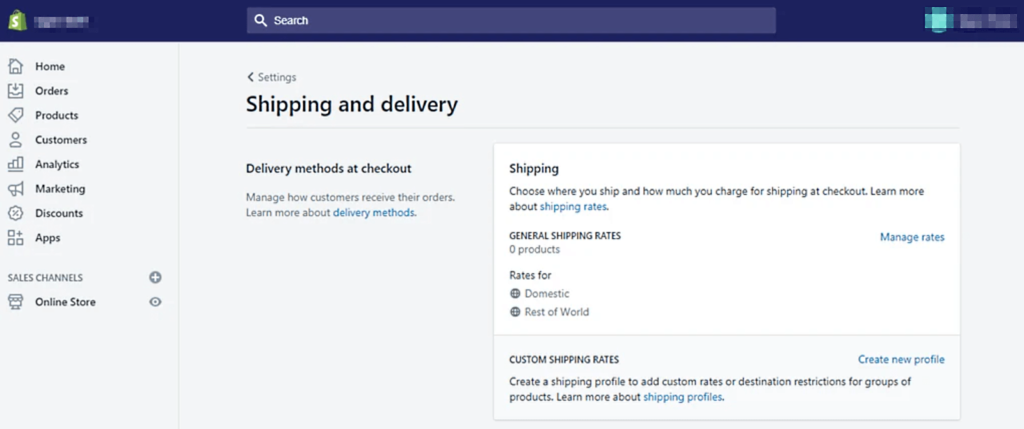
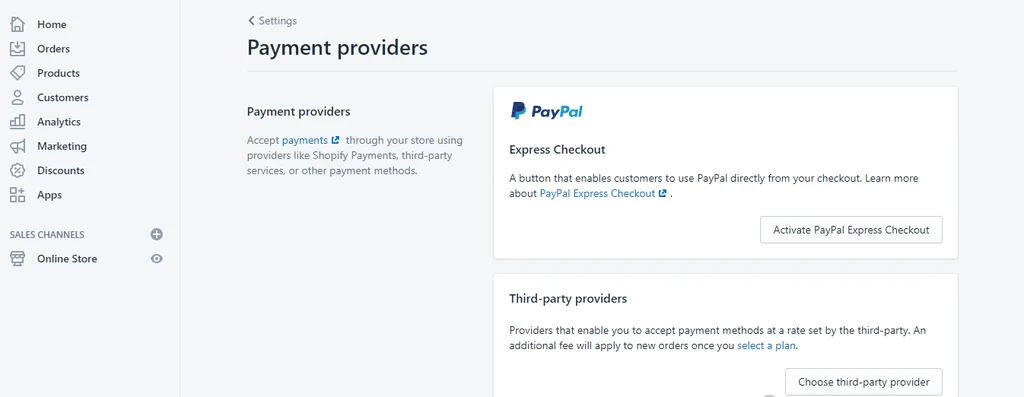


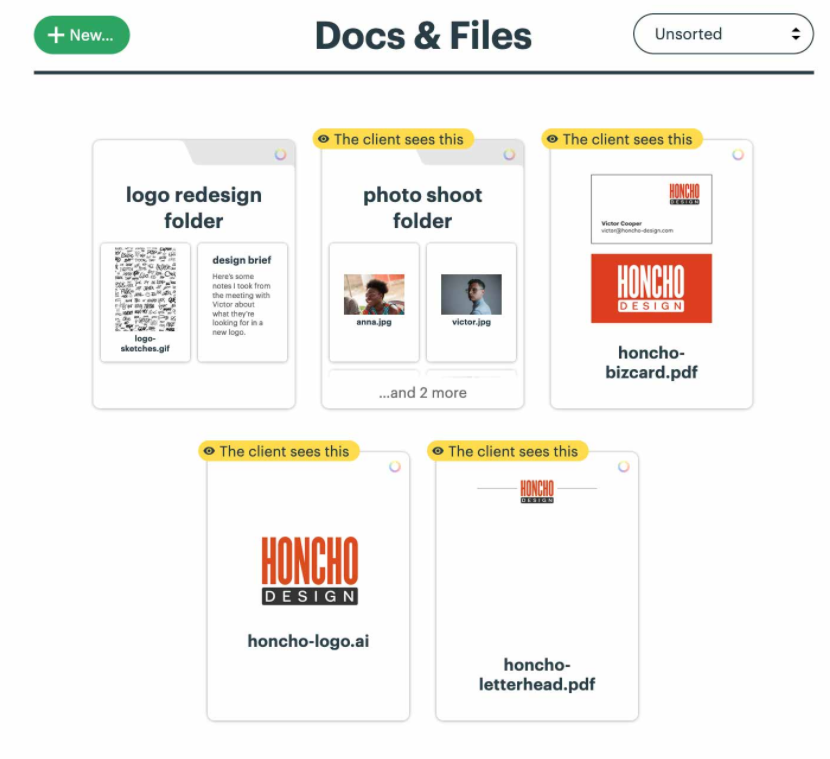
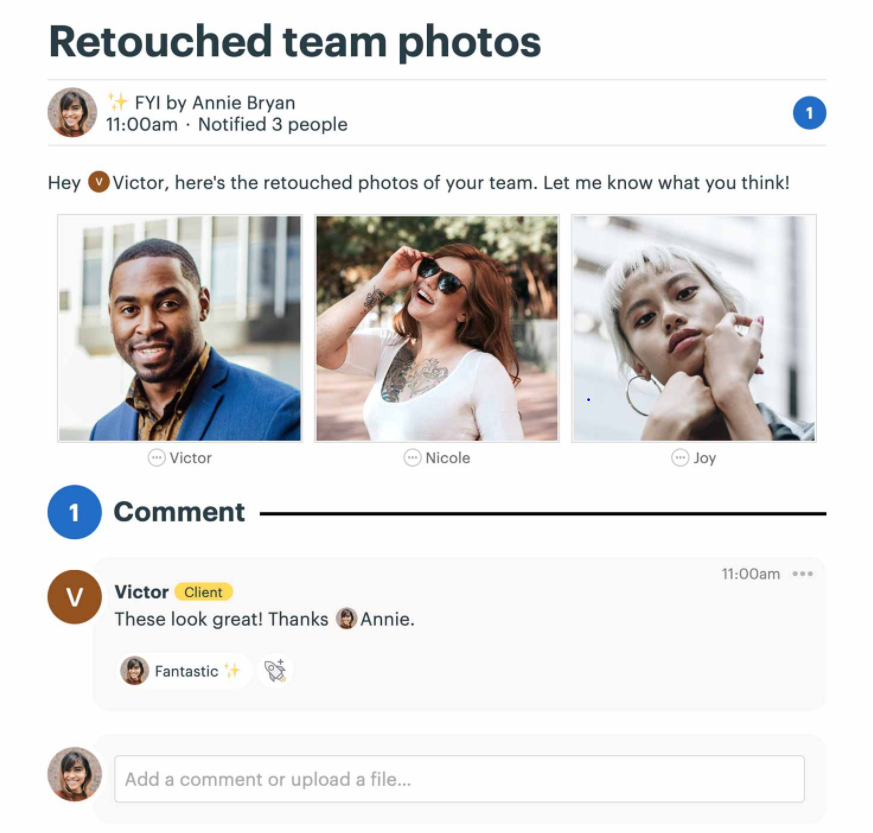

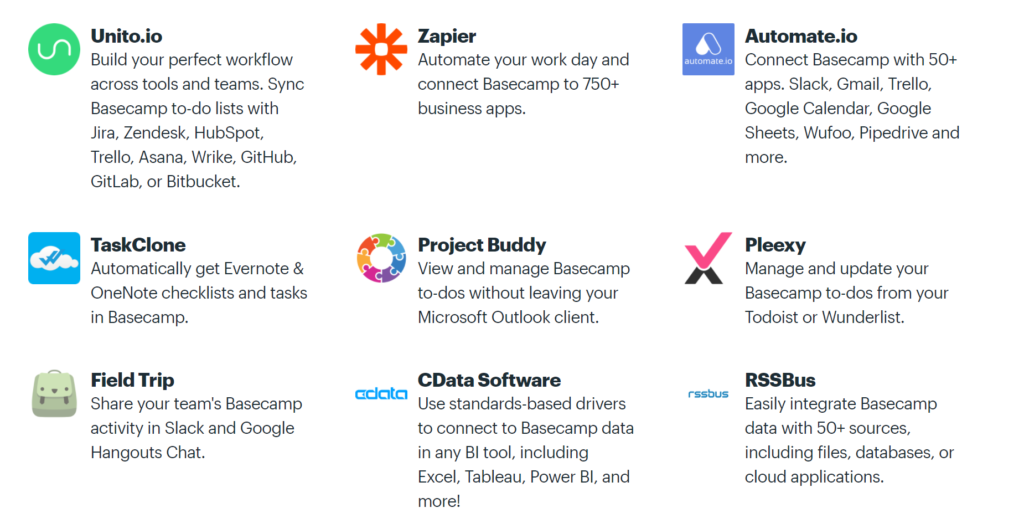
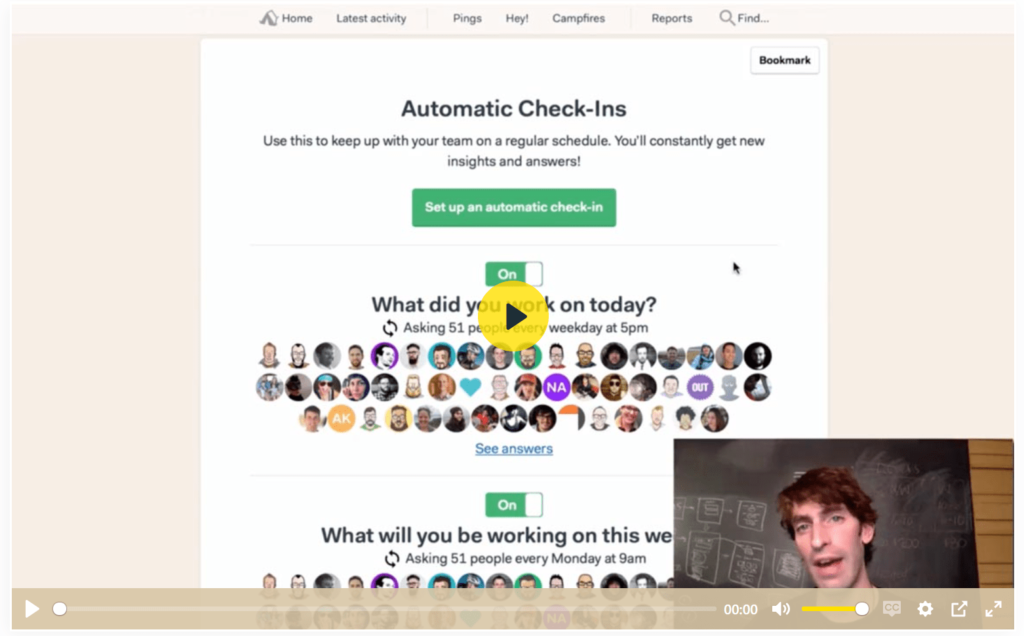

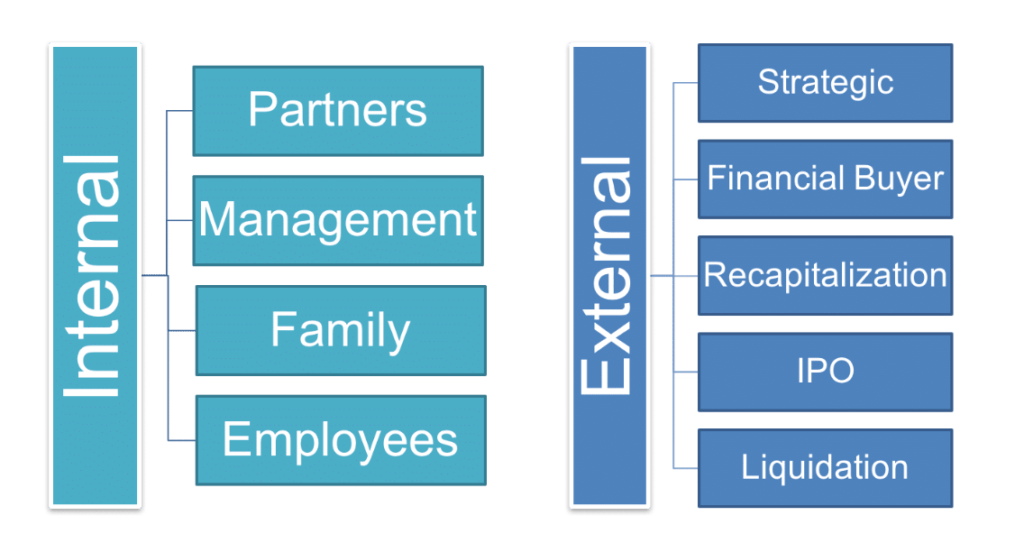
 RSS Feed
