|
Even though faxing seems like an outdated technology, it’s still widely used in a variety of industries, including healthcare and finance. Thanks to its ability to securely send and receive sensitive documents, faxing is still a vital part of many business operations. But if you thought people no longer used fax machines, you’re right. Thanks to the rise of digital technology, people now use online faxing services to easily send and receive documents. Two popular choices are eFax and MyFax. Let’s take a look at what each one offers. 
eFax and MyFax Compared to the BestMyFax and eFax are common online faxing solutions, but MyFax did not make our top list due to its lack of e-signature software, restrictive pricing, and glaring user reviews. Major organizations with significant cybersecurity requirements need the ultimate level of efficiency and security from a faxing solution, and you can get that with our top pick, SRFax. Get started with SRFax today for just $9.99 per month. Here’s our full list of the best online faxing services:
eFax vs. MyFax: High-Level ComparisoneFax is a global leader in online faxing, with over 10 million users worldwide. With its easy-to-use interface and high-quality technology, you can send online faxes from any device, be it a smartphone, computer, or tablet. MyFax is another online faxing solution, and its main attribute is its simplicity. Using MyFax, you can send and receive faxes from any device in a few clicks. eFax is excellent for personal use—for one straightforward price, you can have your own personal fax number and access the eFax mobile app. MyFax is also acceptable for personal use, but companies have the option of enrolling in a customized corporate plan if they ever decide to scale up their operations. Products and Services Offered by eFax and MyFaxBoth eFax and MyFax are straightforward online faxing solutions. As such, they offer many of the same basic features:
eFax integrates with email, cloud storage, and third-party software such as Dropbox, Google Drive, and Salesforce. MyFax has similar integrations but is more limited. Company Health and Stability of eFax and MyFaxBoth eFax and MyFax are owned by J2 Global, a cloud-based business technology specialist that owns over 60 brands worldwide, including Ziff Davis and IGN. That means both services are backed by one of the most stable companies in the industry. They have also both been around since the 2000s and are constantly improving their technology and service offerings. Having been in business for so long, it’s clear that both companies are here to stay and offer viable solutions for their customers. eFax vs. MyFax Pricing ComparisonSince many online fax services offer the same basic tools (along with their own suite of unique features), pricing plays a significant role in determining which is best for you. Especially if your organization has dozens of people who would need a seat, the costs can quickly scale up. In general, we find the pricing of eFax to be high, and the added fees are something we’ve never seen from a competitor. But MyFax’s pricing, while cheaper, includes fewer faxes in its basic plan and requires a full plan upgrade to get more. Pricing Structure of eFax and MyFaxeFax’s pricing is as straightforward as its platform—you can access its entire software platform for a flat monthly rate of $18.95 per month. You can send and receive up to 200 pages each month, with additional pages available for $0.10 each. However, it is also a high price for the level of service offered. It is the only platform on the list that charges a $10 setup fee, and $0.10 per additional page can quickly add up if you aren’t careful. MyFax offers a range of plans to fit different customer needs. Their basic plan costs $10 per month and allows you to send and receive up to 100 pages. With their higher subscriptions (i.e., Small Business and Power plans), you can send up to 600 pages. Unlike eFax, MyFax does not charge a $10 setup fee or a $0.10-per-page overage charge. If you’re looking for a simple solution to send a few faxes per month, eFax might be a good option. But if you need a tool that scales with your business needs (i.e., you need more than one pricing option), MyFax is the better option. Cost Comparison of eFax and MyFaxBeyond the pricing structures of each service, there are other costs to consider.
Trials and Guarantees for eFax and MyFaxOne of the things we love about eFax is that it allows you to start with a 14-day free trial, even if you know that’s the service you want to use. MyFax does not offer a free trial period, which some prospective users might find frustrating. Neither service offers refund guarantees, meaning that once you sign up for a subscription and start using it, you’re locked into that plan until the end of the month. For users who sign up annually, the same principle applies. eFax vs. MyFax: Core Criteria ComparisonBeyond pricing, there are plenty of reasons why you would choose one or another service. To make it easier for you to decide which is the best for your needs, let’s look at how eFax and MyFax stack up in essential categories. In general, eFax’s better user interface, email-to-fax features, and security features make it a better choice than MyFax. The level of value we get from eFax isn’t as great as some other solutions out there, but it certainly stands out against MyFax. Sending and Receiving Faxes — eFax Wins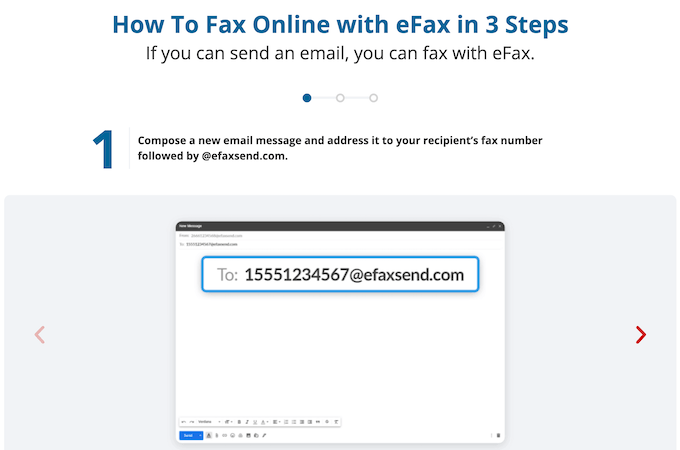
Sending and receiving faxes is the most important function of an online fax service, so it’s an essential first comparison. The platform that executes these two tasks the best is usually the best option overall. MyFax and eFax offer similar features that make sending and receiving faxes a breeze. You’ll be able to access the online platform from any internet-connected device. With both of these services, you are just one click away from being able to send off your fax as effortlessly as you would an email. Each service has its own set of features, so the choice you make should depend on your individual needs. eFax stands out for providing apps to support Android devices, iPhones, and iPads. MyFax is not quite up to par in this regard—its UI isn’t as intuitive and modern as its competitor. You can send and receive faxes from your mobile phone or tablet device as long as it is connected to the internet. To do this, simply open up a web browser on your device and access either an eFax or MyFax account. If you wish to avoid these services altogether, sending emails through any standard email client will also suffice. If you and your team are always on the go with their mobile devices, eFax is the better choice due to its comprehensive support for mobile devices. If instead faxing from a laptop or tablet computer is more common in daily operations, MyFax’s interface is still outdated. Supported File Formats — Tie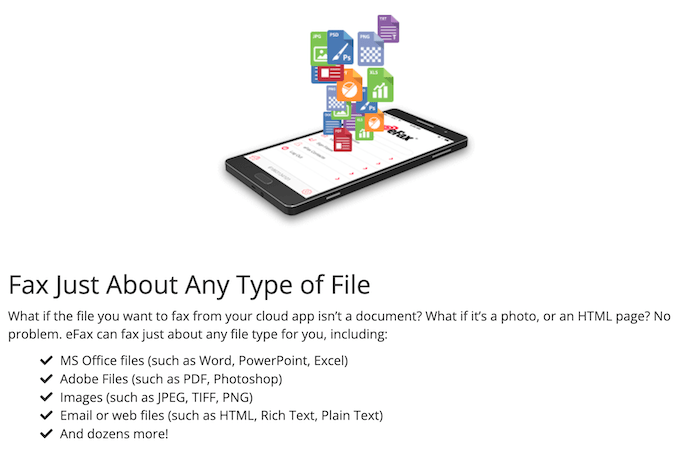
With MyFax and eFax, you don’t have to worry about compatibility issues when sending files – your contacts can receive over ten different types of files effortlessly. Though most people will never need more than five or ten file formats, the option is there for those who do. Regardless if it’s a PDF, DOCX, JPEG, or TXT, all popular file formats are supported by both services! Multi-User Support — Tie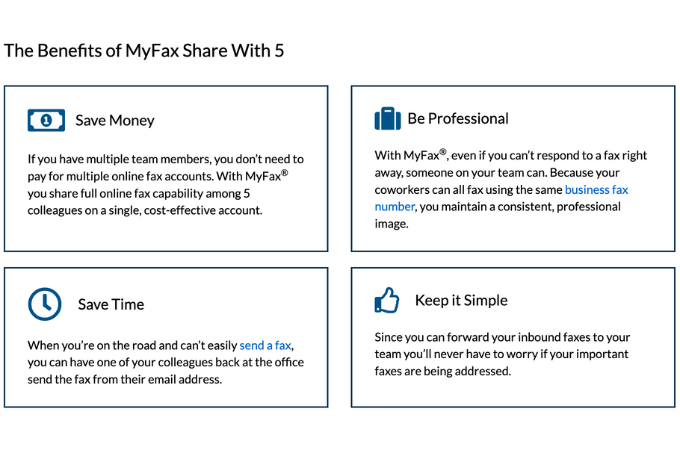
When selecting an electronic fax service, it’s important to consider whether or not other team members can also use it. eFax is a viable solution for those who require a few users. With eFax in particular, you can create one admin user and five sub-users with permission to send and receive your account’s data via their online portal. MyFax offers a similar feature where users can grant up to five email accounts faxing capacities. Whether utilizing MyFax or not, this convenient advantage allows for sending and receiving faxes through multiple inboxes—an asset for businesses with numerous departments and larger companies. Security/Privacy — eFax Wins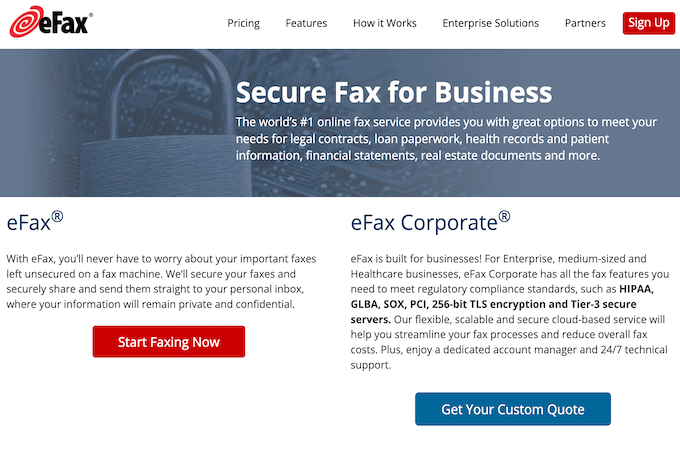
MyFax and eFax both provide SSL encryption throughout the digital transmission process to protect all your sensitive data. But when it comes to safeguarding your faxes, eFax offers a distinct benefit through features like password-protecting specific documents or detaching faxes from email addresses. eFax is also the best secure email-to-fax service. For those who prefer to send faxes via email (which is much easier and more convenient), eFax is the most practical option out there. Monthly Access — MyFax Wins
When comparing eFax and MyFax to other online faxing services, their monthly allowances are quite modest. A more competitive picture is revealed when you compare the two service providers directly. Sure, there are better options out there if you want generous allowance packages for your business. But those usually come at the cost of features. If your business sends over 200 faxes per month, ?eFax? may be too pricey. ?MyFax? offers slightly better value, but it still isn’t a great choice for anybody regularly sending more than a few hundred faxes monthly. Mobile Apps — eFax Wins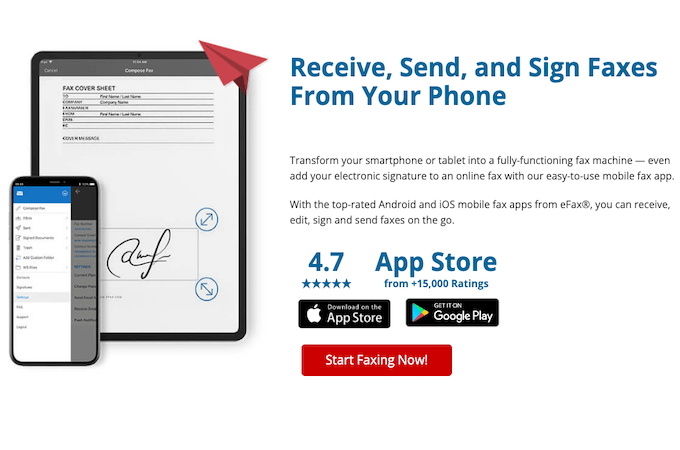
Both platforms offer mobile app solutions compatible with Android and iPhone devices. However, it is worth noting that eFax offers a much more comprehensive app suite than MyFax. eFax offers advanced features such as scheduling, sending broadcast faxes, and even converting emails into fax messages with one click. MyFax’s mobile offering is also feature-rich, but its user interface is lackluster. The app is both less intuitive and more difficult to use than eFax’s. Digital Signatures — eFax Wins
Many organizations need to sign and send documents quickly and efficiently, but the process can be a hassle. Cloud-based platforms like DocuSign, Echosign, or Adobe Sign offer better solutions, but a digital signature feature with your fax service provider can make the process more convenient. eFax provides a digital signature feature, which adds an extra layer of convenience and flexibility when sending faxes from your phone or computer. MyFax does not offer such a feature, instead requiring its users to use another app or manually sign and return documents. So if you require this kind of functionality for your business, then eFax is the better option between these two. International Faxes — MyFax Wins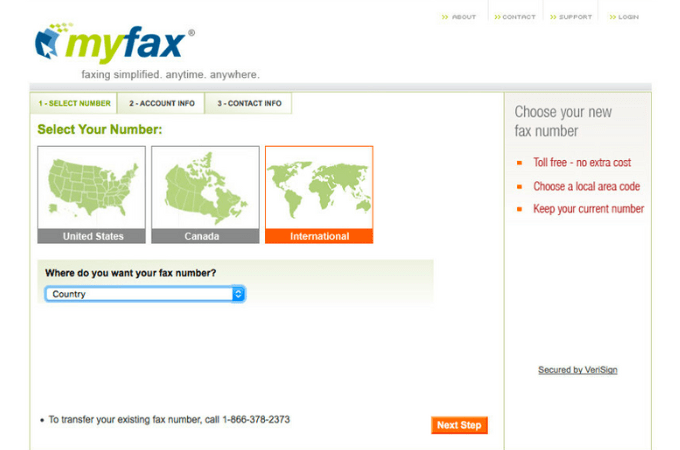
With MyFax, international faxing is free in nearly 50 countries worldwide. eFax charges an additional fee for the global sending and receiving of documents, making it a less cost-effective choice for those who work with international contractors, partners, or customers. Final Verdict — eFax WinsSince neither faxing service is the best (i.e., they don’t offer robust corporate solutions, seating capabilities, enterprise-level security, or unlimited send/receive packages of higher-tier providers), it comes down to the features you need for your business. Both tools are best for individual users and small business owners with minimal faxing needs. In our eyes, that means it comes down to convenience features and user interfaces. eFax offers a more intuitive user experience (although it is still dated), better mobile support, superior security, and digital signature capabilities, which are attributes customers tend to be more concerned with. via Quick Sprout https://www.quicksprout.com/efax-vs-myfax/
0 Comments
So much goes into an effective landing page. It takes practice, testing, analytics, design skills, keyword research, and so much more. Fortunately, there are plenty of landing page creation tools that take the guesswork out of building and optimizing your landing pages. This guide covers the best ones. Landing Page BuildersThese are typically websites or web-based services that let you build a landing page by using an HTML editor or drag-and-drop functionality. Some will give you a basic editor with different landing page templates to choose from. Unbounce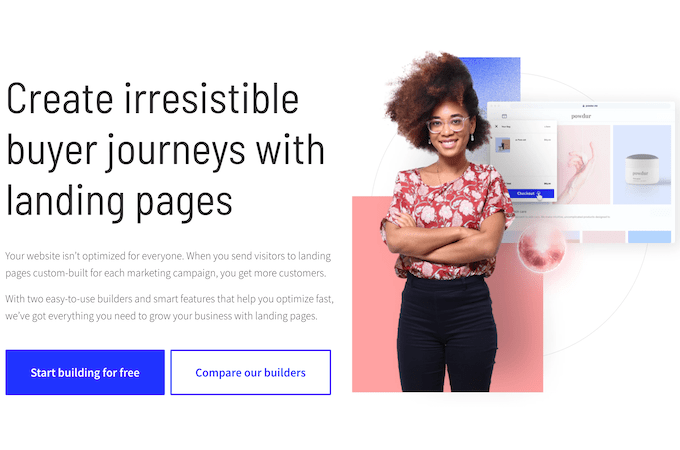
Unbounce is one of the most well-known landing page builders simply because it was one of the first web-based services that allowed people to build and test landing pages without relying on the IT department. Here’s the pricing breakdown:
Additionally, you can test as many landing pages as you want, and Unbounce offers a variety of templates for web-based, email, and social media landing pages. Instapage
Instapage is a bit different than your typical landing page builder in that it does come with a variety of templates for different uses (lead generation, click-through and “coming soon” pages), but what sets it apart is that it learns based on the visitors that come to your landing pages. You can view real-time analytical data and easily determine the winners of your split tests, while tracking a variety of conversion types from button and link clicks, to thank you pages and shopping cart checkouts. Instapage also integrates with a variety of marketing tools and platforms, including:
A free option is available if you’d like to try it out, and a Starter package makes landing page creation and testing a bit easier on the wallet of startups and new entrepreneurs. Real features like the aforementioned integrations start kicking in with the Professional package at $79/month, but if you’d like to get landing pages up and running quickly, it’s hard to beat the stylish templates that Instapage provides. Launchrock
Launchrock is not so much a landing page builder as it is a social and list-building placeholder. Combining “coming soon” pages with list building capabilities, Launchrock also includes some interesting social features that encourage users to share the page with others. For example, get X people to sign up, you’ll get Y. It also includes basic analytics and the ability to use your own domain name or a Launchrock branded subdomain (yoursite.launchrock.com). You can customize the page via the built-in HTML/CSS editor if you know how to code. Launchrock is free and requires only an email address to get started. Landing Page Testers/TrackersWhile many landing page builders also include testing and tracking, they usually do one or the other well, but not both. Of course, when you’re just starting out, it’s a good idea to take advantage of free trials and see which service works best for your needs. Here are a few of the most popular ones available for testing and tracking your campaigns: Optimizely
Optimizely is often touted as a good entry-level product for when you’re just starting out and working toward upgrading to something bigger and better as your business grows. But with prices starting at $17/month and a free 30 day trial period, it’s a powerful product in its own right. There are some limitations with the lower level packages. For example, multivariate testing is not available at the Bronze or Silver levels. It only becomes a feature at the Gold level, which will set you back $359/month. On the upside, Optimizely lets you conduct an unlimited number of tests and also allows for mobile testing and personalization. Although you do get an unlimited number of experiments, you can also edit these on-the-fly, but doing so will also cause you to lose count of which version of which page you were working on. It can also leave some things to be desired when it comes to integration with Google Analytics, for example, it’s not able to segment custom data (like PPC traffic) or advanced analytics segments. You can also tell Optimizely what you consider as “goal” points on your website — ranging from email subscription to buying and checkout, and it will track those items independently. Overall, it does a great job with a simple and intuitive user interface and is ideal for those just starting to optimize their landing pages. CrazyEgg
CrazyEgg is the definitive heat map and visualization service to help you better understand how your website visitors are interacting with your landing pages. Reports are available as “confetti” style, mouse clicks/movement tracking and scrolling heat maps. This gives you an all in one picture to see where your visitors are engaging with your pages (and where you could improve that engagement). 
An example of a CrazyEgg click heatmap. Warmer colors indicate more activity Although CrazyEgg doesn’t consider itself a landing page testing and tracking solution, it does take you beyond the core information that Google Analytics gives you to show you actual user behavior on your landing pages. Pricing starts at $9/month for up to 10,000 visitors with 10 active pages and daily reports available. A 30 day free trial is also available. Hubspot
More than a tracking/testing service, Hubspot’s landing pages offer extremely customizable elements that let you tailor each page to precisely match your customers’ needs. This lets you devise alternative segments for each “persona” you’ve created — driving engagement and conversion rates even higher. The packages are pricey ($200/month starting out) for first-time landing page optimizers, but larger companies and organizations will see the value built in to the platform. Beyond its smart segmenting, Hubspot also offers a drag and drop landing page builder and form builder. This is all in addition to its existing analytics, email marketing, SEO and other platforms. Visual Website Optimizer
If you’d like a more creative, hands-on approach to your landing pages, along with fill in the blanks simplicity, Visual Website Optimizer is as good as it gets. Where this package really shines, however, is through its multivariate testing. It also offers behavioral targeting and usability testing along with heat maps, so you can see precisely how your visitors are interacting with your landing pages, and make changes accordingly. You can also use the built-in WYSIWYG (what you see is what you get) editor to make changes to your landing pages without any prior knowledge of HTML, CSS or other types of coding. Results are reported in real-time and as with Hubspot, you can create landing pages for specific segments of customers. Pricing for all of these features is in the middle of all of the contenders, with the lowest available package starting at $50/month. Still, it’s a good investment for an “all in one” service where you don’t need the advanced features or tracking that other products provide. Ion Interactive
Ion Interactive’s landing page testing solution, could set you back several thousand per month, but it’s one of the most feature-packed options available, letting you create multi-page microsites, different touch-points of engagement, and completely scalable options with a variety of dynamic customizable options. If you’d like to take the service for a test drive, you can have it “score” your page based on an in-house 13-point checklist. A free trial is also available, as is the opportunity to schedule a demo. Of course, once you’ve decided on the best building, testing and tracking solution, there’s still work to be done. Before you formally launch your new landing pages, it’s a good idea to get feedback and first impressions — not just from your marketing or design team, but from real, actual people who will be using your site for the first time. Here are a few tools that can help you do just that. Optimal Workshop
Chalkmark lets you get first impressions from users when uploading wireframes, screenshots or other “under construction” images. Through these services, you can assign tasks to users to determine where they would go in order to complete them. You can also get basic heat maps to see how many users followed a certain route to complete the task. You can buy any of the three services individually, or purchase the whole suite for $1,990/year. A free plan with limited functionality and number of participants is also available if you’d like to try before you buy. Usabilla
Usabilla allows you to immediately capture user feedback on any device, including smartphones and tablets – a feature that sets it apart from most testing services. Improvement is done via a simple feedback button which can be fully customized and encourages the customer to help you improve your site by reporting bugs, asking about features or just letting you know about the great shopping experience they had. Usabilla also lets you conduct targeted surveys and exit surveys to determine why a customer may be leaving a page. They also offer a service called Usabilla survey which is similar to other “first impression” design testing services and lets visitors give you feedback on everything from company names to wireframes and screenshots. Pricing starts at $49/month and a free trial is available. 5 Second Test
Case in point — you can try a sample test to see what a typical user would see. In my case, I was asked my first impressions of an app named “WedSpot” and what I’d expect to find by using such an app. It’s simple questions like these that can actually give you some invaluable insights – and that for just five seconds of your users time. It’s free to conduct and participate in user tests through Five Second test. Other Helpful ToolsBeyond usability testing and user experience videos, there are a few other tools that your landing pages can benefit from: Site Readability Test
You’ll need to match the reading level with your intended audience but these tests will give you some insight on simplifying your language and making your pages more reading-accessible to everyone. You simply type in your URL and get your results in seconds. You can also compare your results to other typical readings including Mark Twain, TV Guide, the Bible and more. Pingdom Website Speed Test
They’ll simply leave and potentially go to your competition. Using Pingdom’s website speed test, you can see how fast (or slow) your website is loading. Beyond the speed of your website itself, the service will also calculate your heaviest scripts, CSS, images, or other files that could be slowing down your pages. You should note that testing is conducted from Amsterdam, the Netherlands, so depending on how close or far your server is from there will also factor into the equation. It’s free to test your site on Pingdom. Browser Shots
Fortunately, BrowserShots.org makes this process incredibly easy. You can test your pages on all current versions of the web’s most popular browsers, as well as older versions of those browsers. It does take time for browser screenshots to be taken and uploaded for you to see the results. You can sign up for a paid account and see them faster, but for a free tool, it’s no problem to wait a little while and see just how accessible your page is to visitors on a variety of operating systems, browsers, and browser versions. The Top Landing Page Creation Tools in SummaryThe best landing page creation tools help you with keyword research, split testing, content creation, and everything else you need to drive conversions. Remember, landing page creation is not a one-and-done process. So make sure you assess tools that will help you optimize your landing page after you’ve created them. via Quick Sprout https://www.quicksprout.com/landing-page-tools/ Want to just get started? Click here to sign up for WebiMax and start removing personal information from Google today. I’m sure you’ve heard it all before—once on the internet, always on the internet. But this saying doesn’t have to be true. The internet can be a daunting place, and although information is timeless, it can also spread like wildfire. Sometimes personal information can make its way onto the web without your consent or by complete accident—and let’s be real here, there are many reasons why people want information removed from the depths of Google. If this is the case for you, here are five steps to help you remove personal information from Google for good. The Top Online Reputation Management Companies to Remove Personal Information From GoogleIf you need help with removing personal information from Google and want to learn how to do this effectively and on a friendly budget, here are the best options:
You can read our full reviews of each online reputation management company here. 5 Steps To Remove Personal Information From GoogleRemoving personal information from Google won’t always involve deleting content from the pages you own. Here are five crucial steps to help you remove this information as efficiently as possible:
The Easy Parts of Removing Personal Information From GoogleContrary to popular belief, removing many forms of personal information from Google is possible and easy. Whether you want to avoid identity theft, get rid of problematic blog posts, or shut down misinformation, an online reputation management company can help you do just that. WebiMax is a leading digital marketing agency specializing in reputation management for small businesses. After a free reputation analysis, you will receive a report that lists all the negative online content about you or your company. WebiMax gives you the option to either delete this content altogether or suppress the harmful search results instead, as Google is sensitive to certain types of content, such as anything involving the law. 
Another easy part of this process is removing your own content from Google. If there is any information you’ve put on the internet yourself, it is quick and easy to remove if you still have access. Start by removing personal information from your website’s content wherever it appears. If you have personal information in your blog posts on the website, don’t forget to edit these posts. Then move on to your posts on places like Twitter, YouTube, and Facebook and remove any personal information you now want to hide. Google’s search engine will include information from social media in some searches, so you will need to edit these posts. It is worth mentioning here that Google is doing a better job of valuing its users’ privacy. Thanks to changes Google made to its policies in the past few years, it is now easier than ever to make a request to have personal information removed in Google. In some cases, you may not even have to show that the data you want to remove is dangerous. As another positive step, Google recently promised to give users the ability to make the request to remove personal data through the Google app or after doing a Google search on the web. This step would make the process of requesting removal of your information easier than ever. Online reputation management services can also take advantage of these privacy-friendly steps from Google to help you more thoroughly protect and remove your personal information from Google searches. After all, it still remains time consuming to track down your personal information on Google. You may prefer to hire the reputation company to do this for you, so you can focus on running your business. The Difficult Parts of Removing Personal Information From GoogleWhen it comes to removing personal information from Google, the potential difficulty depends on what kind of information you want removed and from what pages. If you want to remove content from another person’s page, getting in contact with that person can often be time-consuming, and there’s no guarantee that you will hear back from them—or that they’ll be open to removing the content if you do. It can also be challenging to remove content for legal reasons because there are different processes and regulations you have to abide by to have content removed from Google. Step 1: Start With a Quick Google SearchBefore attempting to remove any personal information from Google, you will need to know what’s out there first. The easiest way to do this is to start with a quick Google search of either your name or business name. Turn On Incognito ModeBefore you begin searching, you should put your browser in incognito mode to prevent some tracking and auto-filling from your previous internet usage. Here are quick shortcuts for going incognito mode on both Mac and Windows.
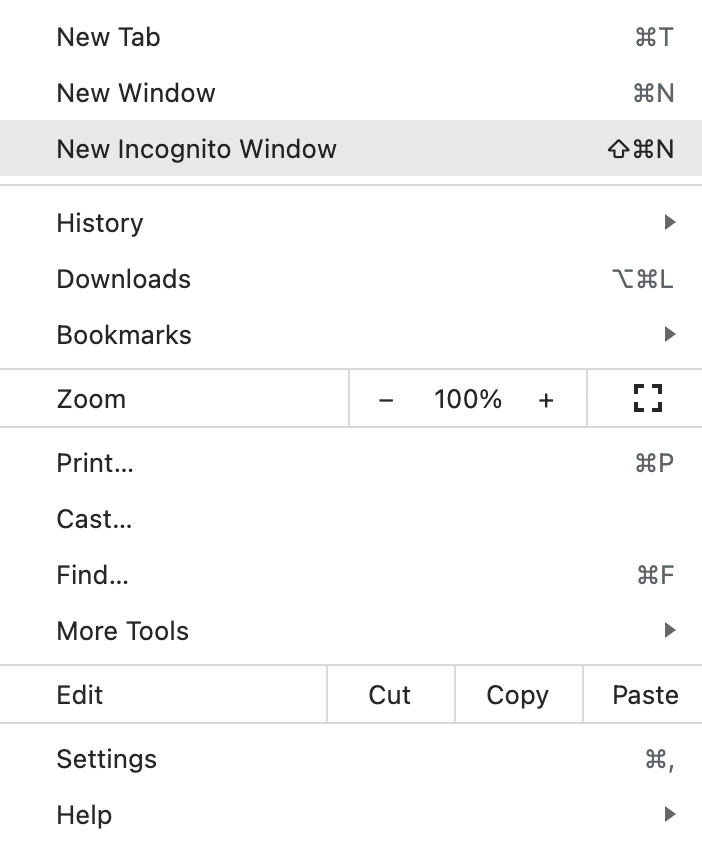
Alternatively, you can open Google Chrome on Mac or Windows and click the three vertical dots in the top right-hand corner of the screen and click New Incognito Window instead. Search Google and Google ImagesOnce you look through Google’s search results, don’t forget to look at Google Images as well. Google Images can store different information and data and can often help you find more content you wish to remove in an easier way than looking through pages of links. Depending on what you want to remove, it’s best to look through at least the first three pages of Google search results and images to understand how much content there is. Step 2: Delete Information From Web Pages You ControlFirstly, you can remove personal information from Google by removing it from all the web pages you have control over. Here are three of the most common web page categories and how to go about removing information from these pages: Social MediaSocial media accounts are one of the easiest ways for information to spread online, making it difficult to remove every little aspect of data—especially if the information you want to remove has gone viral. If you are active on platforms like Facebook, Instagram, Twitter, Pinterest, or Snapchat, it’s better to deactivate these accounts entirely, depending on how much you want to remove. It can be time-consuming to remove every Facebook status or picture on your Instagram feed, although it is doable. On the other hand, if deactivation isn’t on the table for you, you can always make your social media accounts private and remove any sensitive information instead. For example, on Facebook, you can adjust your privacy settings to prevent Google from linking to your profile, here’s how:
Website DomainsIf you own a professional website, this counts as a website domain and is a separate entity with its own data and information. If you operate a website, the easiest way to remove any personal information is to log in and delete the content you want to. If you don’t have access to the backend of your website anymore, you can contact your domain admin for access. If you ask an admin to grant you access, you may need to provide personal information to prove your identity. BlogsWhether you operate a blog on WordPress, HubSpot, Blogger, Weebly, Wix, or another blog site—you will be able to log in and remove any information you own. Again, if you don’t have access to these, you can always contact admin support for help. If you operate a blog with more than one person, it’s imperative to let all parties know what information you will be removing. Getting consent from all parties to remove content ensures that no one will reupload this content again. Step 3: Contact Webmasters From Sites You Don’t ControlBecause Google gathers information, content, and data from across the internet, there will be times when the information you wish to remove will be behind a web page you don’t own. In these situations, contact the webmaster and ask them to remove the information. Contacting the site owner is the only viable way to remove this content. Even if Google deletes the site or image from its search results, it’s still visible through a URL, social media sharing, or other search engines like Bing or Yahoo. There are three ways to contact the webmaster to remove content: Find the “Contact Us” LinkMost websites will have a ‘contact us’ link somewhere on the homepage. Alternatively, there will be an email address you can contact. It doesn’t matter which way you contact them, but finding this information on their website is an easy way to reach out first. Find Contact Information Using WhoisIf the webmaster you are trying to get in contact with doesn’t have any contact information on their website, you can opt to search within the Whois database. Every domain name has a Whois listing, and without domain privacy or Whois privacy protection, this listing information is available to the public and includes the owner’s name, email address, and phone number. Here’s how to find contact information using Whois and Google search:
Alternatively, you can search for the domain name on the Whois website via its Domain Lookup feature. Contact the Site’s Hosting CompanyIf all else fails and you can’t retrieve the contact information from either Whois or the owner’s homepage, you can always attempt to contact the site hosting company. Whois also provides the hosting information, but contacting them should be a last resort. Contacting the site hosting company may be time-consuming and involve additional information. Step 4: Contact GoogleThe good news is that if you still can’t get in contact with the webmaster or are locked out of your website, you can contact Google, and it will remove personal information for you. However, there are specific types of content that Google will remove, and you will have to prove that the information creates a significant risk for identity theft, financial fraud, or other harm. Here is what to expect when contacting Google for content removal: Types of Removals AvailableFirst, you will need to know the types of removals that are available. Here is a list of the current types of content that Google will remove from its search results:
Each category requires slightly different information for you to submit a removal request. However, the most common requirements you will need are your name, the URLs, websites, or imagery associated with the content. Aura has a good list of additional tips on different types of removable personal information. Outdated ContentOn the other hand, you can also request that Google remove outdated content that was shared or published on other websites you don’t have access to. You can do so by using its free Outdated Content Tool. 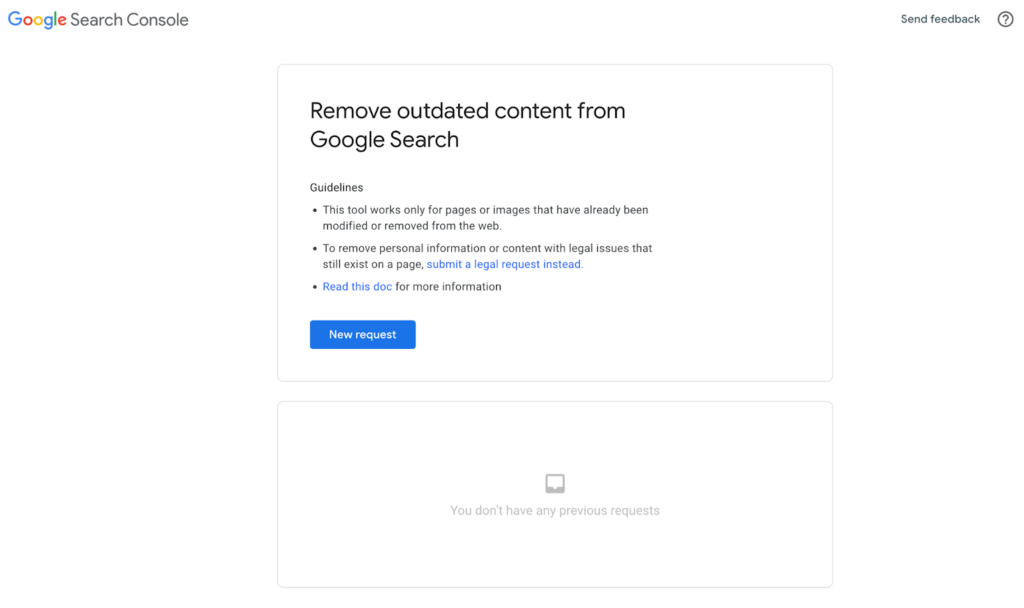
However, this is strictly for outdated info. You shouldn’t use this tool if:
Removing Content For Legal ReasonsLegal disputes happen, and if you wish to remove information for legal purposes, you can also do this by requesting a removal through Google. Legal requests are more sensitive than other requests, so it’s crucial that you make sure you have the right information. 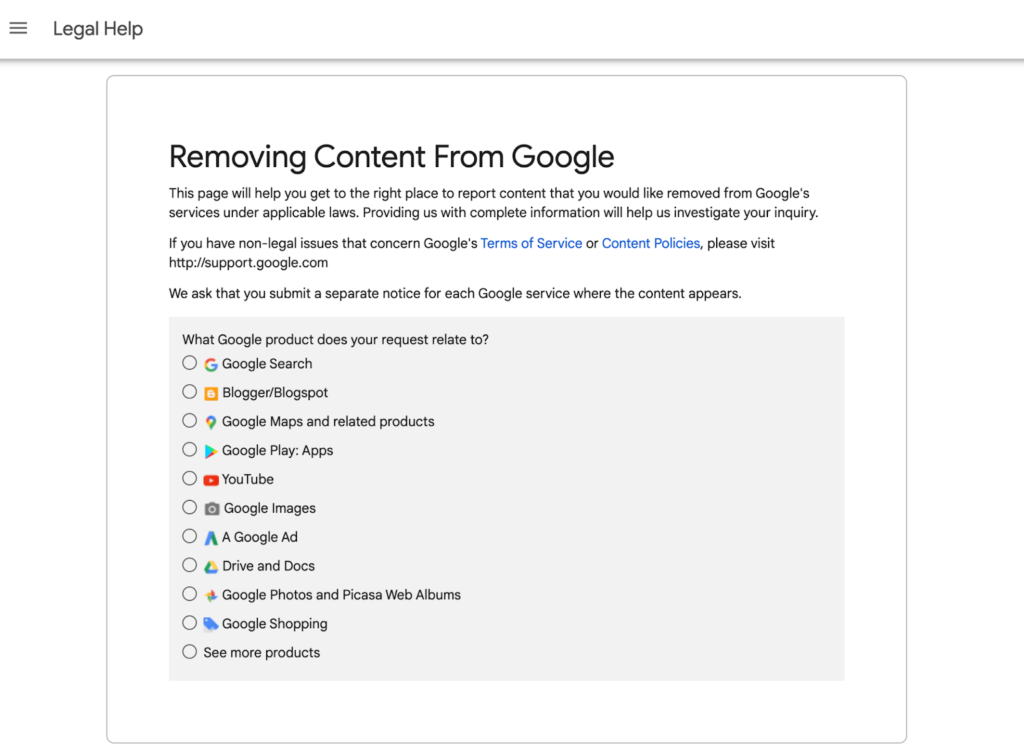
You can request the removal of content that includes malware, phishing, intellectual property use, defamation, court order, or abusive/explicit material. Step 5: Delete Information From Collection SitesThe final step is a bit tedious. I should also warn you that it’s impossible to remove every piece of your data floating around on the web. With some work, however, you can get pretty far. To get started, seek out various websites that collect data and request that they remove your information. Find Data Collection Websites on GoogleGoogle will be a helpful resource as you go through this process. Simply search for data collection companies on Google, and create a list of sites that collect your data for different purposes. Opt-OutTake the list you curated from Google and use it to visit each data collection service to opt out manually. Once you land on a site, you should be able to find an opt-out form at the bottom of the page in the footer section. From here, you’ll choose which data types you want removed—from phone numbers and email addresses to mailing addresses and other personal information. Keep in mind that the opt-out process won’t be instant. It’ll probably take at least one to two weeks for the site to remove your data after it receives your request. via Quick Sprout https://www.quicksprout.com/how-to-remove-personal-information-from-google/ Someone might use Rocket Lawyer or LegalZoom for various reasons, including creating and managing legal documents quickly and cheaply, protecting their intellectual property rights, finding a specialized attorney, or getting access to other legal services. One common use case for these types of platforms is their registered agent services. With Rocket Lawyer and LegalZoom, you can easily set up a registered agent in any state you want to do business in. This service allows companies to receive essential documents 24/7 without worrying about having an office located in that jurisdiction. 
Rocket Lawyer and LegalZoom Compared to the BestAlthough Rocket Lawyer and LegalZoom are two of the most popular registered agent services out there, neither one made our list of the top six. Northwest Registered Agent is the best overall option for anyone looking for a reliable registered agent service. You can form a business with them right now for just $39.
Rocket Lawyer vs. LegalZoom: High-Level ComparisonRocket Lawyer and LegalZoom are two of the most popular online legal service providers, offering a wide range of services to help individuals and businesses with their legal needs. Both companies offer registered agent services that allow businesses to receive documents 24/7 without maintaining an office in the jurisdiction they do business in. Rocket Lawyer also provides document storage, personalized forms for various types of contracts or agreements, and access to attorneys specializing in different areas of law. People use Rocket Lawyer’s suite of products and services for taxes, wills and trusts, and intellectual property protection as well. LegalZoom specializes in forming corporations and LLCs quickly and cheaply while providing access to attorneys who can advise on any legal issue. Products and Services Offered by Rocket Lawyer and LegalZoomRocket Lawyer and LegalZoom are quite similar in their registered agent service offerings, but they do have their differences. Rocket Lawyer allows you to create an LLC, S-Corp, C-Corp, or Nonprofit in any state you need to register. They also offer a registered agent service and handle all of the paperwork for you. They also offer copyright and trademark protection, business and tax advice, document storage services, and the ability to review and edit documents created by their attorneys. LegalZoom offers a similar range of services but with more emphasis on forming LLCs and corporations as quickly as possible. They provide many of the same residual services, but they also offer patenting and business licensing services. Company Health and Stability of Rocket Lawyer and LegalZoomRocket Lawyer has helped over 20 million businesses and individuals since its formation in 2008, and it has been voted one of the best online legal services around. In 2021, the company announced a $223 million round of funding from venture capital firms and industry leaders. LegalZoom is a publicly traded company with a market cap of $1.61 Billion. For over 20 years, they’ve helped millions of customers with their legal needs. An increasing amount of people are starting online businesses, gaining awareness of the value of structuring their finances, and protecting their intellectual property in a digital landscape. But these people aren’t necessarily becoming business law aficionados. So, online services like Rocket Lawyer and LegalZoom will only become more popular as the digital revolution continues. Rocket Lawyer vs. LegalZoom Pricing ComparisonOf course, pricing is a primary focus for most customers (especially when most companies offer the same basic services). Let’s take a look at the different pricing models of Rocket Lawyer and LegalZoom. Pricing Structure of Rocket Lawyer and LegalZoomWhen it comes to getting started with a business, Rocket Lawyer and LegalZoom both offer extensive services that can help you file formation documents in any state. However, the two differ in their pricing plans, so whatever your budget is for this particular service may decide which one to choose. With Rocket Lawyer, you have the choice between membership or non-membership services. Non-members can purchase legal documents and pay as they go, while members can access exclusive discounts for only $39.99 per month. What we love about LegalZoom is that you pay only for the services you need. Since the company doesn’t offer monthly memberships, you can save a lot of money if you only need help setting up specific functions within your company. With both Rocket Lawyer and LegalZoom, you can also get assistance with family and personal legal matters. With a monthly membership to Rocket Lawyer, these services are included in your subscription fee. For non-members, the cost is on a per-document basis. On the other hand, LegalZoom does not offer memberships, so each service must be purchased separately. It’s also worth noting that there is some lack of transparency with Rocket Lawyer. Rocket Lawyer claims their service is worth $479.88 annually, but the number is slashed and replaced with $239.99 for their annual membership. Customers can also sign up for a seven-day free trial. Upon clicking the $239.99 per year hyperlink and navigating their payment portal, we also noticed a disclaimer that stated a billing of $399 per year, which seems confusing and misleading. The company’s registered agent services are available as an add-on. Non-members can purchase this service as a standalone offering for $149.99, but subscribers get 25% off. LegalZoom is much more straightforward. The company offers a range of business formation plans that begin at just $79 for an LLC. The price will change depending on what type of company you are looking to launch, but these rates are competitive. An extra fee is also incurred when filing the final documents with your state government. Other services can be purchased on an as-needed basis as follows:
For $299 per year, they offer registered agent services without any caveats. This includes their registered agent service, mail forwarding, document storage, and $1 million in identity theft protection. Cost Comparison of Rocket Lawyer and LegalZoomRocket Lawyer offers a seven-day free trial, meaning that users can cancel if they aren’t satisfied with the product after seven days. However, there’s a catch—you have to remember to cancel, or else they’ll bill for an entire year at $399 per year (or $39.99 per month) rather than the advertised price of $239.99. However, Rocket Lawyer offers standalone registered agent services for non-members at $149.99 per year, making it much cheaper than most of LegalZoom’s plans. LegalZoom offers registered agent services for a flat fee of $299 per year with no free trial. There are no upsells or hidden costs, unlike Rocket Lawyer, whose confusing pricing leaves customers often paying more than advertised. Of course, LegalZoom’s a la carte pricing will probably cost more depending on your exact needs, but the organization and transparency of their pricing model make it much easier to budget and plan for services. Trials and Guarantees for Rocket Lawyer and LegalZoomAs mentioned, Rocket Lawyer offers a free trial period with no strings attached. If you cancel within seven days, you will not be charged. But if you forget to cancel, they will bill for a full year at $399. LegalZoom doesn’t offer any kind of free trial, so you’re on the hook for the $299 whether you like the service or not. However, LegalZoom does provide a 60-day satisfaction guarantee, unlike Rocket Lawyer’s services, which do not come with any kind of guarantee. Rocket Lawyer vs. LegalZoom: Core Criteria ComparisonBeyond pricing, there are plenty of factors that go into making a decision when it comes to choosing an online legal service. Some businesses may need a particular type of document or access to specific legal services, while others may want lawyers available with their subscriptions. Let’s examine the core criteria below to compare Rocket Lawyer and LegalZoom. Ease of Use — Rocket Lawyer Wins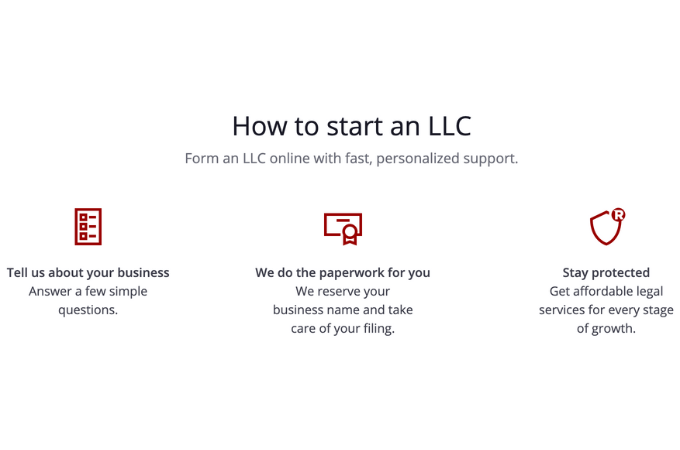
If you wanted to know everything about business law, you would have become a lawyer yourself. Of course, business owners assume the responsibility of knowing the basics and maintaining compliance. Still, the actual process of forming an LLC or setting up a corporate structure can be complicated and time-consuming. Rocket Lawyer’s layout is user-friendly, and guided instructions and step-by-step explanations make the process much easier. The platform has an extensive knowledge base that teaches you how to file forms and answer questions about business law, so you can do it yourself confidently. LegalZoom’s platform is made for convenience and speed. It’s more straightforward than Rocket Lawyer and offers plenty of helpful information, but it doesn’t have the same guided approach to filing documents. This means you might need to do more of the work yourself, which might be challenging. Web User Interface — LegalZoom Wins
Mobile apps are essential, but website navigability plays a significant role in whether you can use the service. Since the website is the first point of contact for most users, it’s one of the most important elements to critique. Its outdated website design is among our least favorite elements of Rocket Lawyer’s platform. Despite the user-friendly features and abundant valuable information, it’s cluttered and difficult to navigate. The platform’s search feature and sitemap are cumbersome, and it can be hard to find the information you need. LegalZoom, on the other hand, boasts a modern and attractive user interface. The company has invested heavily in making its website more intuitive, and they have been successful so far. You can easily find what you’re looking for within minutes, and their blog posts, videos, and other online content are both readily accessible and digestible. Mobile App — Rocket Lawyer Wins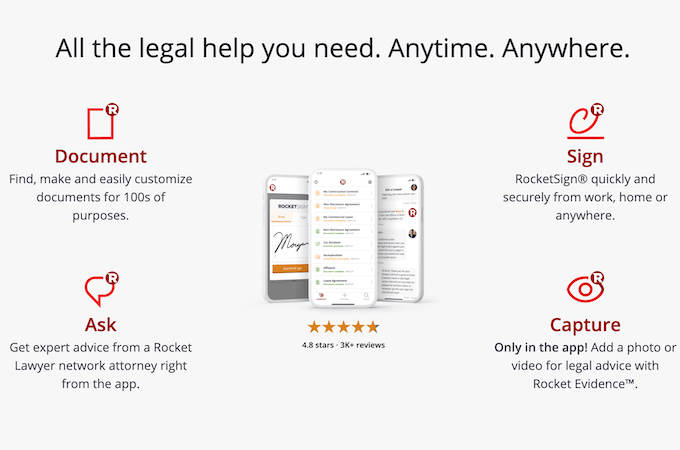
The majority of people will need to manage their business filings and documents while on the go. Having a solid mobile app is an absolute must. Rocket Lawyer offers a fully-functional mobile app that syncs with the desktop version of their platform, so you can stay organized and up to date from anywhere. The app is available for both iOS and Android devices, and users can create contracts, register new businesses, and communicate with legal professionals in real-time. LegalZoom’s mobile app is sufficient, but it doesn’t have the same features as Rocket Lawyer. The app has basic document filing capabilities but isn’t as built out as its competitor. Customizability and Service Offerings — LegalZoom Wins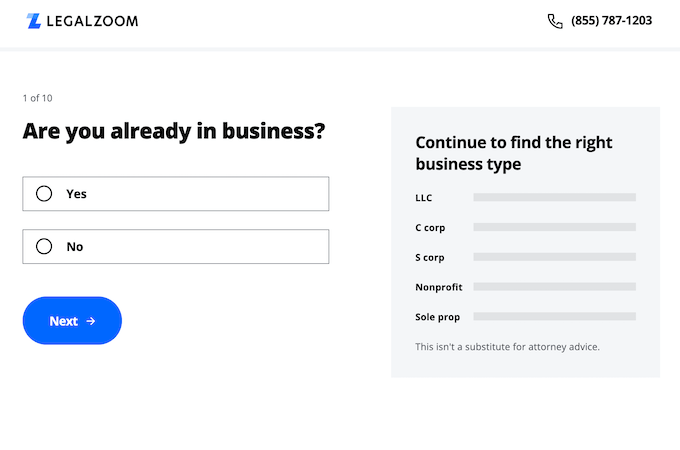
Every business has different needs, and the ability to customize services to fit those needs is key. On the one hand, adding standalone services can be a great way to get the specific help you need without paying for extra features you don’t. On the other hand, comprehensive service packages can save time and money in the long run. When it comes to setting up an LLC, both Rocket Lawyer and LegalZoom provide basic business formation services that involve filling out paperwork in the state of your choosing. However, each company offers something unique: while LegalZoom provides a banking resolution to help you open a savings or checking account for your business, Rocket Lawyer’s exclusive addition is physical copies of all your filing documents. When it comes down to it, Rocket Lawyer’s $39.99 monthly service offers plenty of excellent services, including free consultations with lawyers and the ability to access documents and contracts online. It also gives customers unlimited access to its vast library of legal templates. But paying for standalone services is a much better option for businesses that need specific help regarding taxes and formation without strings attached. Customer Support — Rocket Lawyer Wins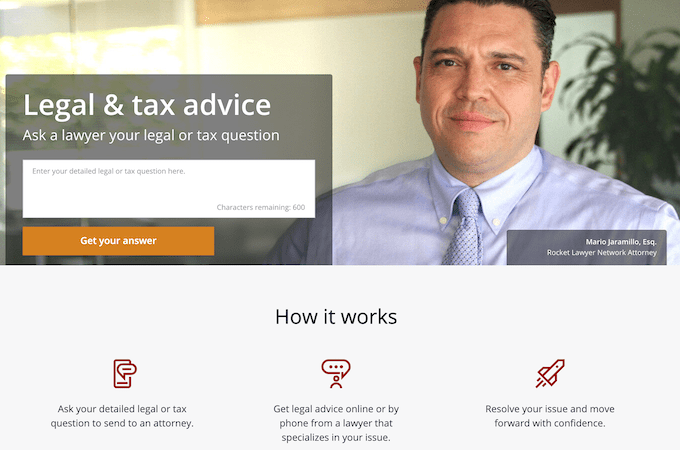
As any business owner knows, time is money. It should not be wasted on trivial matters or paperwork. Quality customer service is always important, especially when dealing with something as serious as a business filing. Rocket Lawyer and LegalZoom are so successful thanks to their comprehensive support systems. But like any large company, they might still miss some disgruntled clients because of the sheer volume of customers they serve. LegalZoom’s customer support is available longer (including weekends), but Rocket Lawyer goes the extra mile to ensure that their customers are taken care of. The ability to ask a lawyer questions and get a response within the same day sets Rocket Lawyer apart, and we’ve found their customer service to be much more helpful. Final Verdict — LegalZoom WinsUltimately, the business formation service you choose will depend on your company’s specific needs. Both Rocket Lawyer and LegalZoom offer comprehensive services at competitive prices, but LegalZoom’s ability to hand-pick the files and services you need ensures that you aren’t overpaying for unused features. Even if it ends up costing more, LegalZoom’s transparent pricing makes it easier to budget for, and you won’t find any surprise fees on your bill. That said, Rocket Lawyer has superior customer support, knowledge base, and mobile app capabilities, making it the perfect choice for users who need help organizing their paperwork from anywhere. It’s a great way to get extra guidance without having to pay for every little detail. via Quick Sprout https://www.quicksprout.com/rocket-lawyer-vs-legalzoom/ Many people believe that faxing is an outdated technology, and they’re right–to an extent. The use of traditional fax machines and paper documents is on the decline, but it isn’t leaving without a replacement. There are plenty of reasons to use digital faxing, including fewer costs and an easier way to send documents. When it comes to selecting a service for digital faxing, two options come up frequently: eFax and HelloFax. 
eFax and HelloFax Compared to the BesteFax and HelloFax are straightforward, reliable faxing solutions for small businesses and individual users. They also both made our list of the best online fax services. But companies that need a higher level of security and features should consider a more advanced solution, like SRFax, the best fax software for rigorous compliance and cybersecurity requirements. You can get started with SRFax for the low price of $9.99 per month. Here’s our full list of the best online faxing services:
See our in-depth review post for more information on these top fax services. eFax vs. HelloFax: High-Level ComparisoneFax is an online fax service owned by J2 Global and offers plans starting at $16.95 a month. It is designed for individual users and small businesses with limited faxing needs, but it also offers an enterprise plan with greater scalability. HelloFax is a service owned by Dropbox and offers paid plans starting at $9.99 per month. It also offers an enterprise plan with more advanced features like fax number porting but with limited customization options. Products and Services Offered by eFax and HelloFaxeFax offers two plans: a regular plan and a corporate plan (which has a separate website). If there is any sort of brand recognition in the online faxing world, it is eFax.
HelloFax offers a similar deal—cloud storage, editing and e-signature features, and email-to-fax functionality. But HelloFax also offers international faxing coverage across all of its plans, and as a Dropbox company, integrates with Dropbox, Google Drive, and other commonly used business tools. Company Health and Stability of eFax and HelloFaxeFax is an established company that has been around since the late 1990s. It is owned by J2 Global, which also owns one of the biggest names in web hosting—Bluehost—and a few other faxing platforms. As such, eFax has a long history of providing reliable services and is backed by a large parent company that can help address any issues. HelloFax is a relatively new company, having only been around since 2010. It has grown quickly but still faces stiff competition from the more established players in the industry. That being said, DropBox recently acquired it, which provides HelloFax with plenty of resources to continue growing and innovating. As we mentioned earlier, eFax is probably the most well-known name in the online faxing world because it’s been around for so long. But HelloFax is backed by a highly reputable company and offers solid features for a similar target market. eFax vs. HelloFax Pricing ComparisonOf course, pricing is one of the most essential factors to consider when choosing any software—particularly when both offer similar products. No product in the realm of online faxing will cost you an arm and a leg (i.e., you won’t spend hundreds of dollars on sending a few pages of faxes), but looking at pricing is still important. In general, we find eFax to be a bit pricey compared to most online faxing solutions. Its faxing plan offers users the most basic features. And although it does so reliably, it does not offer any additional features like international faxing or toll-free numbers. Pricing Structure of eFax and HelloFaxeFax’s pricing model is simple—one option is available to all users, and it includes all of the standard features that come with the platform. Instead of allowing users to scale up their plans, eFax charges a flat fee for their Pro plan and an additional $0.10 per additional page. HelloFax has four main pricing options:
HelloFax’s pricing structure is easy for anyone to understand, and since there isn’t as large of an overage fee, businesses won’t need to count the number of pages they send every time. Cost Comparison of eFax and HelloFaxCompared to HelloFax (and the rest of the industry, really), eFax is costly. $18.95 per month doesn’t sound like a lot, but HelloFax gives users a greater faxing allowance (300 pages from HelloFax vs. 200 from eFax) for almost 50% less. And by the time HelloFax and eFax are the same in price, you’re getting a higher allowance from HelloFax. One benefit of eFax is that it bundles its 200-page faxing service with jSign for the same price. Since its e-signature platform is usually a separate cost, using them together would be a monthly savings of around $16. But again, HelloFax offers electronic document signing and DocuSign integration for $9.99 per month. HelloFax charges a $0.05 overage fee for pages after the monthly allowance, half of what eFax charges. For businesses sending a high volume of faxes, this could potentially result in significant savings. In both cases, the value of these services plateaus and starts to diminish at the SMB level. Businesses with moderate or greater fax needs will almost certainly find better deals elsewhere. Trials and Guarantees for eFax vs. HelloFaxeFax offers a 14-day free trial with its Pro plan. This gives you two weeks to test the service and ensure it meets your needs before fully committing. HelloFax offers a 30-day free trial, and it can be used with any of the plans. This gives users more time to test out its features and decide if it’s worth the cost. Whether or not you plan to use HelloFax past the trial period, 30 days is better than 14. Neither company offers a money-back guarantee, but both companies are highly rated by customers on consumer review sites. This means that users can be confident in these companies’ services. eFax vs. HelloFax: Core Criteria ComparisonHelloFax and eFax are both reliable services for small businesses with basic faxing needs. Both services offer occasional faxers reasonable plans with per-page costs that won’t break the bank. But businesses with frequent or high-volume faxing needs will probably need to look elsewhere for online fax services. From a purely objective standpoint, we compared eFax and HelloFax based on the most important criteria of an online fax platform:
For each of these criteria, we looked at how eFax and HelloFax stack up against one another. Sending and Receiving Faxes — eFax Wins
Sending and receiving faxes are the core functions of any online fax service. To effectively send and receive faxes, an online fax service needs to make it easy for users to do it from anywhere, anytime. And they must make sure that the faxes arrive intact and on time. Both eFax and HelloFax have secure, reliable systems for sending and receiving faxes. But eFax edges out HelloFax in this category for a few reasons:
Overall, eFax makes it much easier for users to send and receive faxes from anywhere, so it wins in this category. Email-to-Fax Capability — eFax Wins
One of the features eFax is known for is its email-to-fax capability. This allows you to send and receive faxes via email, eliminating the need for dedicated hardware or software. With eFax, all you have to do is enter the recipient’s fax number, attach the file you want to send, and hit “send.” With HelloFax, the process is similar. But eFax gives you the highest level of reliability and security when sending and receiving faxes via email. User Interface — eFax Wins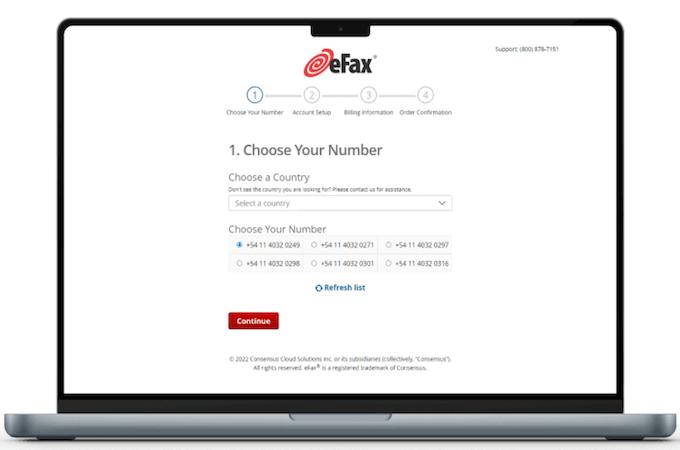
Functionality is important because it determines whether or not the app can actually do the tasks its users need it to do. But a solid user interface is the icing on the cake—it makes the process of using the app easier, more intuitive, and more enjoyable. As a Dropbox company, HelloFax’s interface is designed to be familiar and easy to use. The dashboard has a modern layout and straightforward navigation, making it easy for users to find their way around. But eFax’s user interface is even more straightforward. It features a clean, uncluttered design that makes it easy to find what you’re looking for. Its document organization can be a bit cluttered, but features like notes and easy-access contact integration make it easier to do what you’re using the platform to do: send and receive faxes from anywhere. You can even grab documents for faxing from drop sites and send faxes as PDFs from your mobile app. Digital Signatures — HelloFax Wins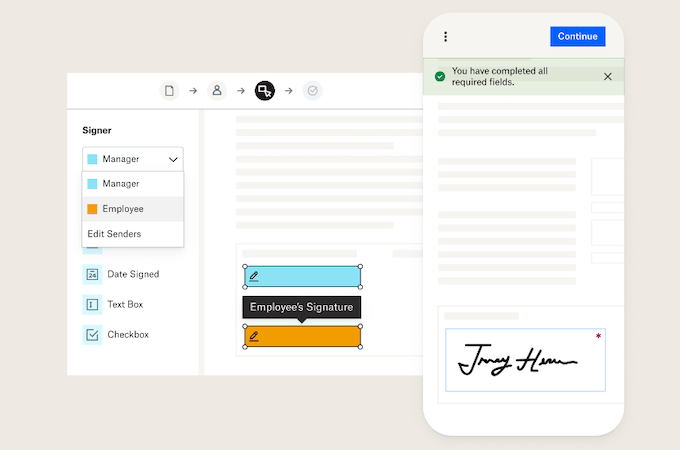
Electronic signatures are an essential part of the faxing process. There’s no point in sending a document over the internet if you can’t get it signed and returned (and most recipients won’t have a printer or fax machine anyways). HelloFax is a member of the DocuSign ecosystem, the best-known digital signature platform. This means that sending and receiving digital signatures is a breeze compared to other solutions. And best of all, recipients will already be familiar with it. eFax’s e-signature platform is effective but not as widely used. This means that many of your clients may struggle to understand how it works. HelloFax brings a certain level of familiarity that can make the process smoother and faster. Integrations with Popular Platforms — HelloFax Wins
Nobody seems to have the same tech stack these days. And if you’re trying to integrate faxing into your workflow, you need a platform that works with the tools you already use. HelloFax integrates with many popular services like Slack, Dropbox, and Google Drive. This makes sending and receiving documents from anywhere much easier without worrying about software compatibility or manual uploads. Many of Dropbox’s own products, including Paper and Showcase, also integrate with the platform. eFax integrates with many popular services and software tools, making it easy to use. But the familiarity and cohesion that the Dropbox ecosystem offers beat out eFax in this category. Multi-User Support — HelloFax Wins
Even small businesses or families need to have multiple users to fax effectively. If only one person has access, it means that others can’t join in when they need to. Both platforms offer multi-user support. But eFax only allows up to five users, while HelloFax lets you have ten for the same price. And if you need to boost it to 20 users, you can with HelloFax. For the smallest of businesses or those with the most limited faxing needs, this probably won’t matter. But if you run a small clinic, family business, or other organization with more than a few stakeholders, this might take eFax out of the equation. Mobile App—eFax Wins
Mobile app support is a crucial element for any business tool. If you can’t effectively complete a business activity from your phone or tablet, there’s almost no point in using the platform. HelloFax does not offer a dedicated mobile app for faxing. The mobile UI of its website and the Dropbox ecosystem are fine, but the lack of a dedicated app limits the amount of accessibility you have. If you want to send your fax quickly and efficiently, you’ll need your laptop. eFax, on the other hand, offers a dedicated mobile app for both iOS and Android devices. This makes it much easier to send and receive faxes while you’re away from your desk. You can even upload documents directly from cloud storage solutions like Google Drive or Dropbox, making the whole process even more streamlined. Compliance and Security — eFax Wins
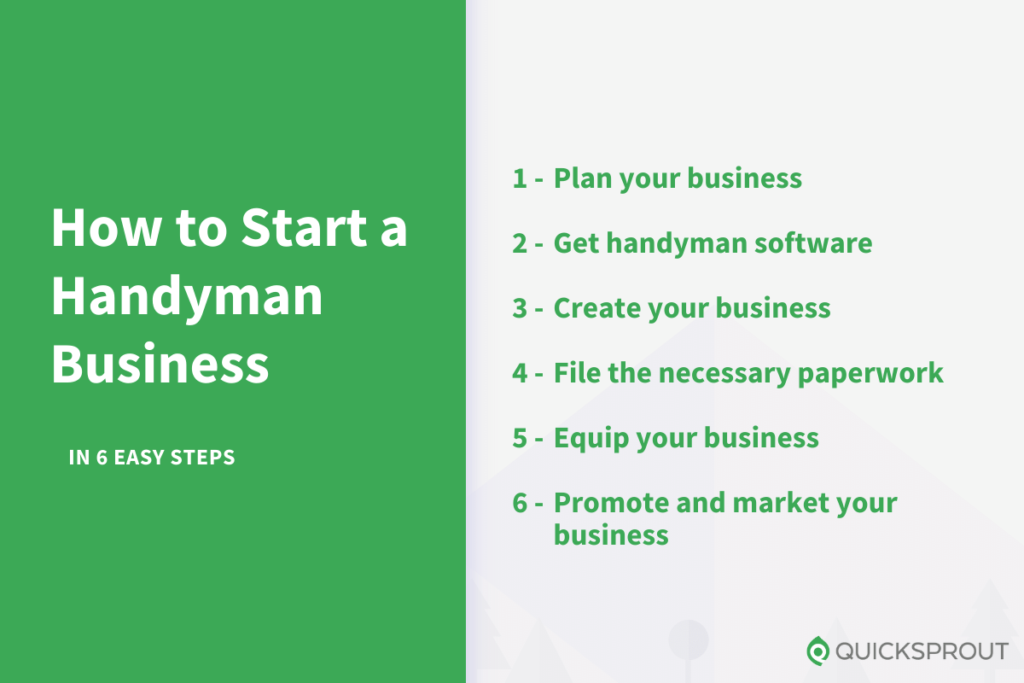
Above all, you don’t want your sensitive documents to be compromised, and neither do your recipients. That could mean bad news for your business or even legal repercussions. With eFax, you can securely store your faxes in a digital folder accessible to you at any time and for the duration of your account. All faxes from desktop, email, and mobile apps are encrypted, making sure that your documents stay secure. HelloFax also encrypts all data with bank-level cybersecurity measures and offers the same features as eFax in terms of compliance and security. However, it doesn’t have a two-factor authentication process, meaning that anyone with access to your account can view and send faxes from anywhere. Final Verdict — eFax WinsHelloFax has a few advantages with its integration capabilities and user-friendly design, but it’s not the best for compliance or security. And because it doesn’t have a dedicated mobile app, multi-platform access isn’t as easy to use as it should be. eFax is overpriced—paying nearly $20 per month for basic faxing isn’t ideal. But if you need multi-user support, compliance and security measures, and a dedicated mobile app, it’s definitely worth the extra money when compared to HelloFax. via Quick Sprout https://www.quicksprout.com/efax-vs-hellofax/ Are you good with your hands, in good physical shape, and dream of being your own boss? A handyman business may be your ticket to freedom and financial security. This business has relatively low overhead expenses and the potential for high profits. But like with any other enterprise, it has its set of challenges. The good news is that it is possible to create a handyman business from scratch with minimal investment. I have put together this comprehensive guide to take you through everything you need to know to start a successful handyman business. 6 Steps to Start a Handyman BusinessStarting a handyman business is easier than it sounds. You just need to follow these steps:
The Easy Parts of Starting a Handyman BusinessGenerally, a handyman business has low startup costs. The typical homeowner has a long list of home repair and general maintenance tasks that don’t require specialized equipment. You can start with relatively simple tasks like moving furniture around, assembling furniture, painting, minor repairs, defrosting freezers, organizing garages, and cleaning ovens. Then, you can expand your list of services as you build a reputation and invest in equipment for more complex and specialized jobs. The capital required to start your business will still be relatively low even if you decide to purchase tools. Marketplaces such as eBay, Facebook Marketplace, and Craigslist are great places to buy cheaper, second-hand equipment. The startup cost is even lower if you already have a vehicle to go to job sites and transport tools. Depending on your point of entry, you may be able to start your business with as little as $1000. Additionally, many jobs don’t require you to be licensed by the state. There’s a massive list of jobs that you’d still be able to take without a license. These jobs include minor dry rot repairs, building gates, repairing fences, touching up paint, installing trim, and power-washing decks. Many contractors don’t like taking these jobs. Their overheads are too high to justify taking “small jobs.” So there’s still plenty of room to build a successful handyman business without a license. Finally, software tools like Jobber make handling the administrative aspects of your business much more manageable. Some essential Jobber features include client relationship management (CRM), invoicing and follow-ups, quoting and follow-ups, scheduling and dispatching, and online appointment booking. Jobber prices are as low as $49 per month with annual billing on the core plan. 
The Difficult Parts of Starting a Handyman BusinessNot everything about starting a handyman business is smooth sailing. Some parts of the journey may make it harder to get your business off the ground. But it is still possible to overcome these obstacles and build the business of your dreams. While not all handyman jobs require it, those that pay more typically need you to be licensed. For example, most states require a general contractor’s license for specialized jobs like plumbing and electrical work. Additionally, most states set a dollar amount limit for the jobs you can take without a permit. For example, you’ll need a contractor’s license to perform work over $1000 in Arizona. The laws and regulations governing handypersons can also be confusing. These laws vary from state to state. Furthermore, each city may have its unique ordinances that you need to observe. As a result, it is often difficult to wrap your head around the services you can and cannot legally offer. For example, you may offer services that require a specific trade license in some cities and not others. But you aren’t allowed to advertise these services in those cities until you acquire the license. Your local contractor’s board website can offer more information about the legal restrictions in your city or state. Lastly, being a handyman requires you to have a vast set of trade skills if you hope to make a good living. Conversely, you’ll need on-the-job experience to gain these skills. This classic catch-22 can make it challenging to get clients and build a reputation, especially in the beginning. For example, you may need to fix a leaky faucet, caulk a shower, fix a loose tile, and unclog a drain in the course of a single job. Therefore, having an extensive repertoire of trade skills will help improve customer satisfaction. Here’s how to start your handyman business, step-by-step. Step 1 – Plan Your BusinessMany new businesses fail due to a lack of adequate planning. Creating a roadmap for your business will help you identify the critical action steps to a successful enterprise. Determine the Services You’ll OfferThe good news is that there is always a demand for handyman services. With economic growth, a less handy population, and increasingly complex homes and offices, you’ll likely be spoiled for choice in terms of services. You’ll still need to carefully consider the services you’ll offer. The first step is to evaluate your skills. Next, make a list of all the things that you know how to do. This list should include all your skills, regardless of how trivial or obvious. You’d be surprised at how many people are willing to pay for simple tasks like assembling IKEA furniture or hanging pictures. Next, refer to your state’s contractor’s board. Specifically, check whether there are any special licensing requirements for any services on your list. Finally, create a list of the kinds of services you will offer based on your skills and your state’s licensing requirements. Identify Your Target MarketIdentifying a target market will help you determine how to market your business. Additionally, you’ll have the opportunity to specialize and establish yourself within a niche. Most of the highly paid handymen are well established in their fields. Potential target markets may include the elderly, single women, apartments and complexes, new constructions, or property owners. Come up with a list of groups of people that may require your services. Create a Business PlanYou don’t need a complicated, multi-page business plan for it to be effective. Instead, you can think of your business plan as a way of articulating your vision for your business. The idea is to have a clear vision for what you would like to achieve with your business. Start by writing down what a successful handyman business looks like six months, one year, and five years from now. Include as many details as possible such as:
The idea is to create milestones for your business. While it’s good to be optimistic, it is equally essential to be realistic with your expectations. For example, it will be challenging to get 100 clients in the first six months of your business. Having realistic milestones will help to guide the direction of your business. Other details to consider adding to your business plan include:
Step 2 – Get Handyman SoftwareOften, people are surprised at how much administrative work goes into running a business. The same can be said for starting a handyman business. These tasks are also often tedious, repetitive, and even dull. Good handyman software can help ease things when starting and running your business. Sign Up For JobberJobber is exceptional software packed with valuable features that you’ll need when setting up your business. For one, you’ll be able to organize all of your client’s history neatly. This includes every invoice, job, quote, or visit for every client. You’ll also be able to track time and expenses, invoice clients and follow up on payments, and even send on my way text messages to clients. Choose Your PlanJobber offers three pricing plans depending on the number of users and the features you want. Jobber pricing options include: Core Plan – Costs $49 per month if you pay annually or $69 per month billed monthly. This plan is only suitable for one user. Connect Plan – Costs $149 per month with the annual plan or $169 if you pay monthly. You can have up to five users with this plan. Grow Plan – Costs $249 per month with the annual plan or $349 per month if you pay monthly. You can connect up to 15 users to your account with this plan. You can add more users at $19 per month for every extra user. 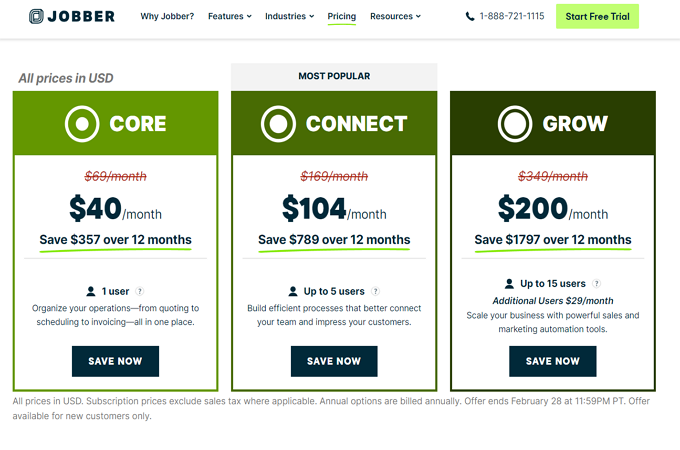
Step 3 – Create Your BusinessYou don’t necessarily need to register your handyman business in most states. This is especially true if you do not plan to hire employees or open a business bank account. But this route comes with many restrictions that may limit your prospects and expose you to risk. For example, you won’t have any personal protection in case your business is sued. The best strategy is to form a legal entity. This way, you can scale your business by hiring employees, qualify for insurance, and get access to credit and financing. Register Your BusinessMost handypersons choose to form a limited liability company (LLC). This way, you won’t be personally responsible for your business’ debts and liabilities. Additionally, there are no restrictions on the number of members if you intend to bring on partners. Some of the things you’ll need to form your LLC include:
You can set up your own LLC or use an online business formation company to take care of it for you. Open a Business Bank AccountIt is crucial to separate your business finances from your personal assets. This process makes it more difficult for lawyers to pierce your corporate veil if your business is sued. A separate bank account will also help you build your credit score, become eligible for financing, get higher lines of credit, and enjoy better interest rates. Learn About Your State’s Handyman LawsGetting familiar with handyman laws protects you and your clients. These laws will also inform you about the services that you can offer. Additionally, you can decide whether or not it’s worth getting a contractor license depending on the services you plan to offer. Your state’s contractor board website is an excellent resource for this step. Step 4 – File the Necessary PaperworkYou’ll need to file certain documents depending on your business structure, the services you plan to offer, and your state or city requirements. Getting all the necessary documents in order ensures that you don’t get into legal trouble. Some of these documents can also help to boost your credibility and make you more attractive to customers. Register For TaxesFind out about your state’s handyman taxes and register for the relevant taxes. Additionally, how you are taxed depends on your business structure. At the very least, you may need to pay self-employment taxes on your net profits. Fortunately, you will be eligible for several deductions. A few standard allowable deductions for handymen include:
You’ll also need to acquire an Employer Identification Number (EIN) from the IRS if you plan on hiring people. Jobber makes handling taxes easier with its robust tax reporting tool. You’ll also be able to include a tax rate when quoting or invoicing clients. 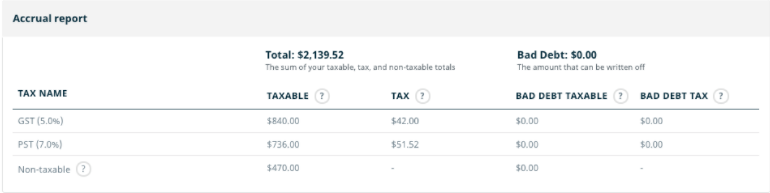
Obtain the Required LicensesAgain, this step may vary depending on your state and city. First, find out if you require a handyman license to operate in your location. You may also need a contractor license to perform bigger and higher-paying jobs. Check your state and city government websites for more details on licensing requirements. Additionally, speak to other contractors in your area for guidance on obtaining licenses if necessary. Get InsuranceSmall business insurance is always a good idea. Consider getting insurance even if it isn’t required at your level. Accidents happen, and insurance will help protect you from claims in case of property damage or injury. Homeowners will also be more comfortable working with you if you are insured. At the very least, general liability insurance will help you with the coverage you need for your business. You may also need to get workers’ compensation insurance if you plan on hiring employees. Step 5 – Equip Your BusinessYou’re almost ready to start offering your services. The main remaining task is to equip your business for success. This step doesn’t need to be too expensive if you start small. There will be plenty of time to scale your business. Don’t overextend yourself. You can get started with surprisingly little in the handyman business. Purchase Tools and EquipmentYou don’t have to purchase every single tool you can think of. Instead, start with only what’s necessary for the jobs at hand. The services you plan to offer will help guide you with the tools you need to buy. Some standard handyman tools to get you started include:
Be sure to compare prices when purchasing your tools. Also, look for secondhand tools for pricier items. Online marketplaces like Craigslist and eBay are great places to shop for gently used tools. Get Reliable TransportationYou may not need to purchase a business vehicle if you already have a truck or van. But make sure you have reliable transportation to get to job sites. Your vehicle can also be a great marketing tool. For example, you can put your company’s logo, list of services, and contact information on your vehicle. You may also consider renting a vehicle in the beginning to keep your startup costs low. Secure SuppliersThere are certain materials you will need at job sites. These include wood, nails, fixtures, and pipes. Shop around for a reliable and affordable supplier before you start offering your services. Alternatively, identify an affordable commercial home improvement store when you’ll be purchasing your supplies. Some of these stores also provide contractor discounts and bulk discounts. Draw Up a Service ContractA service contract makes you appear more professional and protects all parties. Additionally, this agreement helps to minimize the risk of legal disputes. Many states and cities also legally require you to sign a service contract before performing repairs or maintenance. The contract should specify client expectations and payment terms. Be sure to include a detailed work description in your service contracts. Also, include the amount of materials you’ll need for the job and the estimated cost. Finally, detail how you will be paid, the amount due, and when payment is due. Step 6 –Promote and Market Your BusinessYou should be ready for your first clients by now. It will take some time to build a steady pipeline of work. So you’ll have plenty of time to promote and market your business. Be sure to refer to your city and state handyman laws. There might be restrictions on how and what you are allowed to advertise. Start LocalThe first step to advertising your handyman business is to get on all local listings. These include online directories such as Google My Business and Yelp. You can also create accounts on sites like HomeAdvisor. Where your budget allows, post ads on local publications and community websites. Try reaching out to local property management companies in your area. This is an incredibly effective route when just starting. Property management companies are always looking to hire extra hands for odd jobs. You can also connect your Jobber account to your local services ads. Then, you’ll be able to book new leads from Google search. 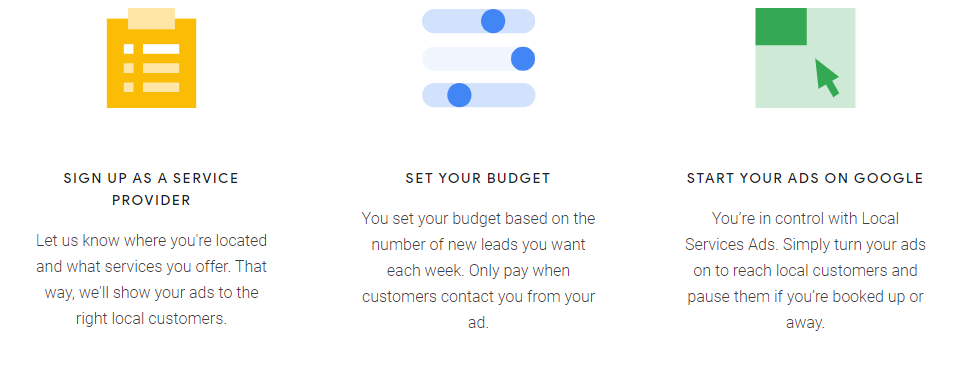
Provide Stellar Customer ServiceThe customer relationship management software in Jobber can help you create a positive customer experience and separate you from the competition. The software’s client hub lets you send your clients quotes for approval, collect client signatures, and notify your clients when you arrive at the job site. Your customers can also review current and past invoices, pay invoices, and print the invoices right from the client hub. In short, Jobber is a great tool for building trust with your clients and creating a professional image. 
Create a Business WebsiteWith today’s technological advancements, a professional business website is within everyone’s reach. You don’t even need to hire a web developer or designer to create your website. Content management systems like WordPress and Wix let you create a professional website with zero coding experience. These CMSs are also very affordable and have numerous templates to help your website stand out from others in your industry. 
A business website will also allow you to accept online bookings. For example, Jobber’s online booking feature collects customer information, including name, address, preferred dates and times, and the services they need. You’ll receive a notification in your Jobber account as soon as clients request your services on your website. via Quick Sprout https://www.quicksprout.com/how-to-start-a-handyman-business/ Want to jump straight to the answer? The best predictive dialer software for most people is Five9. Predictive dialer software automates your outbound calls, freeing up time for other important tasks. Your team will thank you, and your business will grow. But this software isn’t one-size-fits-all. You have to find the one that best helps you connect with your customers once they pick up the phone. Top 5 Best Predictive Dialer Software Solutions
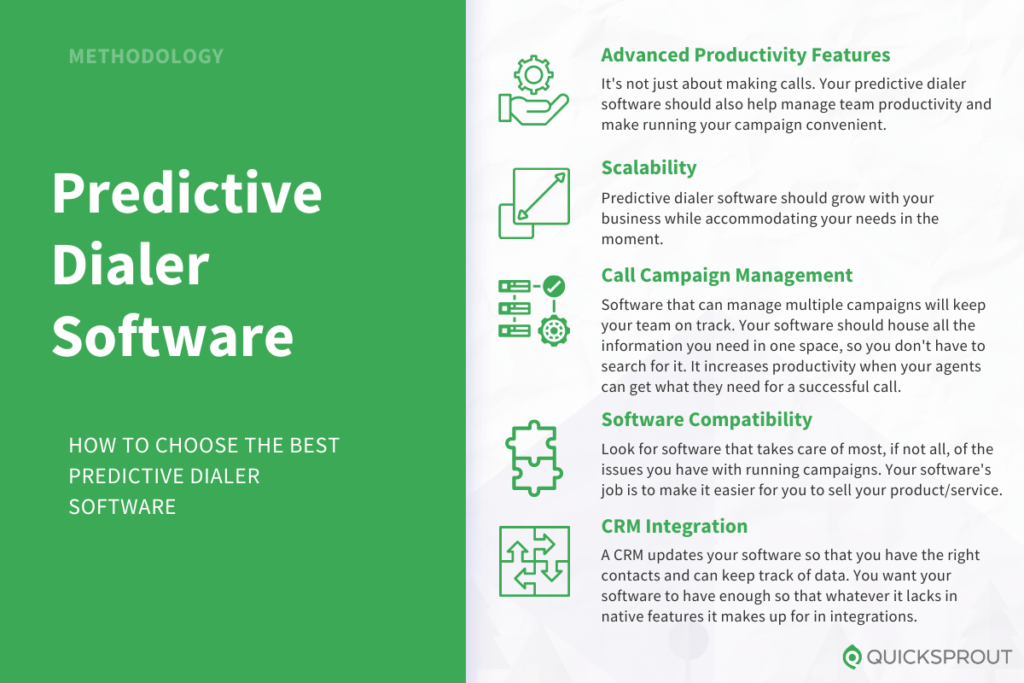
Each of these predictive dialer software solutions has plenty of advanced features and predictive calling options. Find out how they can make the most of your team’s time and boost your marketing campaign success below. Five9 — Best for Sales Teams
A leading cloud-based system, Five9 has lots of native CRM integrations. It comes with many dialing modes to make your team more productive, including:
With so many features, you can increase team productivity, especially with sales teams. AI and workflow optimization keep things running smoothly while using analytics to show you how your campaigns are going and where you can improve. 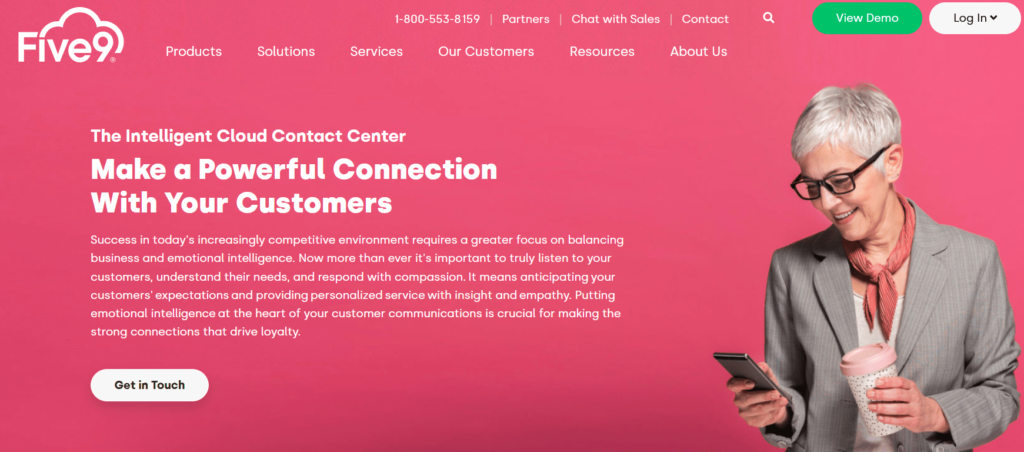
The platform offers a user-friendly interface. Its simple reporting system gives you plenty of customizable options. It even has agent scripts, so your sales team can take the most effective approach to customer connection. Five9’s platform factors in variations with time zones, as well as regulatory compliance between companies. Unfortunately, Five9 doesn’t have a mobile app, which can make remote work more challenging. The company doesn’t list its pricing online. To learn more about their custom pricing, talk to Five9’s sales team. CallTrackingMetrics — Best for Enterprise Businesses
CallTrackingMetrics uses AI for predictive dialing that helps increase leads and connections. You can customize this platform’s features based on your customers. It also includes text messaging and live chat to offer more support channels. The system offers onboarding and training for your internal team, as well as dedicated support. Other internal tools include queue customization, workflow automation, and defining rules and milestones so that your team doesn’t get overwhelmed. CallTrackingMetrics integrates with many other platforms, so you have all the capability you need in one space. It includes integrations for Google Analytics, Microsoft Advertising, Slack, HubSpot, Mailchimp, and more. You can set up alerts for different events, like missed calls. The system also has intelligent call routing based on the caller’s website actions. That ensures callers speak to the right person without going through transfers or waiting on the line. It sends repeat callers to the appropriate queue automatically, without making them go through the menu again. Plus, it has intelligent speech detection and transcription. The downside is that it only offers compliance monitoring with its more expensive tiers. Most of the automated features come with the Contact Center tier, the most expensive of them all. Unlike many other predictive dialer software solutions, CallTrackingMetrics gives you unlimited users, and it’s not billed per user. You can also request a demo before you buy and get your first month free. CallTrackingMetrics offers for packages:
The Business tier gives you call and text tracking, plus call routing, recording, scoring, and tagging. It also comes with Google and Bing integrations and live support. The Marketing package comes with more integrations, plus custom agency account structures like billing. It gives you access to conversation analytics, plus advanced HIPAA security. Contact Center has the most integrations and automated outbound calls. It comes with a remote softphone system to make it easy for work from home employees, and dedicated onboarding helps everyone learn to use the software faster. With its advanced reporting, you can make any necessary improvements to your campaign. Build Your Own packages come with account strategy services and a customized platform. Personalized training packages keep everyone in your company on the same page, and a dedicated account manager keeps your platform organized. Test drive CallTrackingMetrics for a month for free. Genesys Cloud — Best for Multi-Channel Calling
Genesys Cloud works well for medium and large businesses. It includes calling, email, SMS, live chat, and social media while letting you manage it all in one platform. It comes with auto-dialing, predictive and manual calling, and handles inbound calls for you. With call logs and records, you always have access to the information you need. The platform has over 280 integrations and apps, including CRMs. It offers social media management and self-service to make things easier for customers and ensure they can reach you on the channel that works for them without making things harder for your team. 
Genesys Cloud analytics show which channels receive the most attention, where your customers contact you, and which campaigns have the most success. Its enhanced AI and software updates give you the latest technology to reach customers and convert leads. You have a choice of three packages:
Genesys Cloud 1 comes with speech-enabled VR and voice bots, as well as IVR and voicemail. It gives you basic outbound campaigns, unified communications, and interaction recordings. Integrations and insights give you the tools you need to connect with customers. Genesys Cloud 2 adds chatbots and gives you unlimited chat and email routing. It also has callback with IVR and web platforms, as well as screen recording. Its advanced outbound campaigns and inbound/outbound blending combined with quality management and compliance means you have advanced features at an affordable price to ensure you have the best customer connections. Genesys Cloud 3 includes SMS and apps routing, as well as more internal tools like workforce management and employee performance and engagement. Talk to the pros at Genesys to get started. ChaseData — Best for High Call Volume
ChaseData allows you to call multiple customers at once, creating more efficiency and connecting you faster. The platform also has no setup or number port fees. You get basic features like voicemail along with call analytics and reporting, so you know how you’re doing with your campaign. 
The more expensive packages offer more protection for your business and give you a visual script builder so your team can have optimal conversations and increase conversions. You can get a free trial of ChaseData’s predictive dialer software to try it and see if it’s right for your business before you buy. ChaseData gives you the choice of three packages:
Small Business gives you call recording and playback, plus call monitoring and remote agent capability. Preview and injection dialing, plus Zapier integration, create optimal efficiency. The Professional package comes with power, progressive, and preview dialing. With trainee mode and dedicated phone support, you have everything you need to keep your team on top of your campaign. Enterprise gives you six voice channels per agent, plus agentless dialing. You can also take advantage of more integrations, like Salesforce and Zoho. Skills-based routing means callers talk to the right agents, and the software leaves messages on voicemail for you. Unfortunately, the software requires a lot of training to know how to use its advanced features. But if you need one of the most powerful solutions out there, reach out to ChaseData today. Convoso — Best for Generating and Converting Leads
Convoso is a top software for outbound lead generation. Its cloud-based omnichannel software solution targets the problems most users and customers have with predictive dialer software. It raises contact rates, reduces dropped calls, detects answering machines, and offers more insight into campaign performance. Convoso offers lots of productivity tools, including voice, email, SMS, voicemail, and a virtual agent. It also automatically follows up with leads. 
With lead management tools and real-time, customizable reporting and dashboards, you can keep track of your campaign at every step. The platform also has advanced speech recognition and automatically follows up with leads. With power, predictive, progressive, and preview dialing, the platform has everything to make calling and customer connection more efficient. Convoso integrates with other platforms like CRMs to give you more comprehensive capabilities. It uses AI and machine learning technology to direct customers to the right agents and improve workflow for your employees. You can request a demo to see how the product works. If you want to get specific pricing information, contact Convoso. How to Find the Best Predictive Dialer Software for YouWhen looking for the right predictive dialer software, look for products that have the features you need to give your company a boost and create more sales. The number of software solutions available can get overwhelming, and there are many more than the ones we’ve reviewed here. If none of these work for you, use these criteria to find one that works for your business. Advanced Productivity FeaturesIt’s not just about making calls. Your predictive dialer software should also help manage team productivity and make running your campaign convenient. Your software should include features that allow customers to connect with you in custom ways that suit them. It helps if your software accounts for time zones, especially if you plan to call internationally. Not having this feature can lose you clients and customers. Email and text messaging give you more ways to connect with customers and increase your reach for customers who don’t prefer voice calling. Voice call recording helps with quality control and lets you listen to agent messages. This feature can show you how to change your approach if customers aren’t biting. Auto callbacks work well for outbound sales campaigns and still allow calls to be directed appropriately to different agents. Scripts also give agents a flexible guideline for talking to customers. The productivity features you need will depend on your company, how you plan to use your software, and your campaign goals. ScalabilityPredictive dialer software should grow with your business while accommodating your needs in the moment. Do you have five team members who will use it? 50? 500? Not all software is built for all business sizes. Buying the wrong one might mean serious hiccups that could disrupt workflow instead of making things easier. Know how many outboundcalls you need to make, whether you plan to make them nationally or internationally, and how many inbound calls you typically field. Having software capabilities compatible with your business makes it easier to scale up without having to buy new software as your business grows. Call Campaign ManagementYou’ll rarely have just a single marketing campaign going, especially if you run a larger business. Software that can manage multiple campaigns will keep your team on track. Your software should house all the information you need in one space, so you don’t have to search for it. It increases productivity when your agents can get what they need for a successful call without confusion. Analytics also matter, and with software that manages campaigns, you can see where yours succeeds and where it needs help to boost your sales. Software CompatibilityYou don’t want software that takes ages to set up, and you don’t want to buy extra stuff that your teams won’t use or don’t need. Look for software that takes care of most, if not all, of the issues you have with running campaigns. For example, prioritize features that boost team productivity, increase outbound call volume, direct inbound calls, and detect answering machines. Your software’s job is to make it easier for you to sell your product or service. If it’s not doing that, you have the wrong one. If you can get a free trial or demo of the software, always do that before buying. CRM IntegrationA CRM updates your software so that you have the right contacts and can keep track of data. Most predictive dialer software has integrations with CRMs like HubSpot, Salesforce, and Zoho. These CRMs allow you to keep track of other parts of your campaign that might not be included in your predictive dialer software, like social media campaigns. Other integrations are important, too. You want your software to have enough so that whatever it lacks in native features it makes up for in integrations. The Top Predictive Dialer Software in SummaryThe best predictive dialer software automates your outbound calls. It’s perfect for sales teams and call centers that make a high volume of outbound sales. Five9 is our top recommendation in this category. It has advanced features, tons of integrations, and a user-friendly interface via Quick Sprout https://www.quicksprout.com/best-predictive-dialer-software/ Starting an LLC is no easy task, but ZenBusiness and Incfile make it easier than ever for startups and new entrepreneurs to get off the ground. You can get started with ZenBusiness for as little as $0 (plus state filing fees) or register with Incfile for free now. Most people start LLCs in tax-friendly states like Wyoming, South Dakota, and Nevada. But what most people don’t consider is that they also need to pay taxes in their home state. For some Nebraska business owners, this means registering an LLC in their home state. The good news is that forming a Nebraska LLC is just as straightforward as in any other state. However, it does require some background knowledge of Nebraska state laws and regulations. That’s why we’ve created this guide—to help you understand the process of forming an LLC in Nebraska. 
The 11 Best LLC Services for Starting an LLC in NebraskaWith countless LLC formation services out there, it’s safe to say that you won’t have to go through this process alone. But not all are created equal, which is why we created a list of the 11 best LLC services to get the job done.
Click here to read our reviews and decide which is best for you. Start a Nebraska LLC in 10 Easy StepsStarting an LLC in Nebraska can be beneficial for business owners who have customers, employees, or vendors located within the state. And it is a requirement for those who do business in the state, whether that is via an online or brick-and-mortar business. The following ten steps will help you start an LLC in Nebraska:
Every business is unique, so you may need to take additional steps depending on your situation. But by following these ten steps, you’ll have a solid foundation for launching your Nebraska LLC. Step 1: Name Your LLCThe first thing you’ll want to do is come up with a name for your LLC. There are several ways to do this, and how you go about naming it will depend on the type of business you own and the level of recognition you want for your brand. The most common business naming strategies include:
If you aren’t sure what to call your business, you aren’t alone. Most business owners find naming their business to be one of the most challenging steps. That’s why it’s helpful to start by brainstorming a list of potential names and then narrowing it down from there. 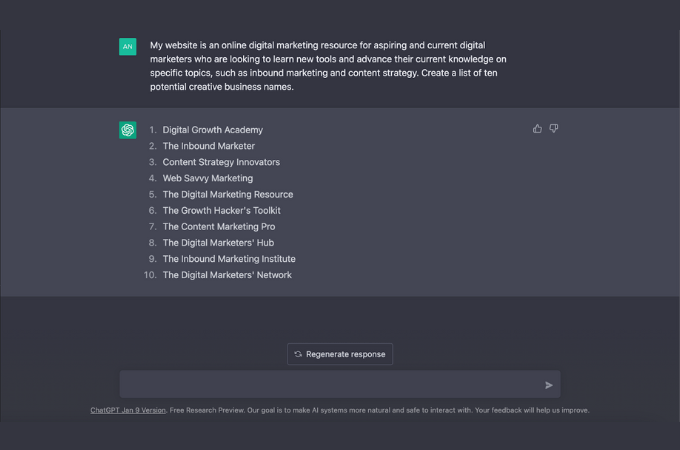
If you don’t know where to start, you can try using ChatGPT to come up with a few names for you. All you need to do is enter a prompt and have it generate ideas that you can use. You can have fun with this and run the commands as many times as you’d like. Once you have a few potential names in mind, you’ll need to make sure they are available by searching the Nebraska Secretary of State website. Your chosen name must be distinctive and not already registered with the state. Then, check to ensure that the domain name you want is available for your chosen LLC name. Even if you don’t need a website right away, the right domain name can make or break your online presence later on. If the URL you want is already taken, you may have to get creative and come up with a different name or an alternate domain extension. Alternatively, you could look into purchasing the domain from its current owner. Step 2: Choose a Registered AgentEvery Nebraska LLC must appoint a registered agent to officially receive documents and legal notices on behalf of the business. This can be either an individual or a third-party service located in Nebraska. The registered agent must have a physical street address in Nebraska and agree to accept any official mail sent by the state and any court summons. They must also be available during regular business hours to receive any documents that may need to be served. You can act as your own registered agent, but we advise against it, and so do legal professionals. 
Fortunately, appointing a registered agent is easy. All you have to do is fill out a simple form and state the name and address of your chosen agent. And if the process seems confusing, you can use a business formation service like Incfile to do it for you. Step 3: File Your Certificate of OrganizationThe Certificate of Organization is the official document that must be filed with the Nebraska Secretary of State to form a Limited Liability Company in Nebraska. It might sound like a challenging process, but it’s actually quite simple—fill out the form online and pay the filing fee. To correctly prepare your Certificate of Organization, you’ll need to provide the following information:
Once you’ve completed the form, you’ll need to submit it along with the filing fee ($100). After you submit your Certificate of Organization, it will be reviewed by the state, and your business will become a legal entity once it is approved. To file your Certificate of Organization and officially form your Nebraska LLC, visit the Nebraska Secretary of State website here. Step 4: Create an Operating AgreementAn operating agreement is a document that outlines the operational rules, responsibilities, and rights of the members of an LLC. It is an important document that must be established before setting up a Limited Liability Company (LLC), as it helps ensure that everyone involved in the business knows what their roles, obligations, and duties are. It also helps to clearly establish the relationships between all the members of the LLC, which makes it easier to resolve any disputes that may arise. And if you ever come up against legal trouble, having an operating agreement can help protect your business from liability. If you decide to do business without one, you will be subject to state operating laws and regulations that may not be favorable to your business. 
Creating an operating agreement isn’t difficult, but it requires some research and planning. You’ll need to outline how decisions will be made, how profits and losses will be shared, what happens in the case of a dispute, and any other rules that you think are important. We recommend using an online drag-and-drop service that can help you create a customized Operating Agreement with minimal input from you and your stakeholders. Step 5: File an Affidavit of PublicationIf you’re creating a business in Nebraska, be aware that you must publish an announcement of your company’s formation within 45 days. This statement requires the name and place of the LLC itself as well as contact details for its registered agent. It should also include any professional services the business provides. After this notice has been published for three consecutive weeks in one newspaper, said publication will submit their Affidavit of Publication to your LLC. Then you must then file it with the Nebraska Secretary of State. Step 6: Obtain any Additional Licenses and PermitsMost businesses don’t need additional licenses and permits to operate legally in Nebraska. However, it’s important to check with your local government or the Secretary of State’s office to make sure you have all the necessary documents required by law. For example, if you plan to sell alcoholic beverages or offer certain professional services, you must obtain a license specific to those activities. If your business is located in a specific city or county, you may also be required to get a special permit from that local governing body. Some business models that require additional licenses and permits include:
Once you have obtained the necessary licenses and permits, you’ll be able to legally operate your Nebraska LLC. Step 7: Obtain an Employer Identification Number (EIN)An Employer Identification Number (EIN) is a unique nine-digit number issued by the Internal Revenue Service (IRS) to identify employers, sole proprietors, corporations, and other entities for tax purposes. This number is used to report business income, pay taxes, open bank accounts, hire employees, and just about anything else related to operating a business. You can apply for an EIN online by visiting the IRS website here. It’s quick, easy, and free! Step 8: Open a Business Bank AccountEven if your business doesn’t transact or turn a profit right away, it’s important to open a business bank account as soon as you can. This will help differentiate your personal finances from your company’s and make managing taxes and other financial responsibilities easier. There are several benefits to having a business bank account:
When looking for a business bank account, look for one that offers features like free online banking, low monthly fees, good customer service, and access to other financial services such as merchant accounts and loans. Step 9: Comply With Nebraska State Laws and RegulationsAs a business owner, it’s important to understand the laws and regulations of your state. To ensure that you are compliant with Nebraska state law, consult an attorney or accountant who is knowledgeable in this area. Relevant information includes:
Knowing the law is essential for running a successful business in Nebraska. It will help you avoid costly fines and penalties and ensure that you are providing a safe workplace for your employees and customers. Step 10: Keep Detailed Records of All Financial TransactionsBookkeeping is one of the most important aspects of running a business. Keeping accurate and up-to-date records of your income and expenses is essential. This includes receipts, invoices, bank statements, credit card statements, loan payments, and anything related to your business’s financial transactions. These detailed records will come in handy when it comes time to file taxes and apply for loans or financing. They also provide you with a snapshot of your financial health and help you make sound decisions for the future. 
The best way to stay on top of your finances is to use accounting software to keep track of your transactions. Popular options include QuickBooks, FreshBooks, and Xero. All of these programs are user-friendly and can help you streamline your bookkeeping process. Final Thoughts About Starting an LLC in NebraskaIf you plan to do business in Nebraska, forming an LLC is the best way to protect yourself and your assets. You’ll need to register your business with the Secretary of State, obtain any necessary licenses or permits, open a business bank account, and comply with state laws and regulations. Once you’ve done all of this, you can start operating as an LLC in Nebraska and enjoy the benefits that come with it. And most importantly, you can focus on running and growing your business. via Quick Sprout https://www.quicksprout.com/how-to-start-an-llc-in-nebraska/ Most aspiring business owners don’t fully understand business law, but ZenBusiness and Incfile make it easy to file documents and start doing business. ZenBusiness can help you file for as little as $0 (plus state filing fees), or you can register with Incfile right now for free. Business structures range in complexity from sole proprietorships (simplest) to corporations (most complex). Limited liability companies (LLCs) are right in the middle—they provide the personal liability protection of a corporation but have fewer formalities. For North Dakota residents and aspiring business owners, forming an LLC is a smart way to protect your personal assets from business debts and liabilities. Establishing an LLC can be relatively straightforward, but it’s important to understand the basic requirements for forming an LLC in North Dakota before doing so. This article explores the eight essential steps for starting an LLC in North Dakota. 
The 11 Best LLC Services for Starting an LLC in North DakotaThere are plenty of online LLC formation services out there, meaning you won’t have to navigate the confusing world of business law by yourself. But trust us—they aren’t created equal, so we created a list of the 11 best LLC services to cut through the noise.
Click here to read our full, in-depth reviews of each of these LLC services and which might be the best for your needs. Start a North Dakota LLC in 8 Easy StepsA sole proprietorship won’t cut it if you plan to make a living or start a side hustle. The additional liability protection that LLCs provide is essential for business owners, and in North Dakota, the formation process is relatively simple.
The exact process for forming a North Dakota LLC may differ depending on your situation, but this framework covers the basics. If you need help navigating the formation process, enlisting an attorney or professional service can make the process easier and ensure that your LLC is compliant with all state regulations. Step 1: Choose a Unique Business Name for Your LLCYou can’t form an LLC without naming it, but the reality is that the name doesn’t matter as much as you think—it just needs to accurately represent your brand in a way that resonates with potential customers. You can use a few strategies to come up with a name:
If you aren’t sure where to start, plenty of online business name generators can help you brainstorm. 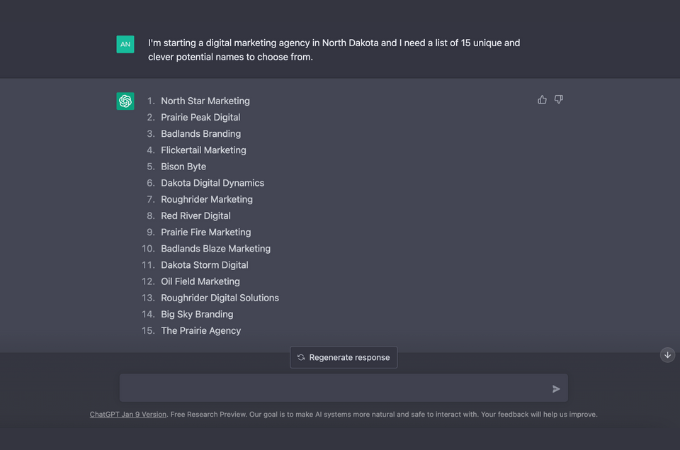
ChatGPT is a newer tool you can use to generate business name ideas. In the example above, we asked it for ideas for a marketing agency, and it returned 15 responses (some of which were surprisingly useful). Since this software is free to use and generates outputs in seconds, you could play with it all day until you come up with the perfect name. No matter which route you decide to take, it’s important that the LLC name abides by the following criteria:
You can check the existing business names in North Dakota by searching the state’s business entity database. Step 2: Appoint a Registered AgentYour LLC must have a registered agent to legally do business in North Dakota. A registered agent is simply an individual or organization authorized to receive service of process on behalf of your LLC. The state’s regulations require the following:
You can appoint yourself as the registered agent for your LLC, or you can hire a registered agent service to handle everything for you. If you decide to self-appoint, make sure that you are always available to accept service of process and other documents related to your business. Note: We advise against appointing yourself as a registered agent. There are several advantages of using a registered agent service, not least of which is that they provide invaluable legal protection at a very affordable price. Plus, registered agent services typically offer other useful services, such as mail forwarding and document filing. Step 3: File Articles of Organization
Articles of Organization is a legal document filed with the Secretary of State that officially establishes an LLC in North Dakota. When you register your North Dakota LLC online with FirstStop, the Secretary of State’s website, it will automatically provide you with a link to set up an account and submit the form. Every state has similar requirements for the filing of this document, but the North Dakota Articles of Organization must include the following information:
This document is meant to be simple and concise—it should not be more than one or two pages long. The North Dakota Articles of Organization can be filed online or by mail, with a fee of $135. Depending on how you choose to file it (online, by mail, or by fax), the processing time can take anywhere from a few days to a few weeks. Once you have submitted your Articles of Organization, the state will review them and notify you if any changes need to be made. Once all requirements are met, the Secretary of State will issue an order granting authority for your LLC to transact business in North Dakota. Step 4: Draft an Operating AgreementAn operating agreement is a legal document that outlines the members’ and managers’ rights, responsibilities, and duties in an LLC. It specifies several aspects of how the business will be managed, including but not limited to:
The operating agreement does not have to be filed with the state—it can stay private among members and managers. However, having an operating agreement is critical because it serves as a legal document that clearly outlines everyone’s roles in the company and can serve as evidence if any disputes arise in the future. Another risk of not having an operating agreement is that your LLC is subject to state default rules, which may not be ideal for your business. In the event of a dispute, it’s best to have a written document in place that outlines how disagreements will be addressed. 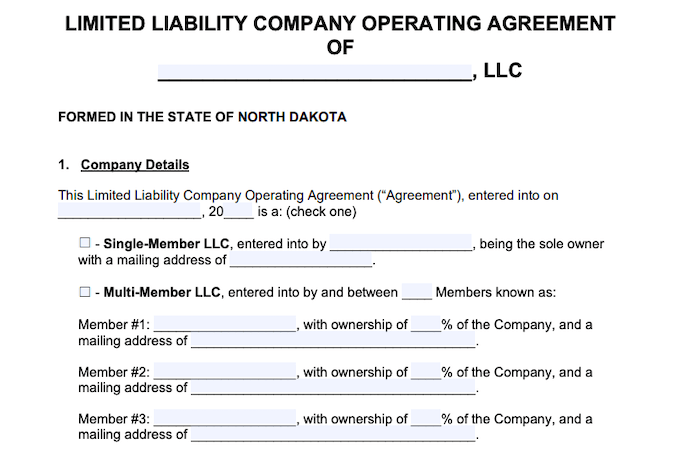
Like Articles of Organization, an operating agreement doesn’t need to be complicated. You can use a free online template to get started or hire an attorney to help you draft a custom agreement that fits your specific needs. Step 5: Apply for an EINAn Employer Identification Number, or EIN, is a unique nine-digit number assigned to each business by the Internal Revenue Service (IRS). It is used for tax identification and reporting purposes and for filing taxes. An EIN is similar to an individual’s Social Security Number in that it identifies the business and allows the IRS to keep track of taxes paid by the LLC. To apply for an EIN, you must fill out Form SS-4 online or by mail and submit it to the IRS. The application is free and takes only a few minutes to complete. There are several times when you will need to use your EIN:
If you work with clients on a contractual basis, you may also need to provide them with your EIN as a part of the agreement. Step 6: Open a Business Bank AccountIt’s important to keep your personal and business finances separate, which is why you should open a business bank account for your LLC once it is formed. This will allow you to track your income and expenses accurately and easily. When choosing a bank for your LLC, keep in mind that not all banks are the same. Some may offer special services or discounts for businesses, so shopping around and comparing different options is important before choosing one. When opening a bank account for your business, you will need to provide the following information:
When it comes to business banking, you have a few options. You could go the traditional route and use a brick-and-mortar bank, or you could opt for an online business banking institution like Brex, Mercury, or Divvy. Choosing the latter means fewer fees, better benefits, software integrations, and a generally better user interface with built-in functionality for your business. Step 7: Obtain Necessary Business Licenses and PermitsBefore you can start operating your business in North Dakota, you will need to obtain any necessary licenses and permits. This may include a general business license as well as specific permits related to your industry or profession. Businesses that sell consumer goods must also apply for a sales tax permit, which is issued by the state’s Department of Revenue. The purpose of this permit is to collect and remit sales tax from customers. For many basic businesses, you won’t need to worry too much about obtaining additional licenses and permits. However, permitting is a significant element of your registration process if you operate in one of the following areas:
You can find a full list of business licenses and permits for North Dakota here. Step 8: Stay Current With Annual Report and Franchise Tax RequirementsAll North Dakota LLCs—both domestic and foreign—must submit an annual report to the Secretary of State by November 15th of each year. This is in addition to their initial registration with the Secretary of State. Fortunately, it’s easy. You can file your report online at the FirstStop page on the official website for a fee of $50. Unlike some states (e.g., California), North Dakota LLCs don’t have to pay additional franchise taxes. However, depending on the industry you are in and its income level, there may be other business taxes that you need to file. Final Thoughts About Starting an LLC in North DakotaForming an LLC in North Dakota doesn’t have to be difficult or time-consuming. By following the eight steps outlined above, you can successfully launch your business and get it up and running in no time. Even if you don’t consider yourself a business expert, there are plenty of resources and guides available to help you along the way. It’s important to take your time, research thoroughly, and determine the right legal structure for your business. Don’t forget, registering an LLC in North Dakota is just the first step of many: you must also stay up to date with filing requirements and obtain any necessary licenses or permits. If you forget this, you could face fines, penalties, and potential business closure or suspension. via Quick Sprout https://www.quicksprout.com/how-to-start-an-llc-in-north-dakota/ If creating a website using WordPress is your plan, a strong web hosting service built around WordPress is necessary. SiteGround and Bluehost are two of our favorite options for web hosting for WordPress. SiteGround is especially useful for creating an ecommerce site that uses WordPress. Bluehost is extremely easy to use, ensuring you can operate a basic website within several minutes. And both options have excellent starting price points, so you can build your site on a budget. 
SiteGround and Bluehost Compared to the BestThrough our research to find the 10 best WordPress web hosts, we placed both Bluehost and SiteGround on our list. Our top pick, however, went to Hostinger, which we found to be the most affordable WordPress web hosting option that still offers strong features. If you sign up for Hostinger today, you receive a 30-day money-back guarantee, and you may be able to receive three months of hosting for free.
SiteGround vs. Bluehost High-Level ComparisonSiteGround and Bluehost have quite a few similarities. Both offer managed and unmanaged web hosting services, shared hosting, WordPress hosting, and dedicated hosting. We believe both web hosting services are a good choice for a wide range of potential users. They both offer low initial hosting prices and rank highly on our list of the best web hosting providers. At a high level is where they slightly differ, though. Bluehost is a slightly better choice for those who need top-notch customer service and built-in marketing tools, especially for novices. SiteGround caters nicely to those with pretty simple website needs while delivering easy-to-use site migration processes, especially for ecommerce websites. Products and Services Offered by SiteGround and BluehostSiteGround has several different types of hosting available. Its WordPress hosting is especially notable, as it offers options specifically made to work with WordPress. You don’t have to download or configure WordPress on your own when you take advantage of SiteGround’s services in this area. SiteGround also offers WooCommerce hosting, which is an ecommerce platform built on WordPress. Cloud hosting is another option available from SiteGround. To learn more about the services available, check out our detailed SiteGround review. In addition to its WordPress hosting services, Bluehost’s claim to fame is low-priced website hosting through shared hosting. Bluehost has both managed and unmanaged shared hosting platforms, ensuring you can find the best option for your needs and budget. Bluehost’s various shared hosting plans are extremely versatile, allowing you to generate the perfect setup. Another key service from Bluehost is its VPS hosting. You receive dedicated server resources, and you can select the amount of dedicated RAM, CPU, and disk space for your website from the virtual private server. Bluehost also offers a dedicated hosting plan, which is the top-end hosting service it has available. Our Bluehost review breaks down the various services available in even more detail. Company Health and Stability of SiteGround and BluehostBoth Bluehost and SiteGround are strong companies with a long track record of serving customers. Bluehost began hosting services in 2003 from its headquarters in Orem, Utah. More than 2 million websites make use of Bluehost web hosting services. Bluehost partnered with WordPress more than 10 years ago, allowing it to provide high-end customer service to its WordPress hosting customers. Bluehost did have a hacking incident in 2015, but it recovered. SiteGround was founded in 2004 in Sofia, Bulgaria, making it almost the same age as Bluehost. SiteGround maintains data centers worldwide, including in the United States, the UK, and Australia. SiteGround provides hosting for about 2 million domains worldwide. As a Bulgarian company, SiteGround does not publicly disclose its ownership group. Endurance International Group owns Bluehost. Neither SiteGround nor Bluehost are publicly traded. SiteGround vs. Bluehost Pricing ComparisonBoth SiteGround and Bluehost offer a wide range of pricing options, helping you find the right features that fit your budget. Both services also provide extremely low introductory prices for the first year, but the prices increase quite a bit in the second year and beyond. Both also offer some free benefits for subscribers in the first year, including a free domain and a free automated backup. You need to pick the right pricing tier if you want these extra benefits. Pricing Structure of SiteGround and BluehostBluehost offers WordPress, shared, dedicated, and VPS hosting. Once you select the type of hosting, you can then pick among a few pricing tiers within each hosting service. Bluehost offers a discount of about 35% to 70% for the first year of hosting before prices rebound to regular rates. Within each pricing tier in Bluehost’s shared hosting plans, for example, you can select the specific number of websites you want to use, the amount of SSD storage, and whether you want to use multi-site management tools. SiteGround offers web hosting, WordPress hosting, WooCommerce hosting, and cloud hosting. As with Bluehost, you can select among various pricing plans within each hosting service. Expect to receive a discount of up to 80% for the first year with your SiteGround package before it reverts to the regular price. Within the pricing tiers in the web hosting plans from SiteGround, you can pick the number of websites available, the number of monthly visits, the amount of storage space you have available, and other items. Cost Comparison of SiteGround and BluehostBoth Bluehost and SiteGround have pricing plans ranging from those for clients planning to run a single, small blogging website to those running dozens of large ecommerce websites. Because both SiteGround and Bluehost offer WordPress web hosting, we’ll compare those plans to give you an idea of how they each handle pricing for similar services. SiteGround offers a larger initial discount with its WordPress web hosting services, but that discount lasts only 12 months. Bluehost’s prices are quite a bit lower when the prices revert to the regular price after the first year. If you are looking for a site host that you will keep for the long run, Bluehost is the better value. Additionally, Bluehost also has an initial three-year discount option that’s even cheaper than its one-year option. Bluehost also has a more powerful top pricing tier than SiteGround. It offers 100 GB of SSD storage in its top tier versus 40 GB of storage in SiteGround’s top tier for WordPress web hosting. Trials and Guarantees for SiteGround and BluehostNeither Bluehost nor SiteGround offer a free trial period for any of their web hosting services. However, both offer a 30-day money-back guarantee on the price of certain hosting subscriptions. With Bluehost, your 30-day refund period only applies to the cost of the hosting service. If you subscribed to a pricing plan that included a free domain name, Bluehost deducts your refund amount by a domain fee. This ensures you maintain control of your domain name. If you cancel after the 30-day initial period, you cannot receive any refund of what you paid. SiteGround offers a 30-day money-back guarantee for shared hosting plans and a 14-day money-back guarantee for cloud hosting plans. If you sign up for a plan that includes a free domain name, you cannot receive a refund for the cost of the domain name. SiteGround vs. Bluehost Core Criteria ComparisonAs we researched the best options for website hosting with WordPress, we settled on measuring each tool against several key criteria. Our research showed that these are the most common criteria that the majority of people need to have for success with their WordPress web hosting options. We wanted to delve into the criteria beyond the obvious ones. We purposefully did not include website loading speed as a core criterion, for example, because any hosting service should excel in this area. The same goes for uptime for the website. Check out our list for more information on how Bluehost and SiteGround stack up against our favorite web hosting with WordPress tools in these core criteria. Multi-Site vs. Single-Site Hosting – Bluehost Wins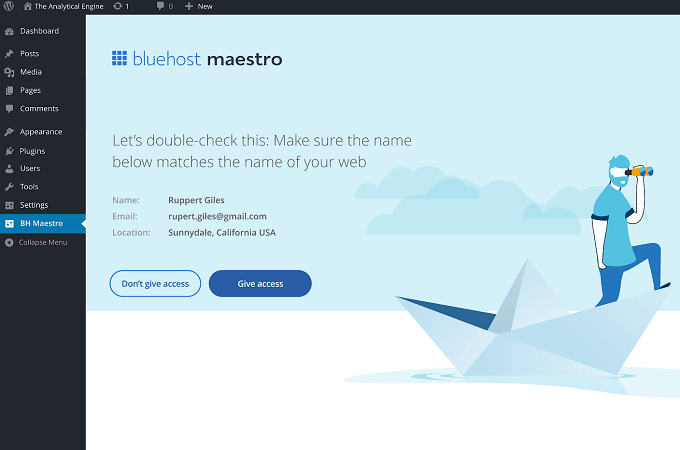
Although some people simply want a single website running from WordPress, you should think about your potential growth plans. You may end up needing to run multiple websites. If so, you will want a hosting provider that can accommodate all your different sites. We like Bluehost for those seeking multi-site hosting at a great price. It allows you to create as many websites as you want at its Choice Plus pricing tier, which starts at $5.45 per month for the first year, which is almost three-quarters off the renewal rate of $19.99. Bluehost’s Choice Plus has a helpful multi-site management tool called Maestro and 24/7 customer service. SiteGround is actually cheaper in its GrowBig tier, which costs $4.99 per month for the first year. However, its renewal rate is $24.99 per month, which eats up the first-year savings versus Bluehost in less than two months. SiteGround does have 24/7 customer service, which is helpful. Customer Service – Bluehost Wins
Although most web hosting for WordPress tools is easy to use, you may find yourself needing to reach out for help on occasion. Finding a host that provides excellent customer service is important. Availability at any time of the day or night is also a key consideration because you never know when you may need help. Bluehost offers 24/7 customer service via telephone or live chat. The phone number is easy to find, so you don’t have to waste time searching for it. Even though Bluehost focuses on unmanaged hosting, its customer service operates at an impressive level. SiteGround’s customer service isn’t quite as easy to access, but it still performs well. The primary means of help is through a live chat session 24/7, but phone support is also available. However, you must receive a one-time verification code to use telephone customer service. Managed vs. Unmanaged Hosting – Tie
Deciding whether you want managed or unmanaged WordPress web hosting is an important consideration. Although most web hosting with WordPress is unmanaged, you also have some managed site options. Sites run faster, have a higher level of security, and have more responsive customer service teams with managed hosting. However, they also cost more than unmanaged hosting. Bluehost only began offering managed hosting options recently, but it jumped into this market with quick success. It works especially well when you want to use marketing tools with your website, like analysis of your site traffic and suggestions for SEO. SiteGround is one of the least expensive managed WordPress hosting options around. However, it is only useful for sites with limited traffic. For unmanaged hosting, either Bluehost or SiteGround are good choices. They both deliver extremely low introductory prices before increasing in price in year two and beyond. You also continue receiving limited customer service capabilities with SiteGround and Bluehost in the unmanaged arena. Site Migration – SiteGround Wins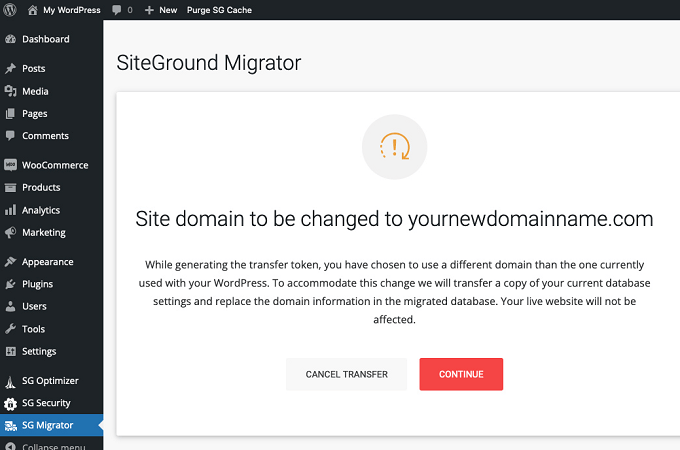
It’s common to need to move an existing website to a web host with WordPress. Because this is so common, you might expect most WordPress web hosts to make this process easy. Unfortunately, this isn’t always the case. Without a simple migration process, you may make an error or waste a lot of time migrating your old site. SiteGround offers site migration as an important aspect of its service, and it excels in this area. Transferring your old site to SiteGround is easy, and SiteGround provides the help you need. Its migration tool is free to use. Bluehost also allows you to migrate your existing site for free. It offers a dedicated tool for migrating the site, although we slightly prefer SiteGround’s tool. Should you need help from the Bluehost support team, you can reach out at any point during the migration. Final Verdict – Bluehost WinsOur research shows that Bluehost is the winner against SiteGround for WordPress web hosting. Both SiteGround and Bluehost hang their hats on low price points and ease of use, but Bluehost slightly outdoes SiteGround in these key areas. Additionally, Bluehost has built a large user base on the strength of its customer service, which is always appreciated when you need help. Both Bluehost and SiteGround are strong options, as both made our list of the top web hosts for WordPress. But we give Bluehost a slight nod in this comparison. via Quick Sprout https://www.quicksprout.com/siteground-vs-bluehost/ |

Sean BrianWhile radishes deter certain insects naturally, they require similar growing conditions as carrots. Although the crops both have roots, radishes grow and germinate quicker, allowing carrots to continue growing in the soil space available when the radishes are harvested, Archives
April 2023
Categories |


 RSS Feed
